Lacebark Elm + Laminated Ash coffee table Pt 2

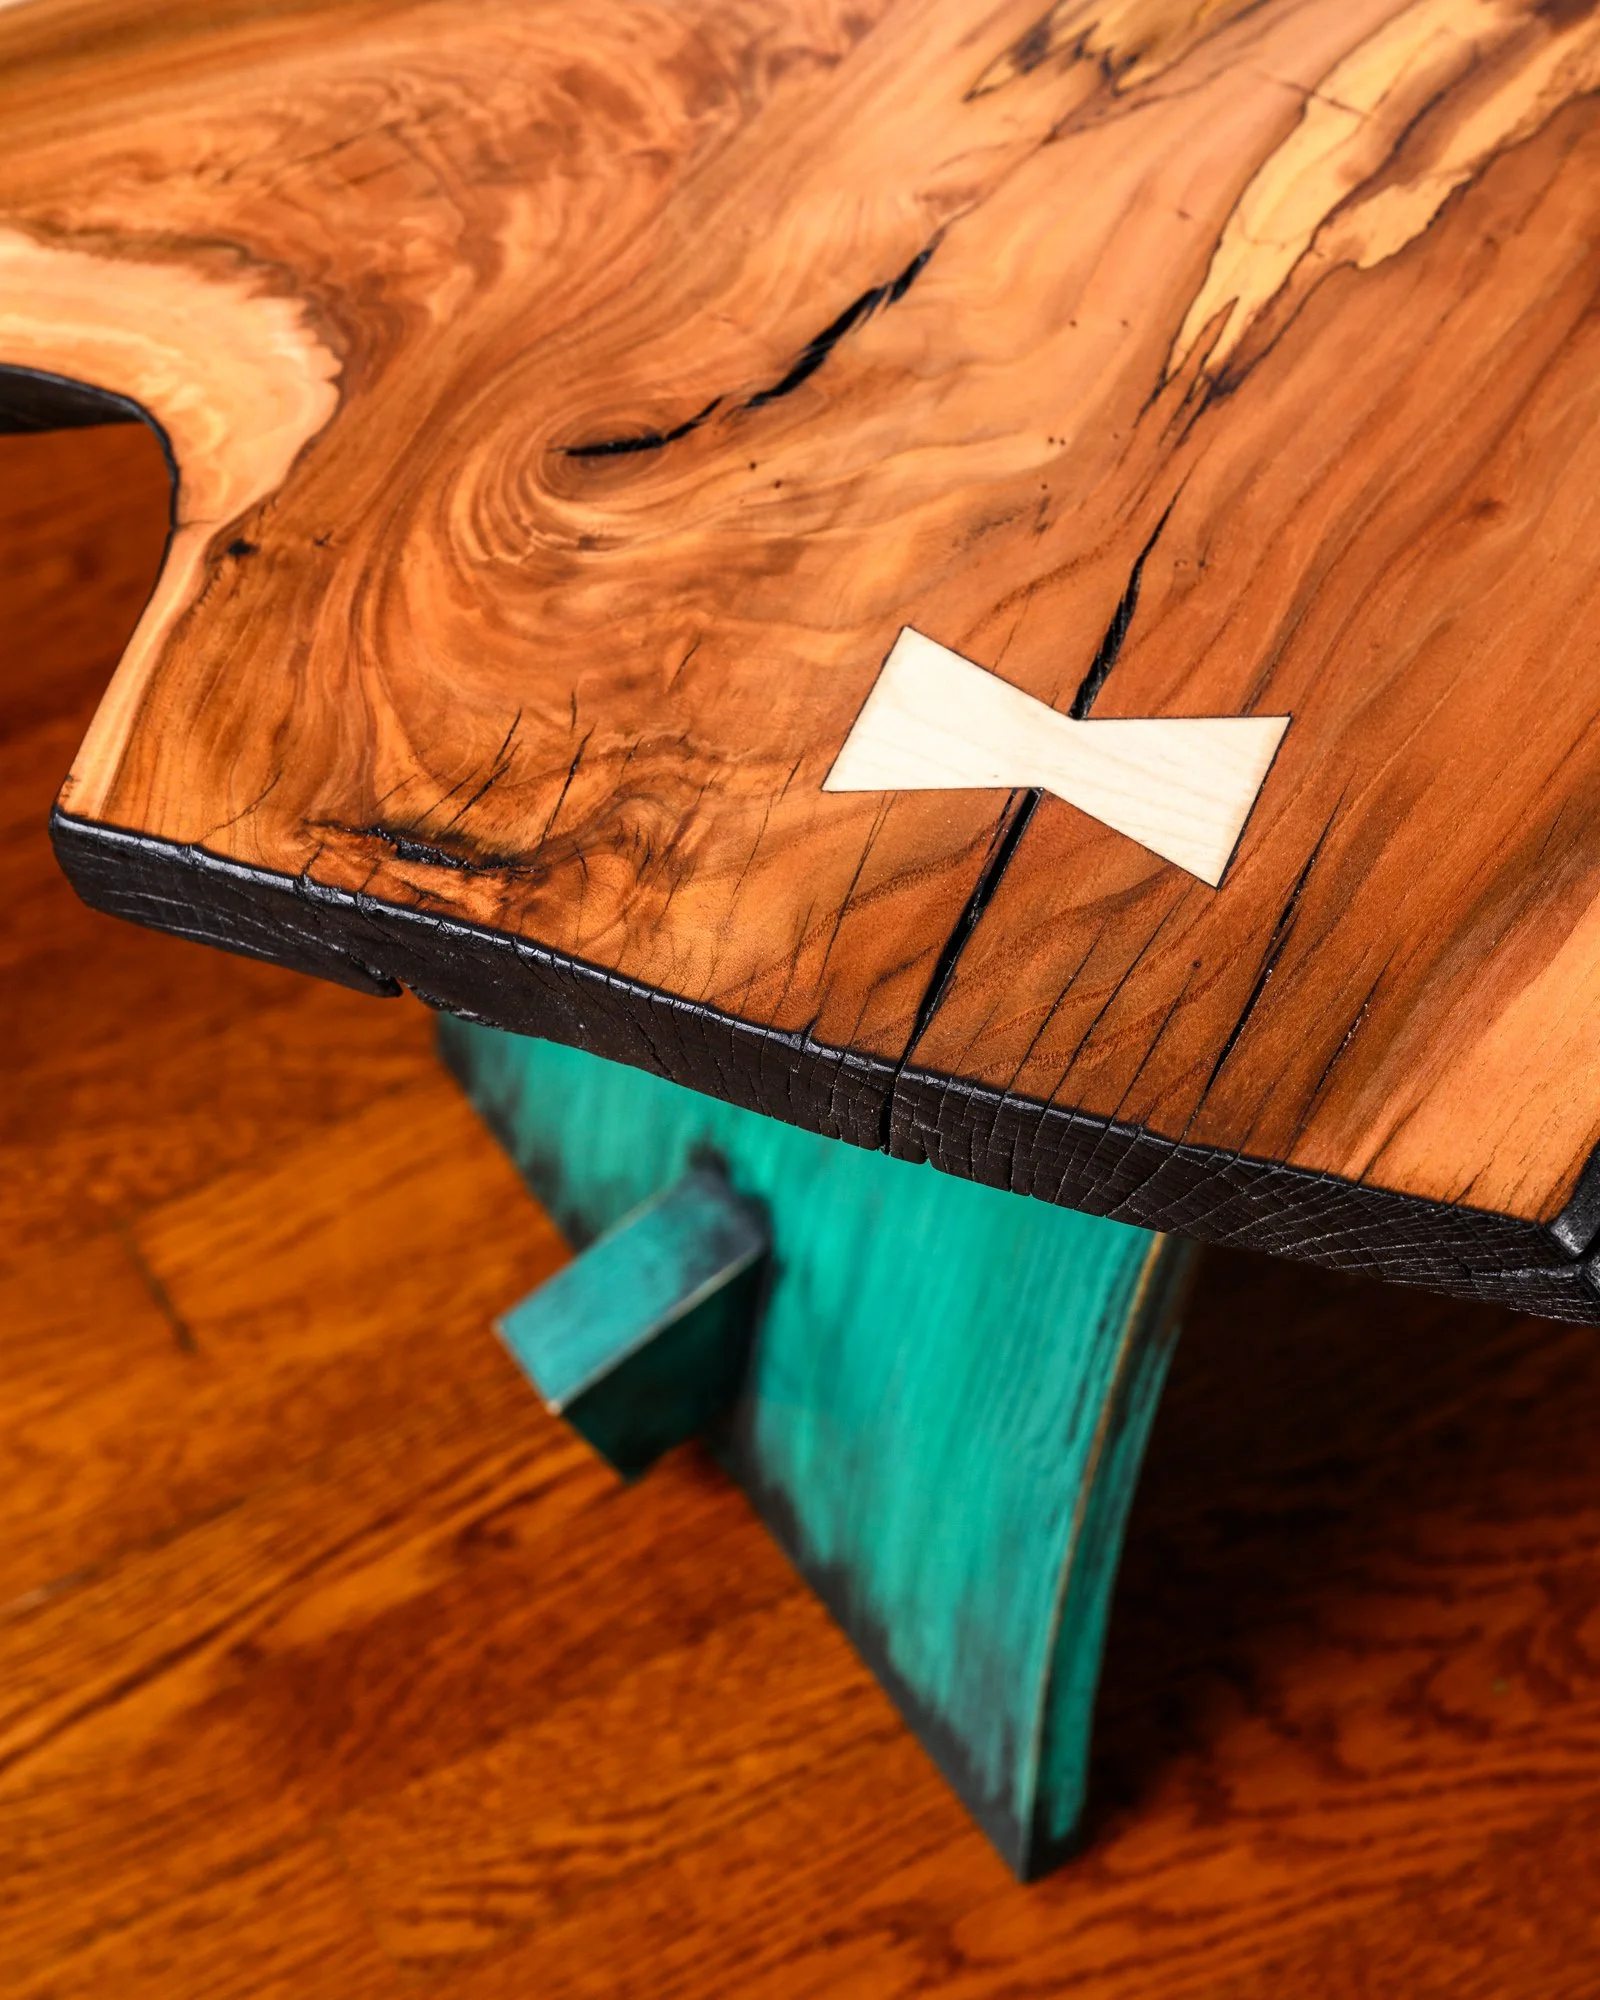
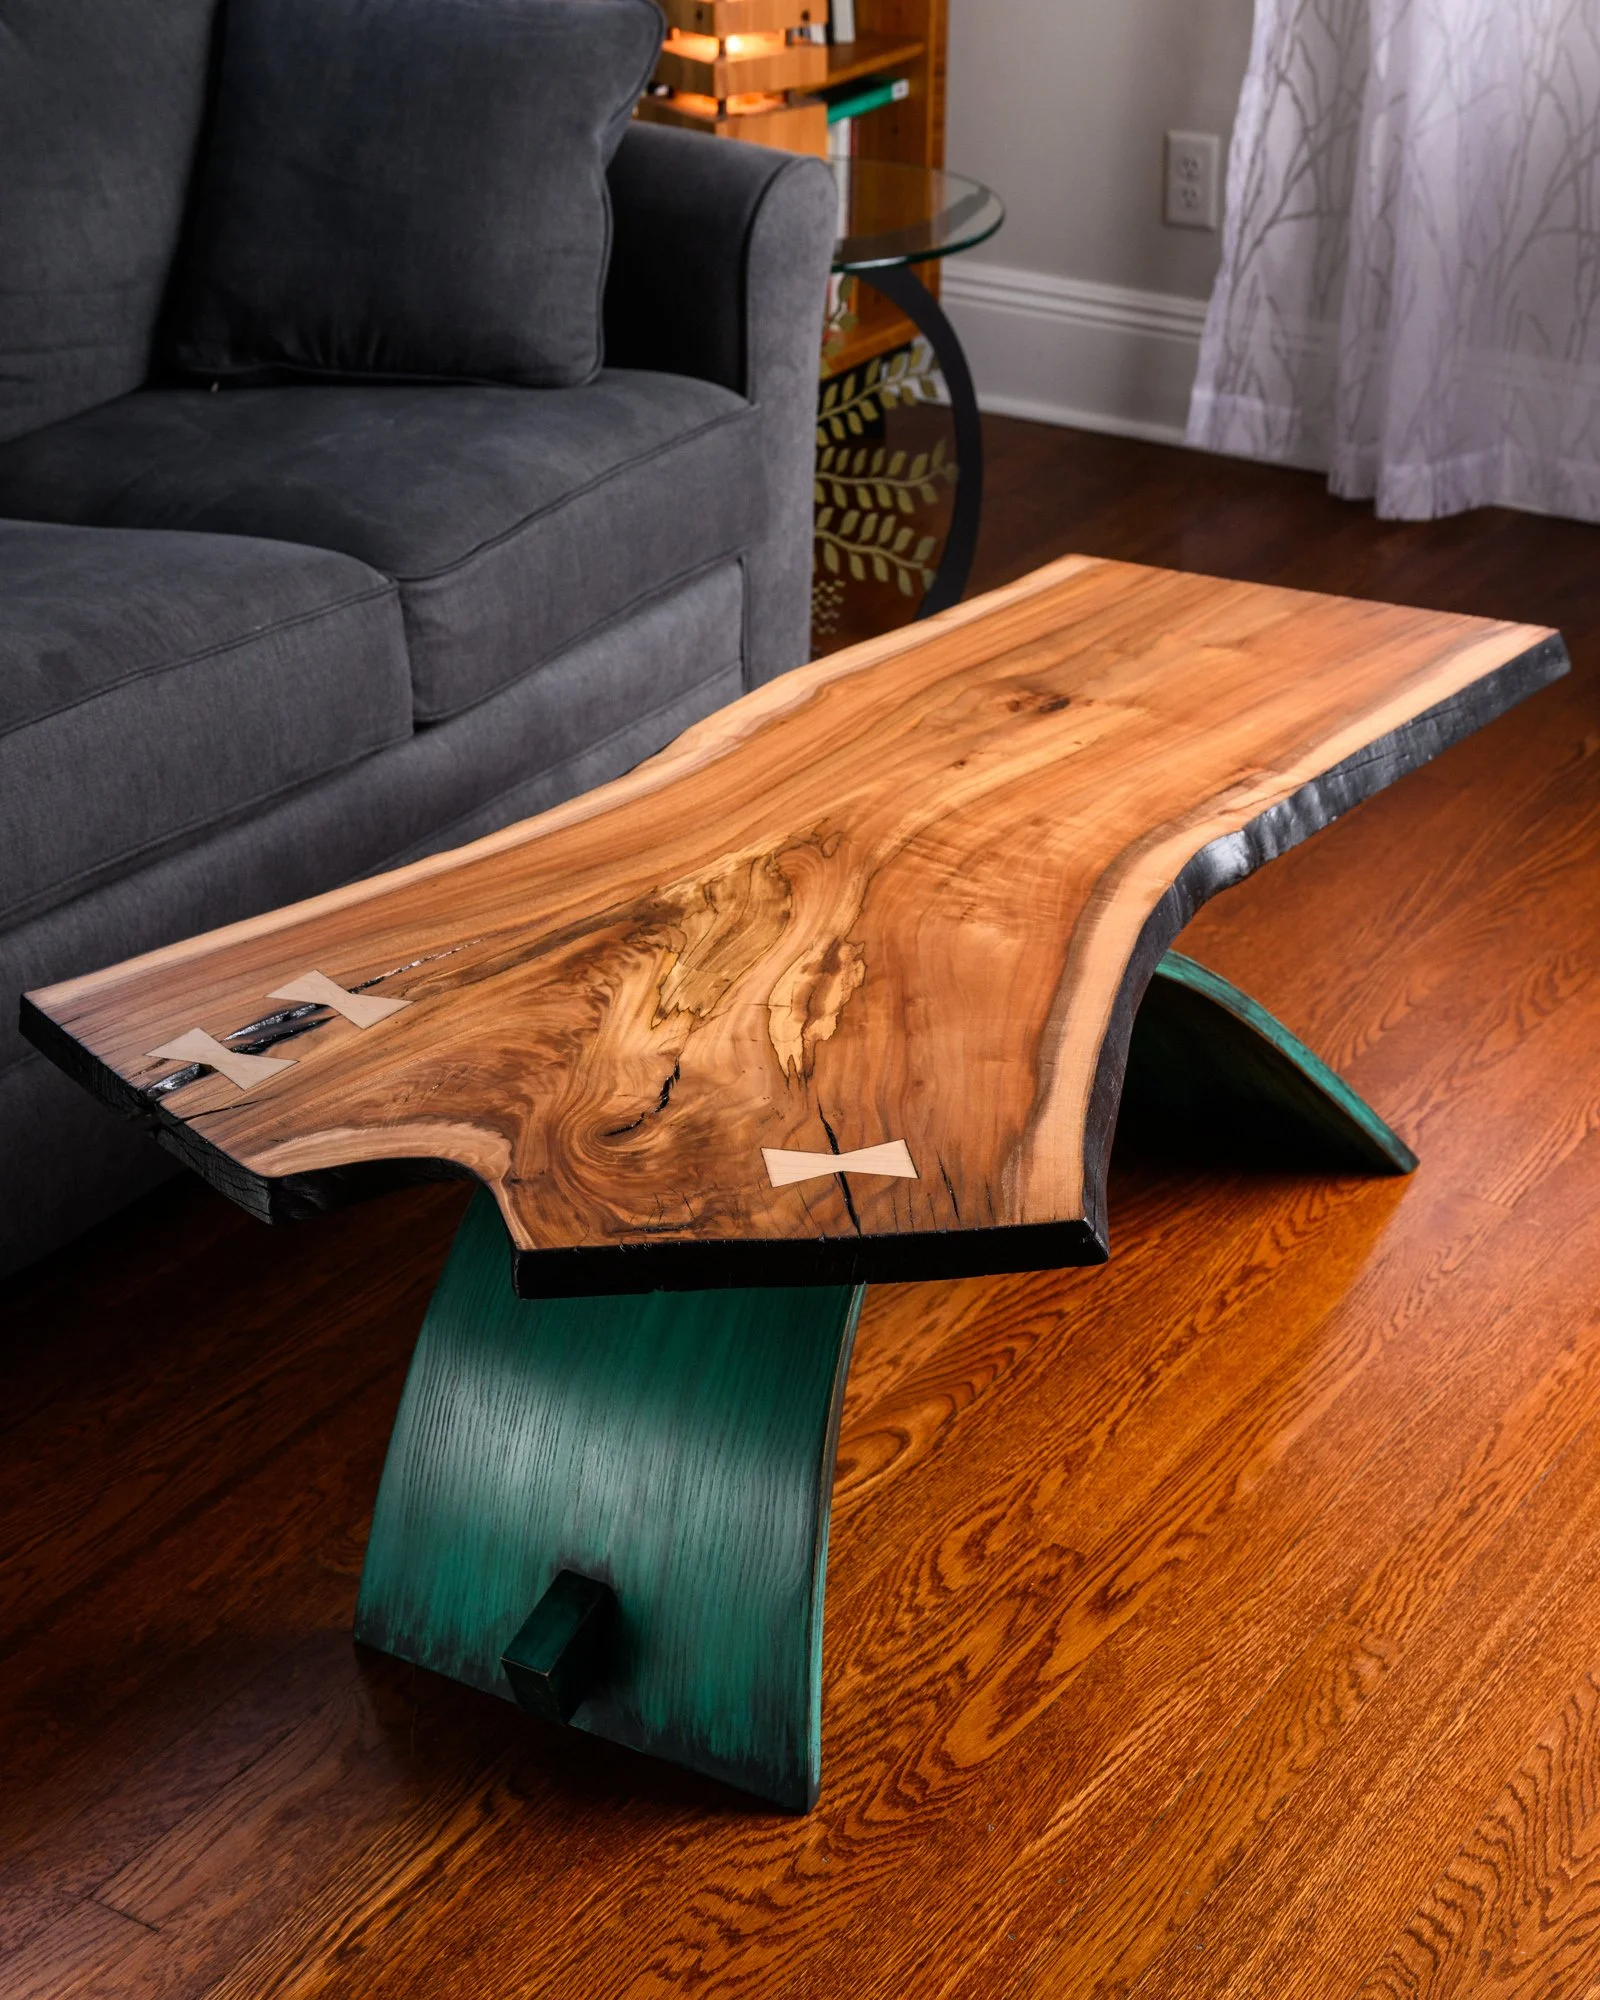
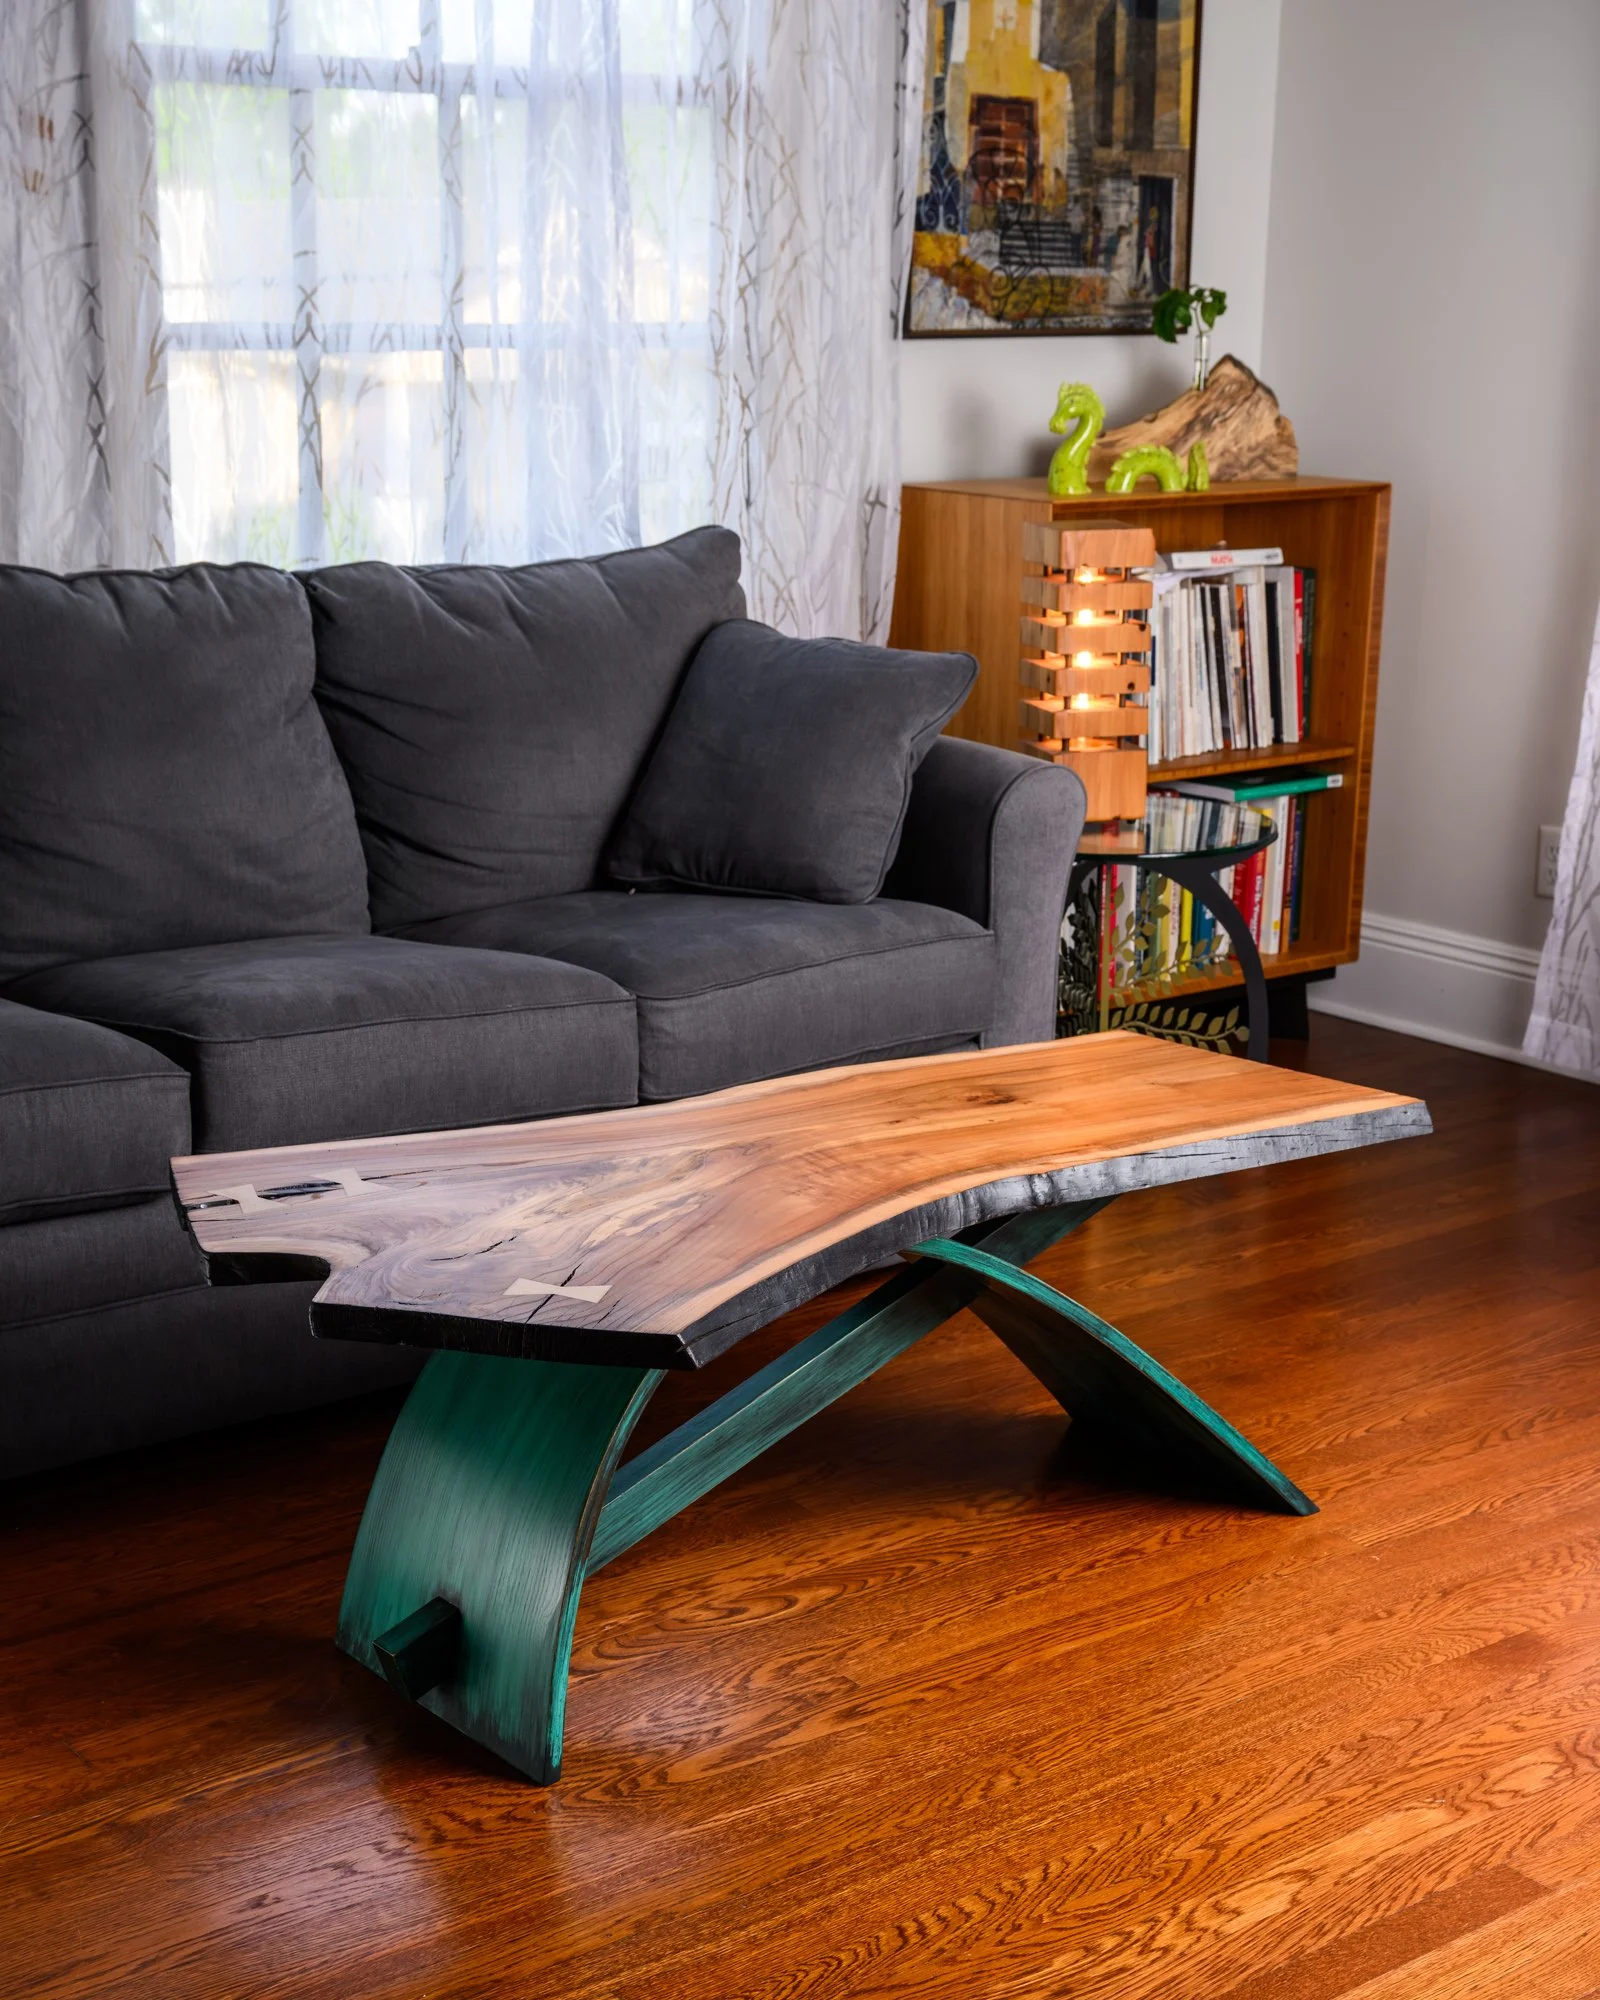
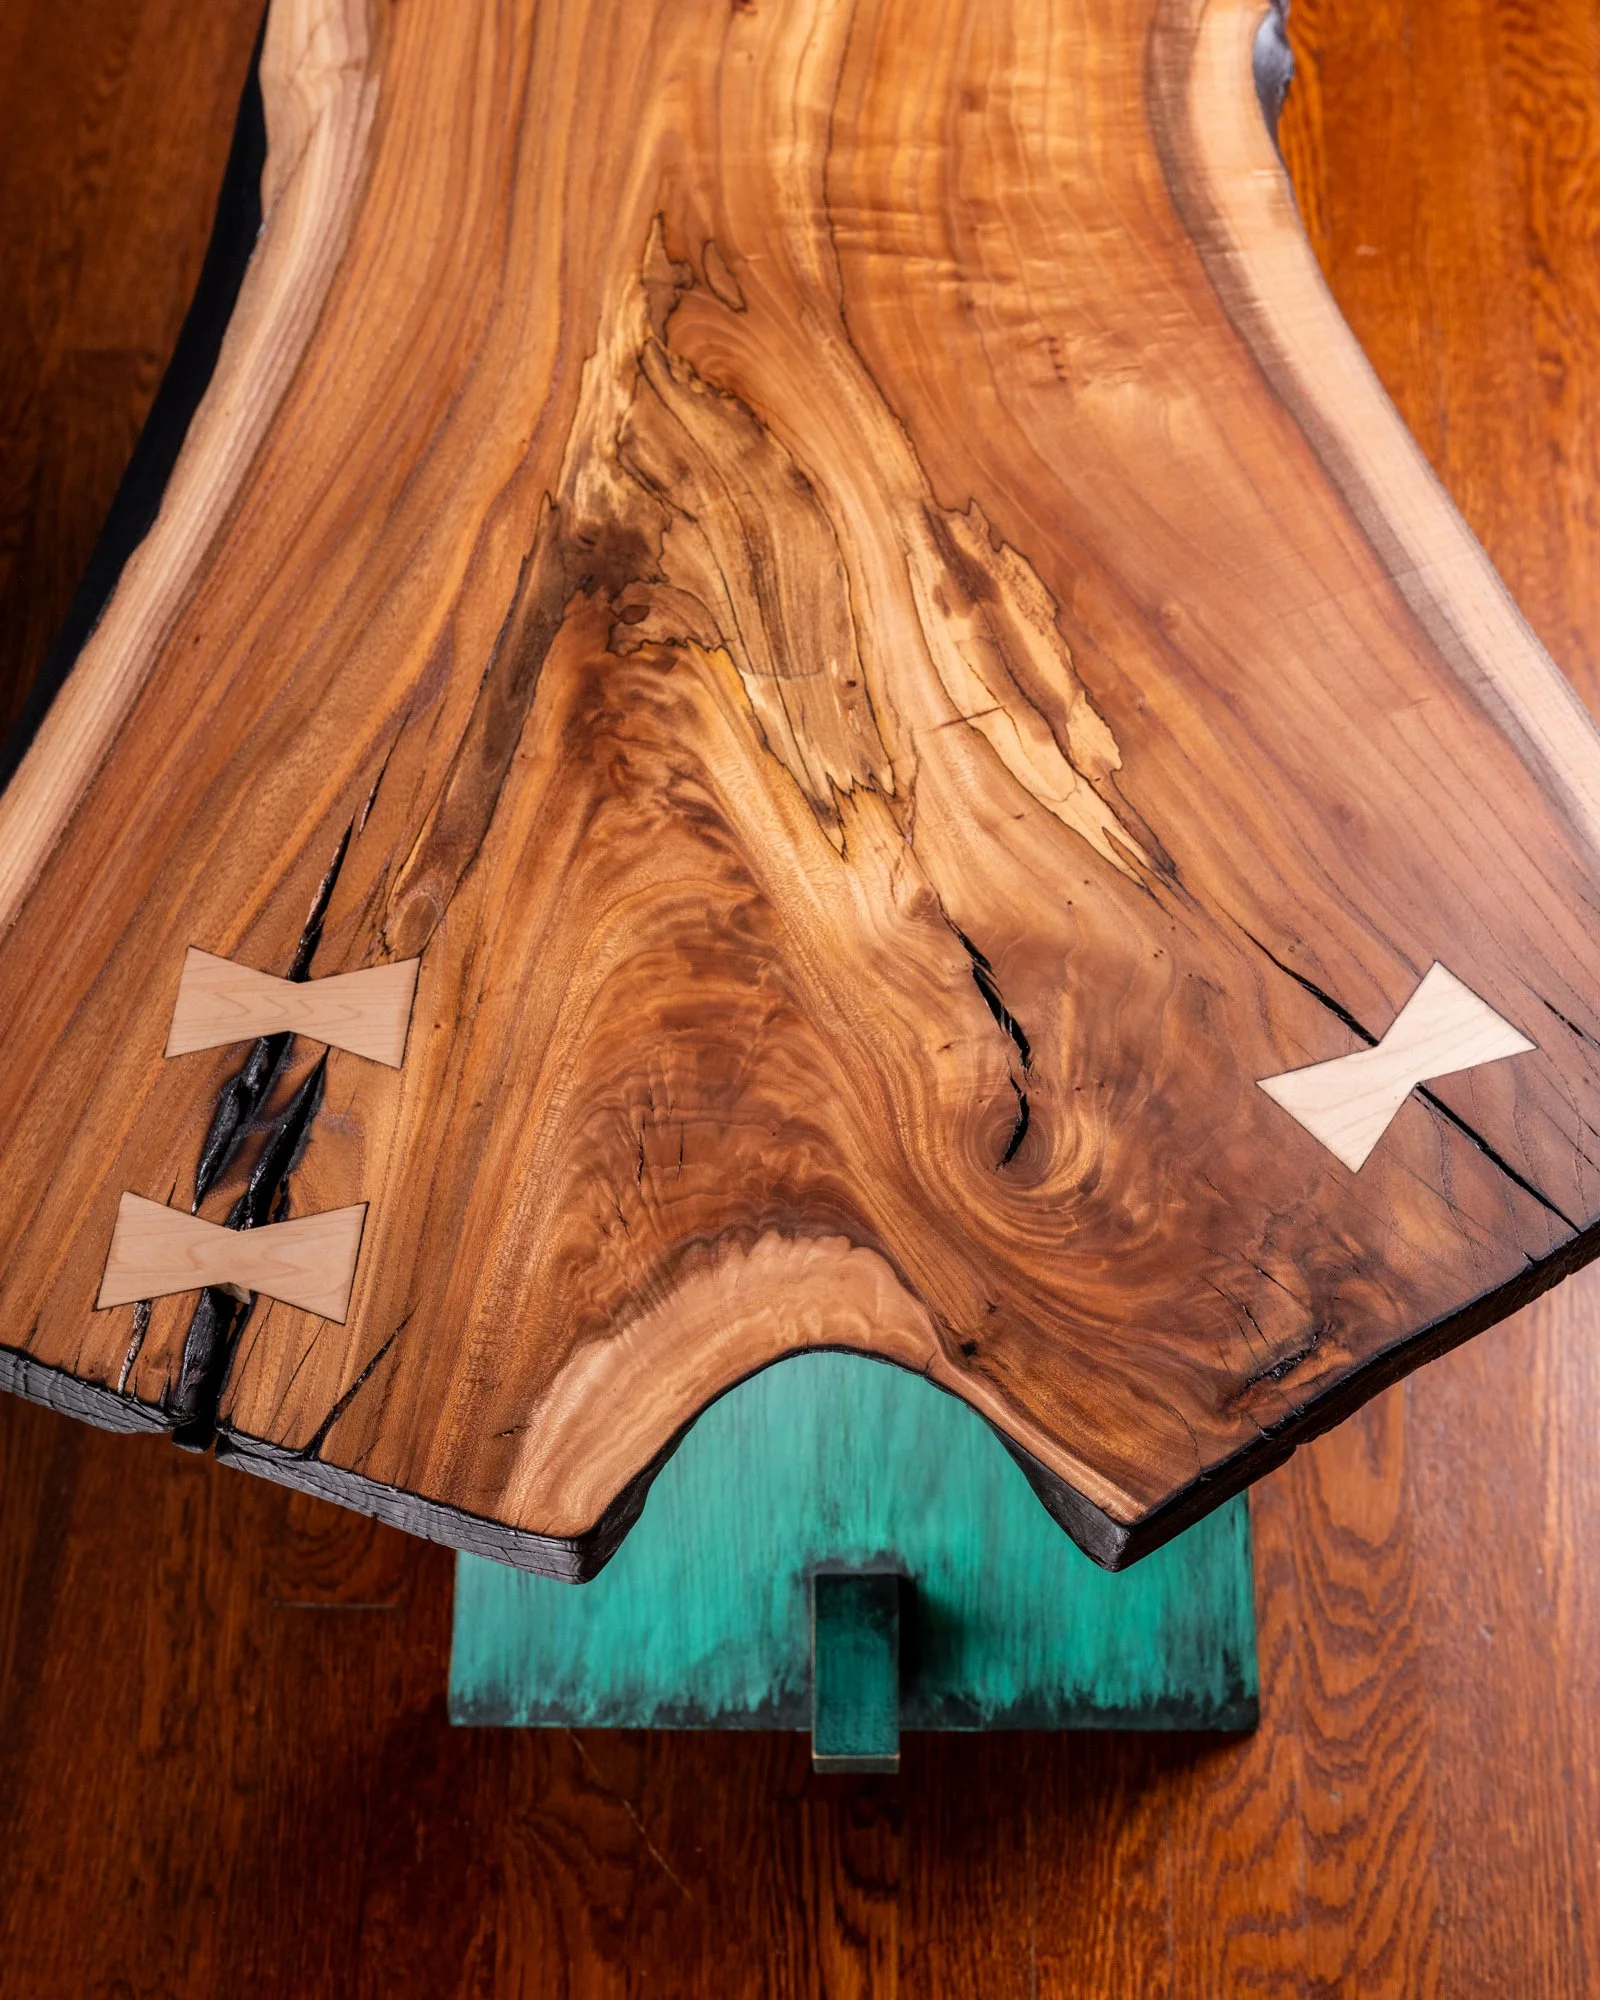
The finished product
The base
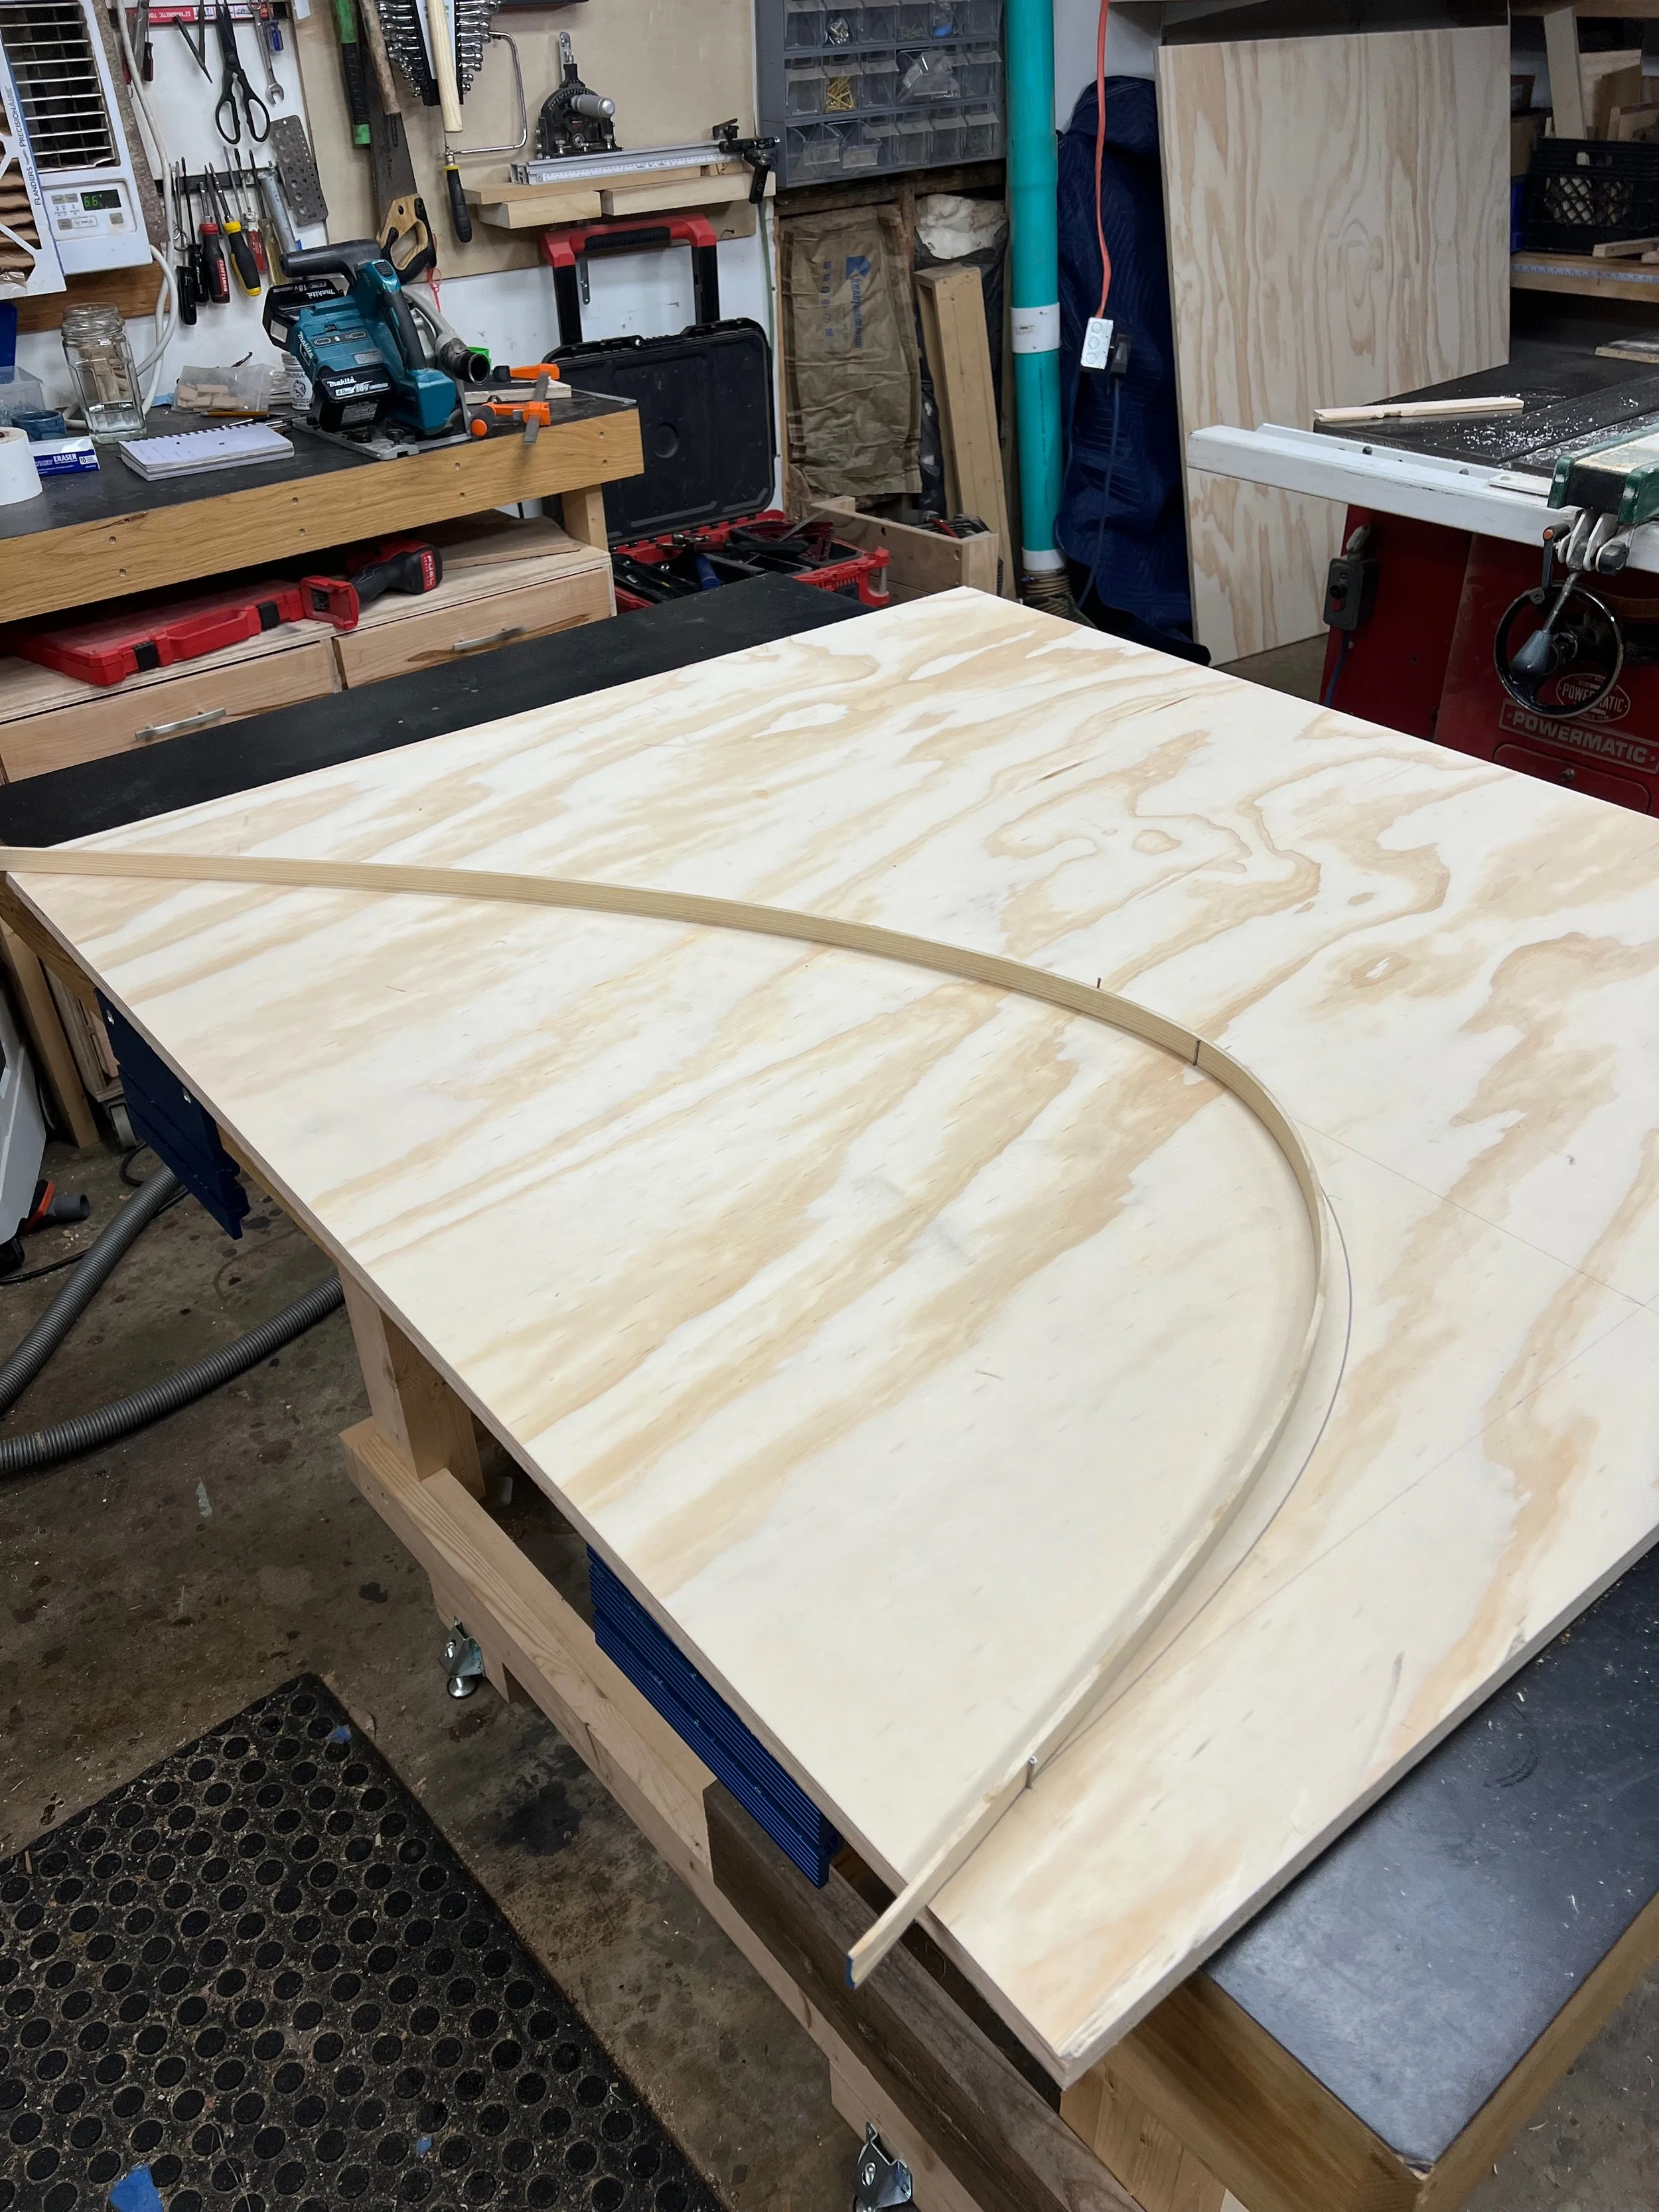
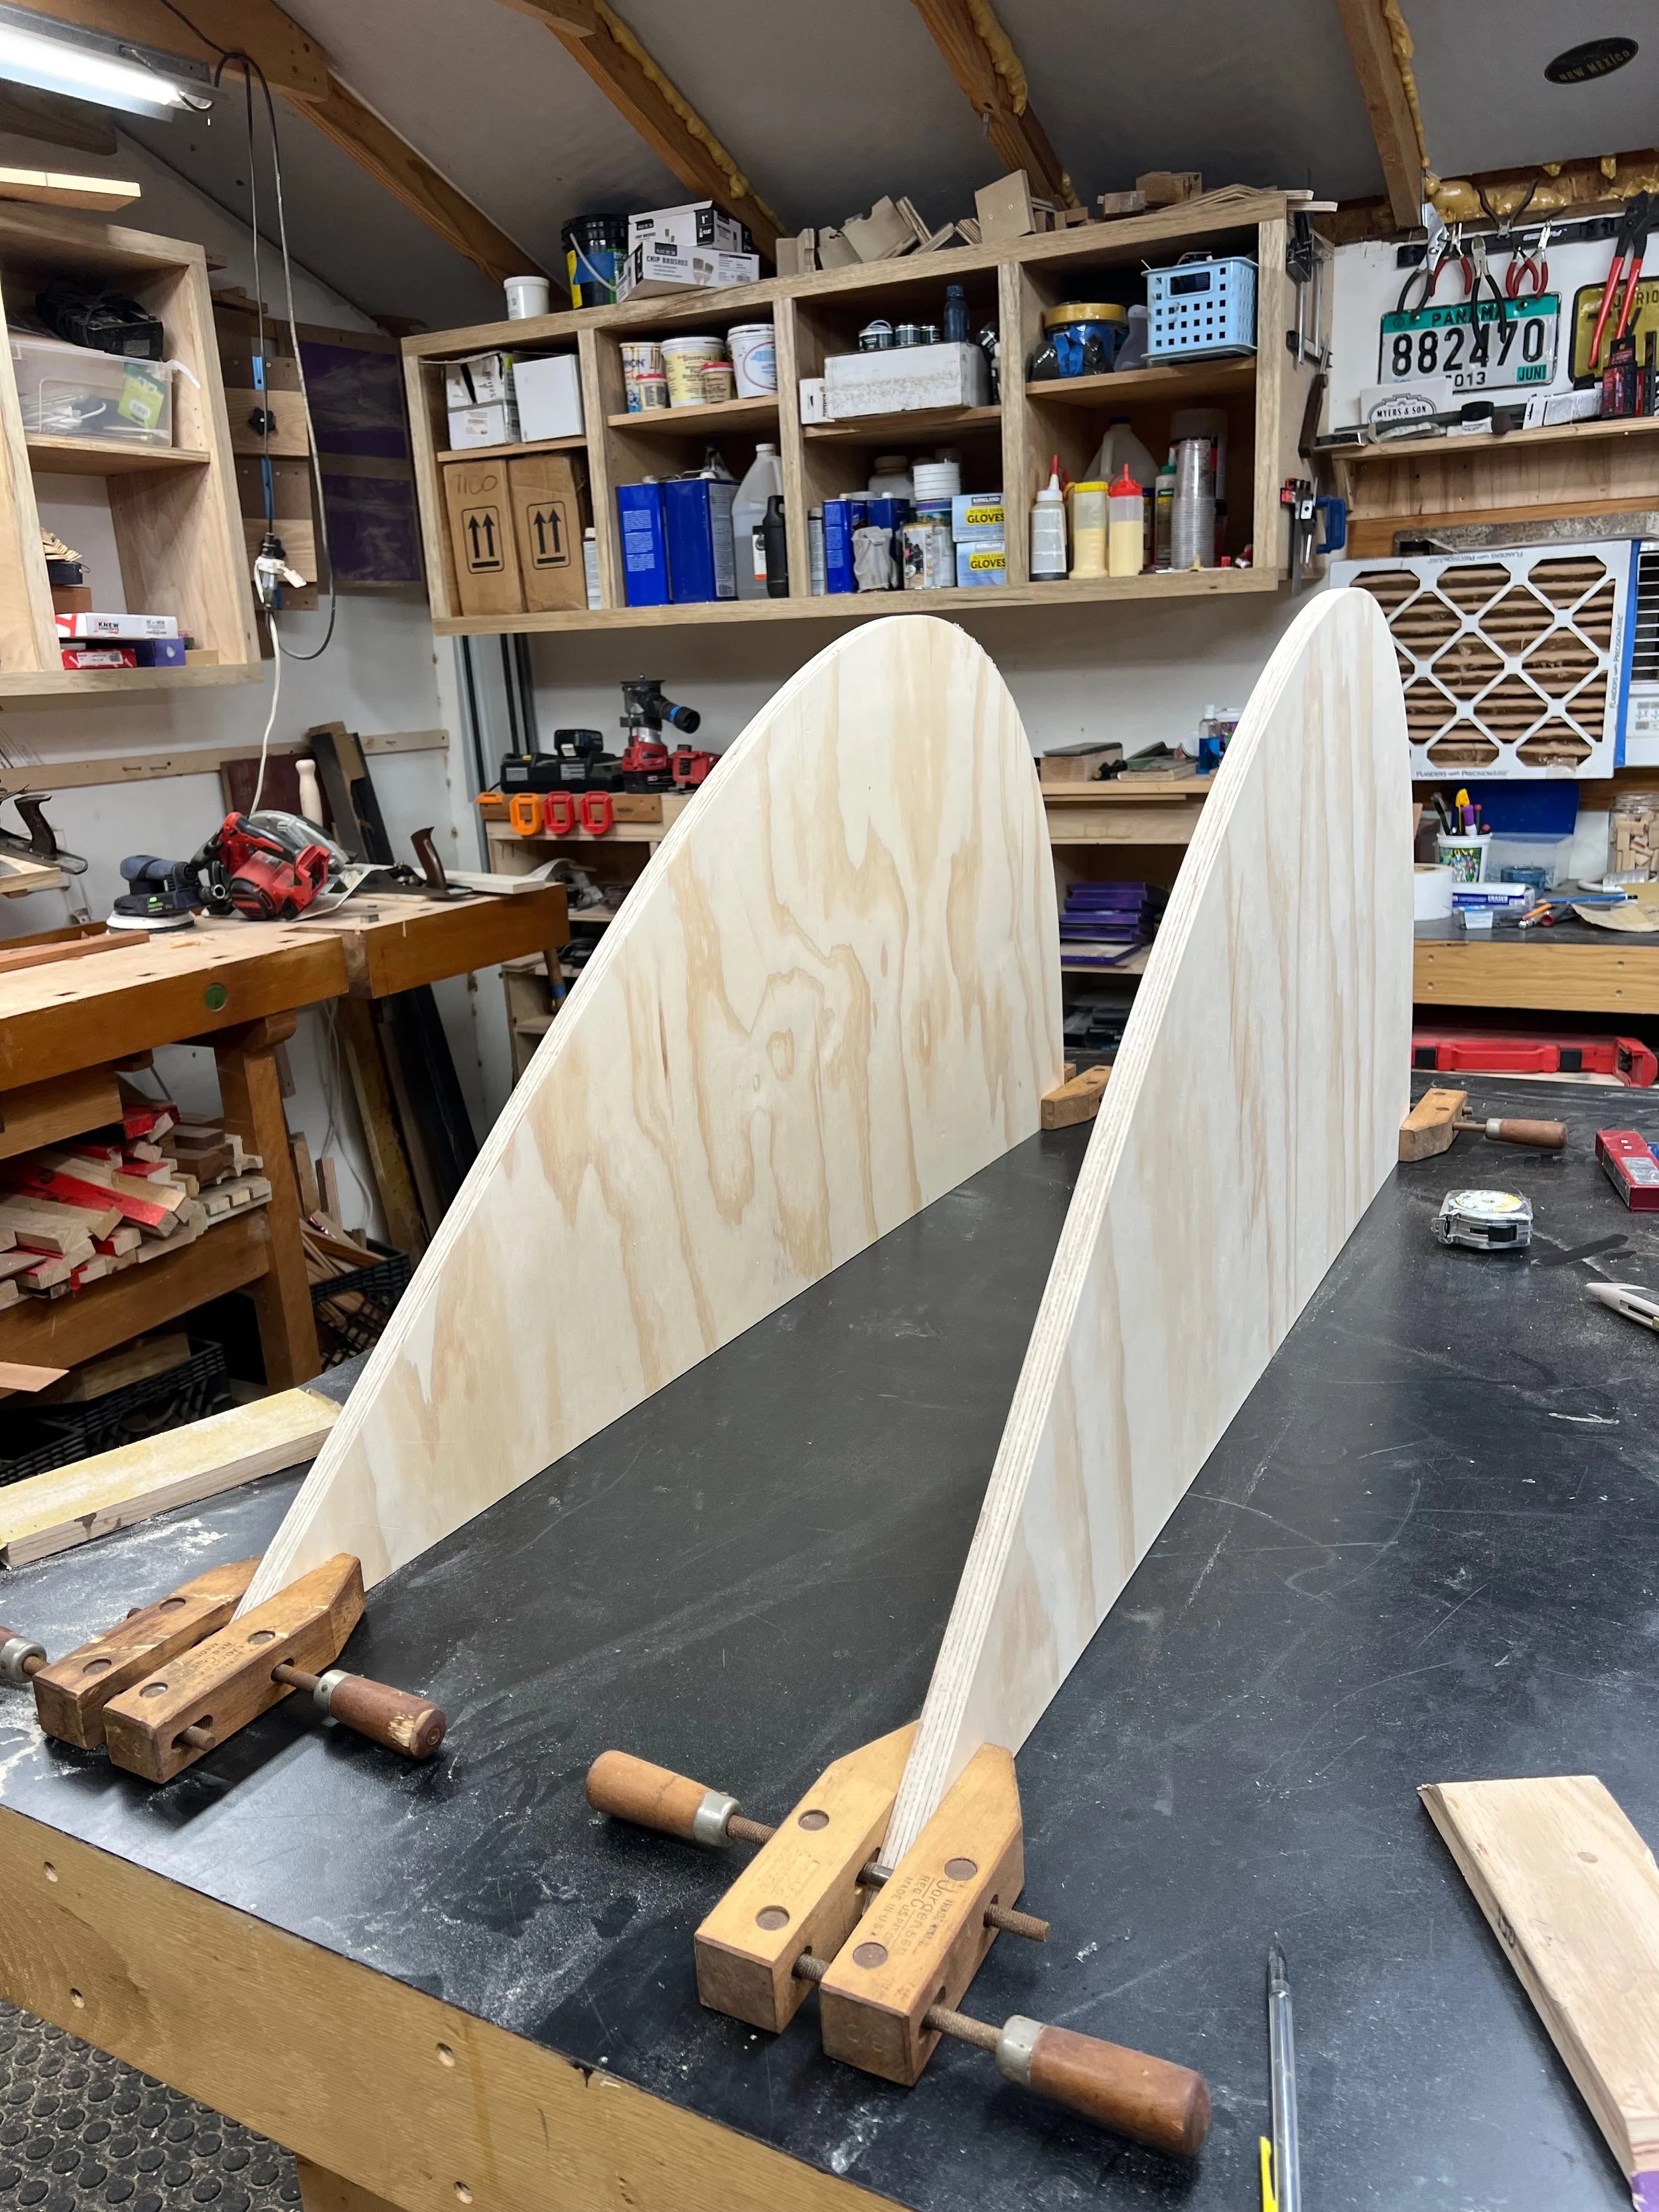
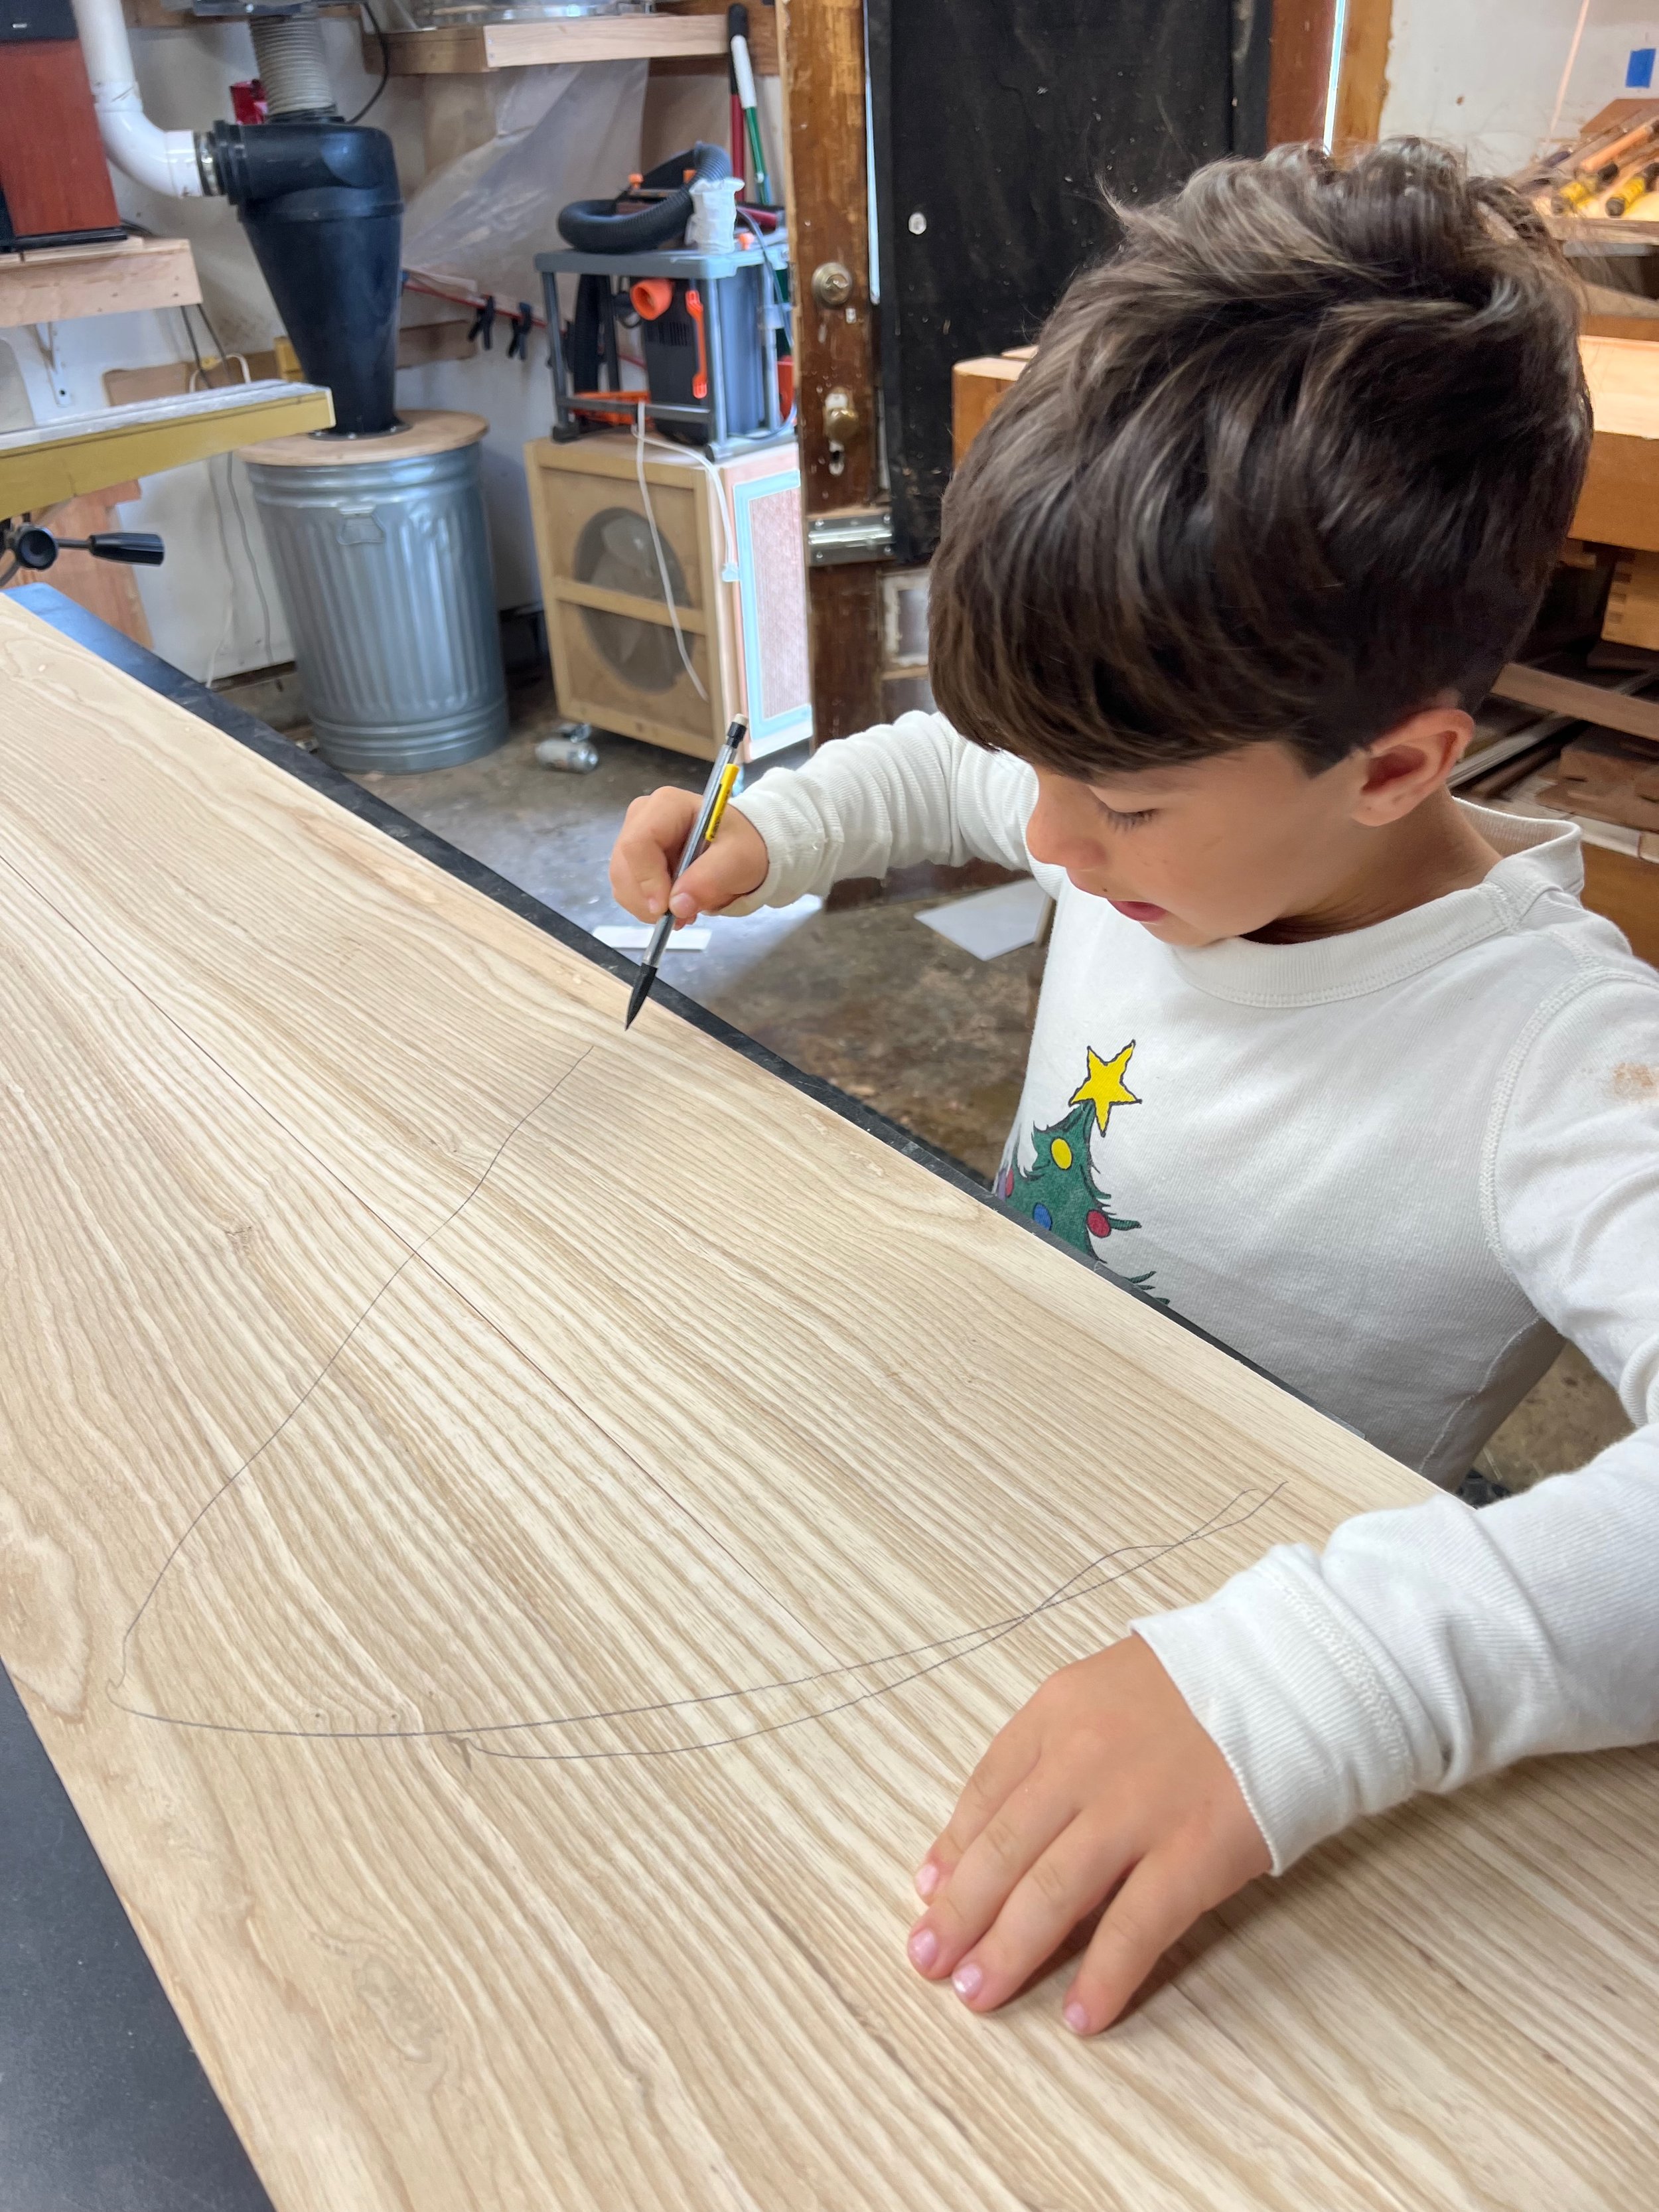
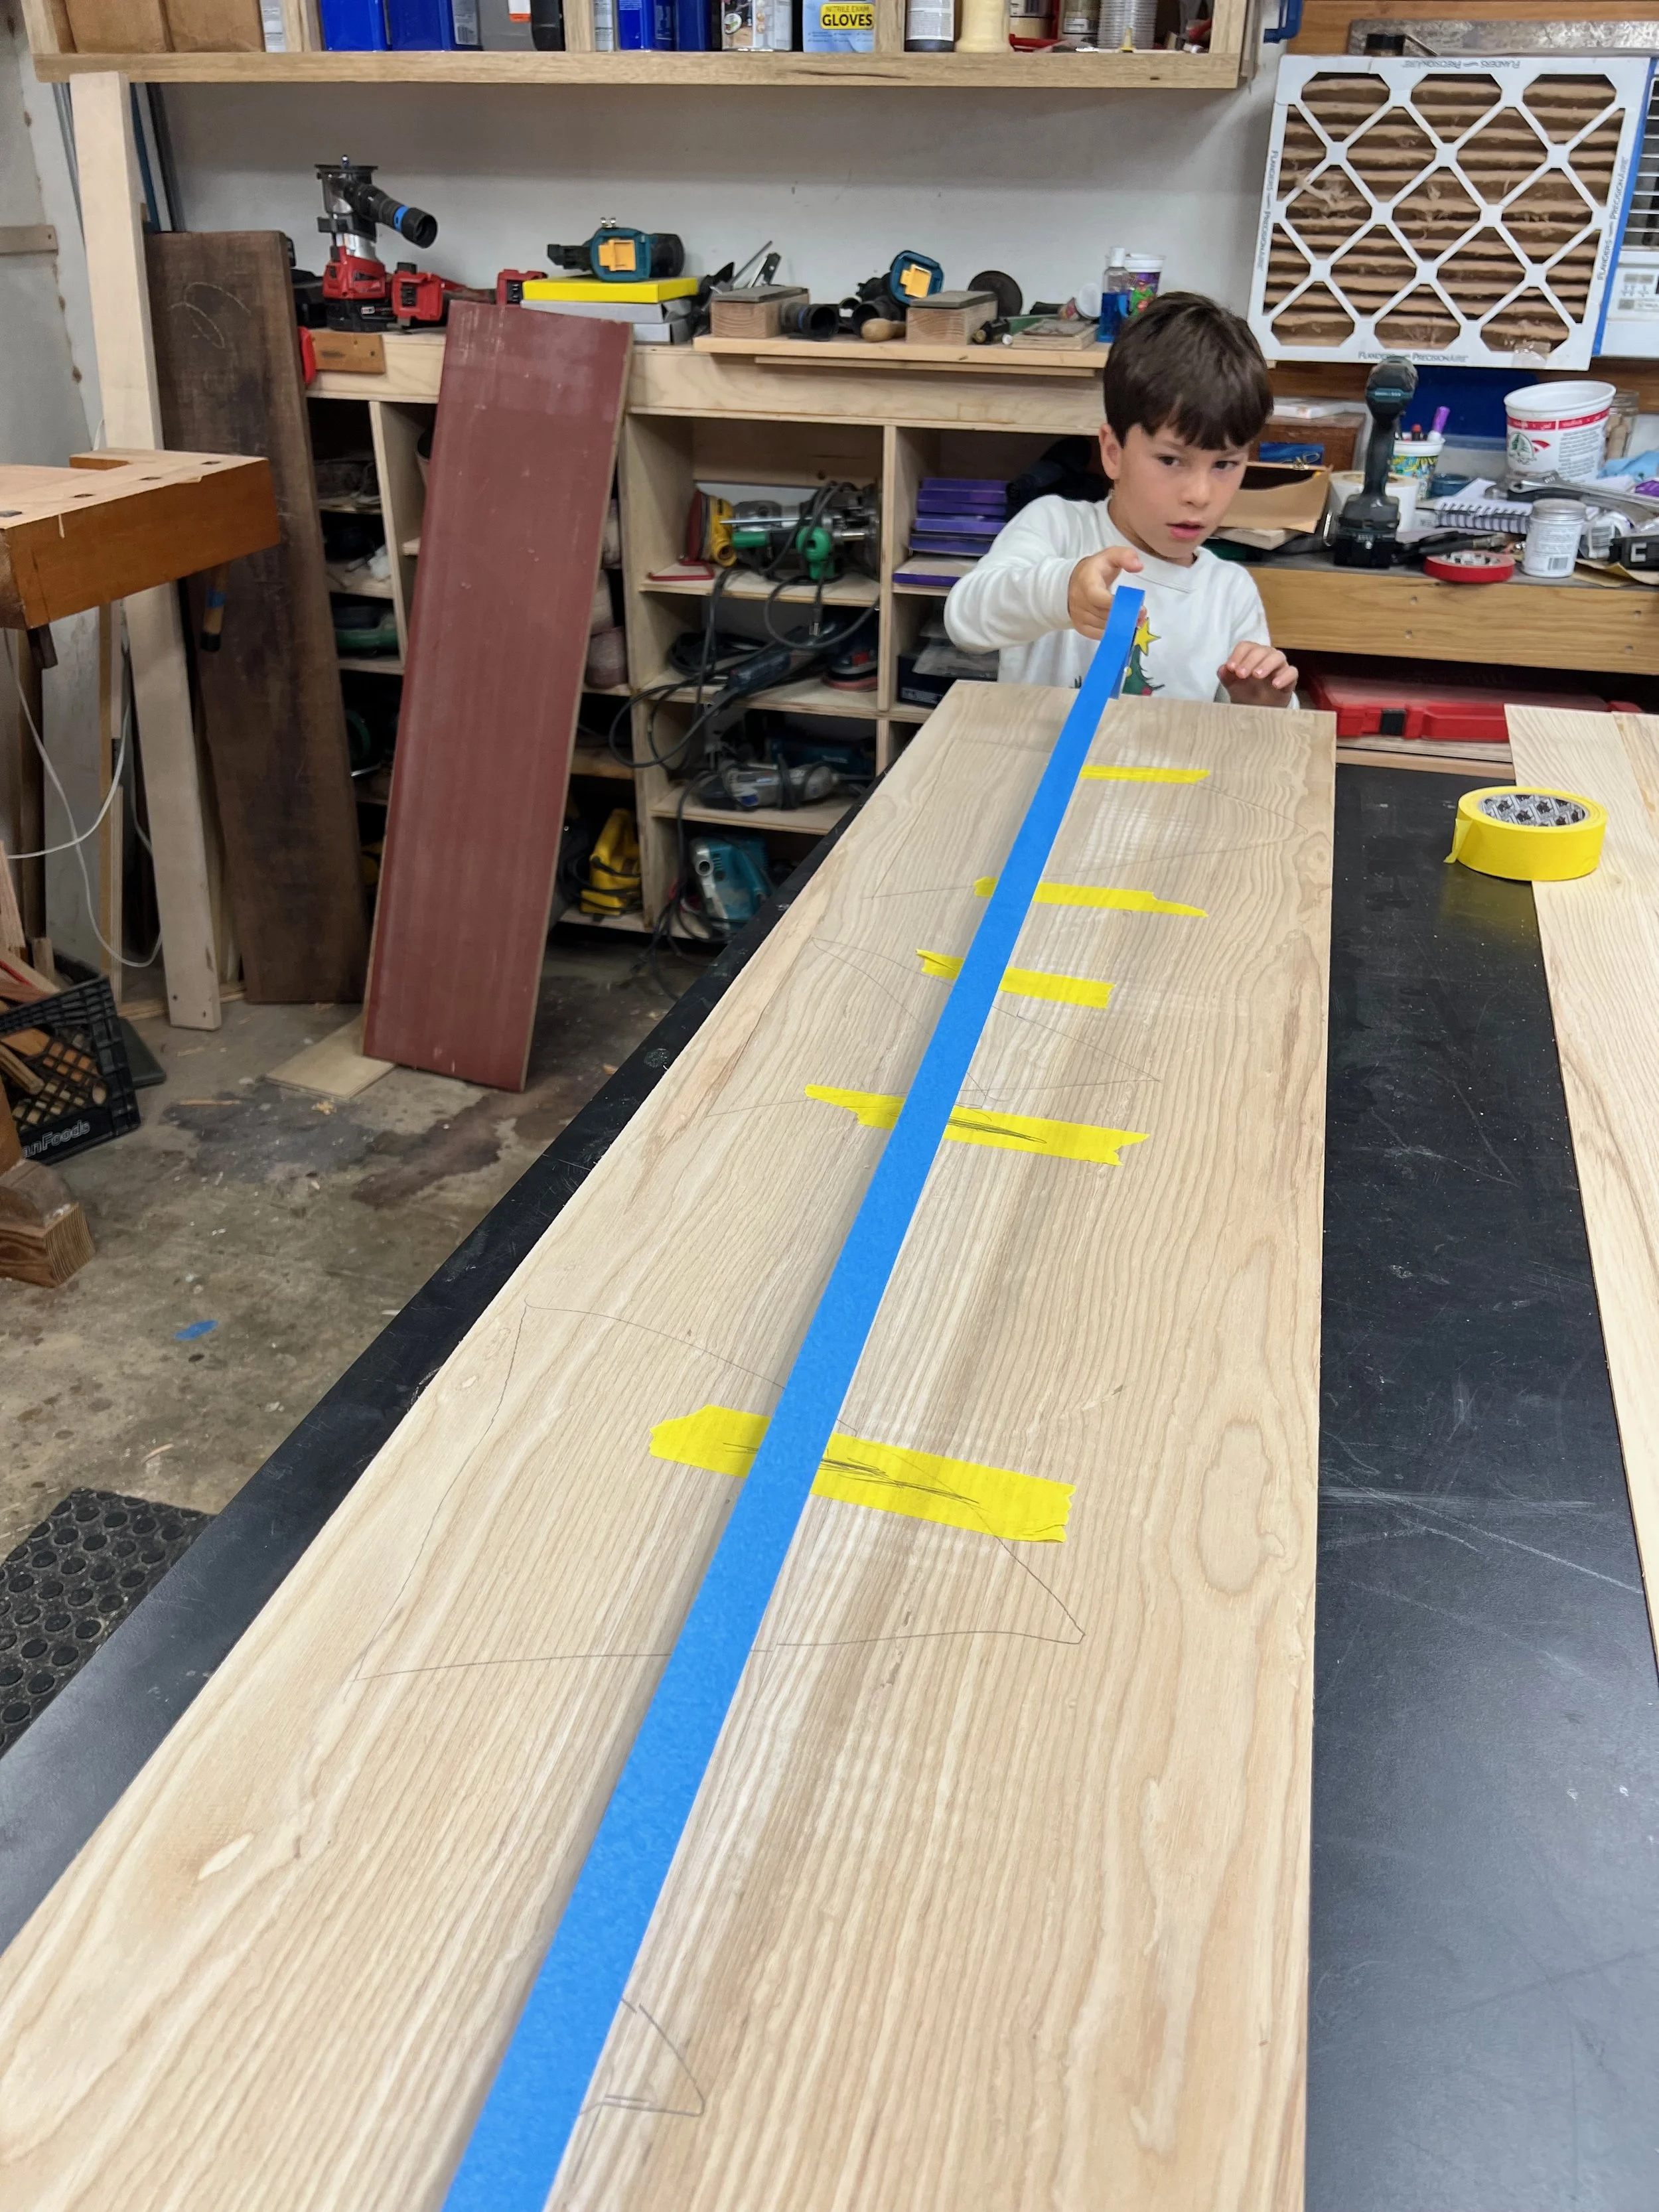
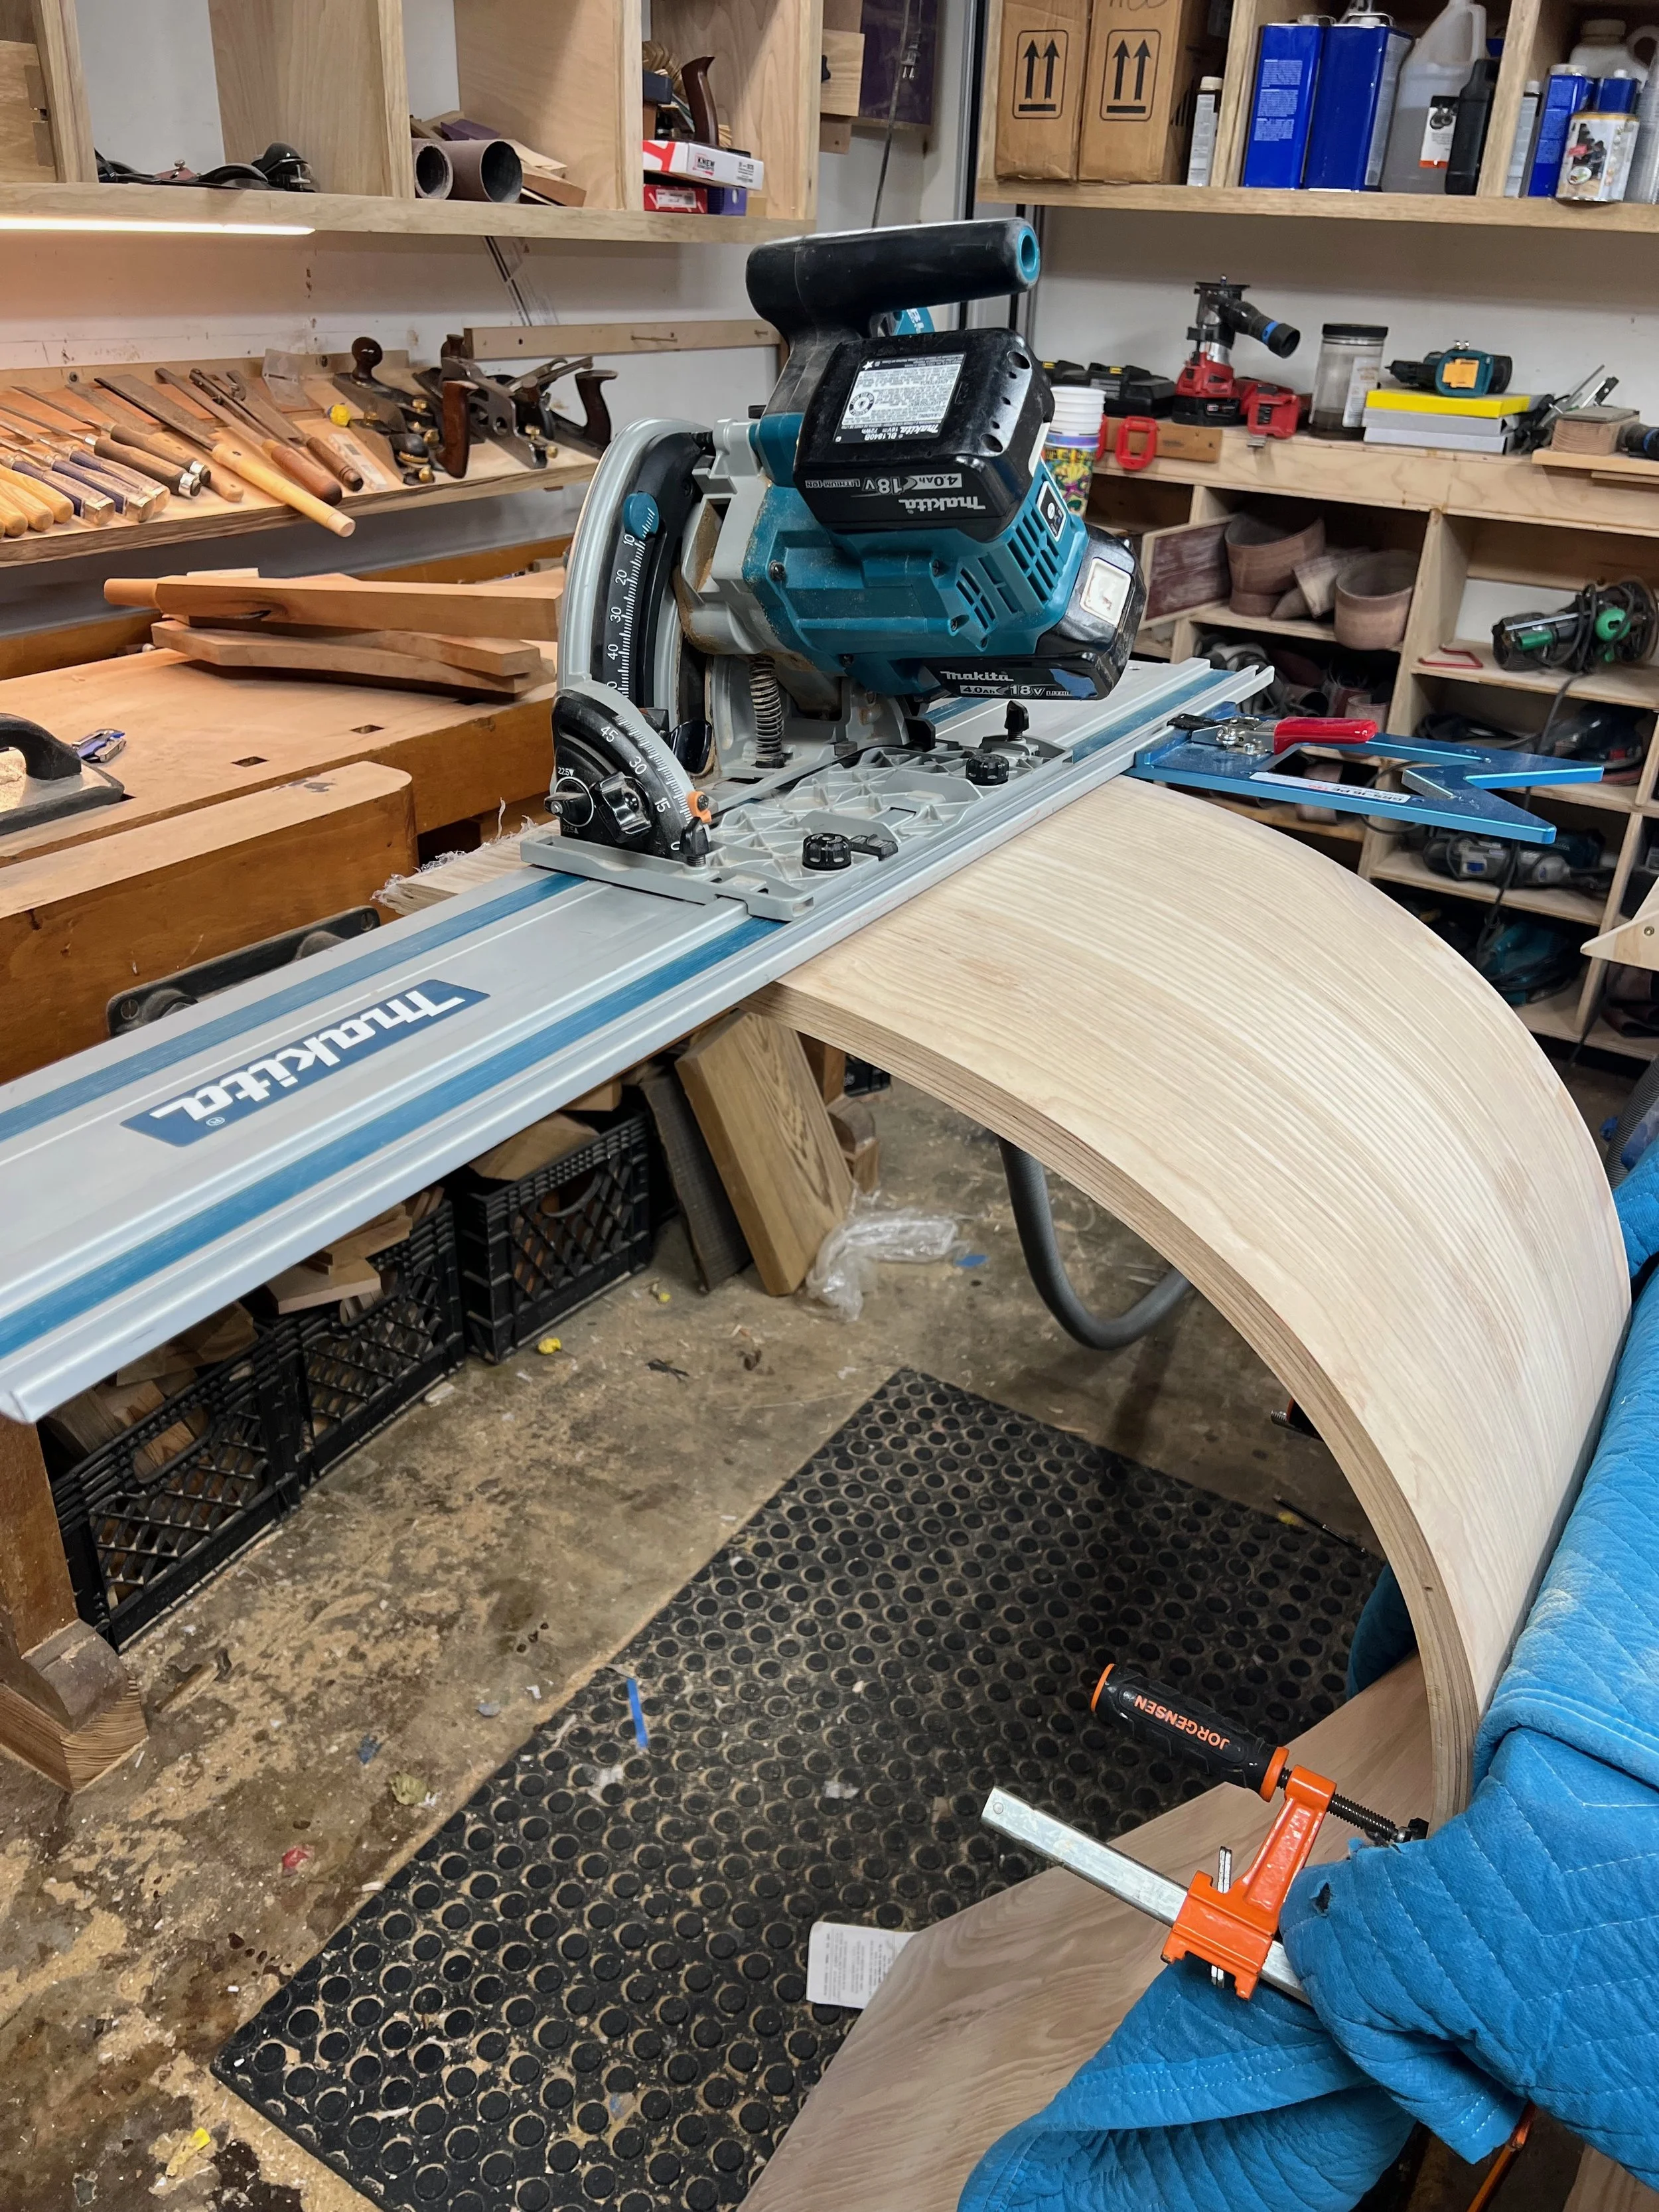
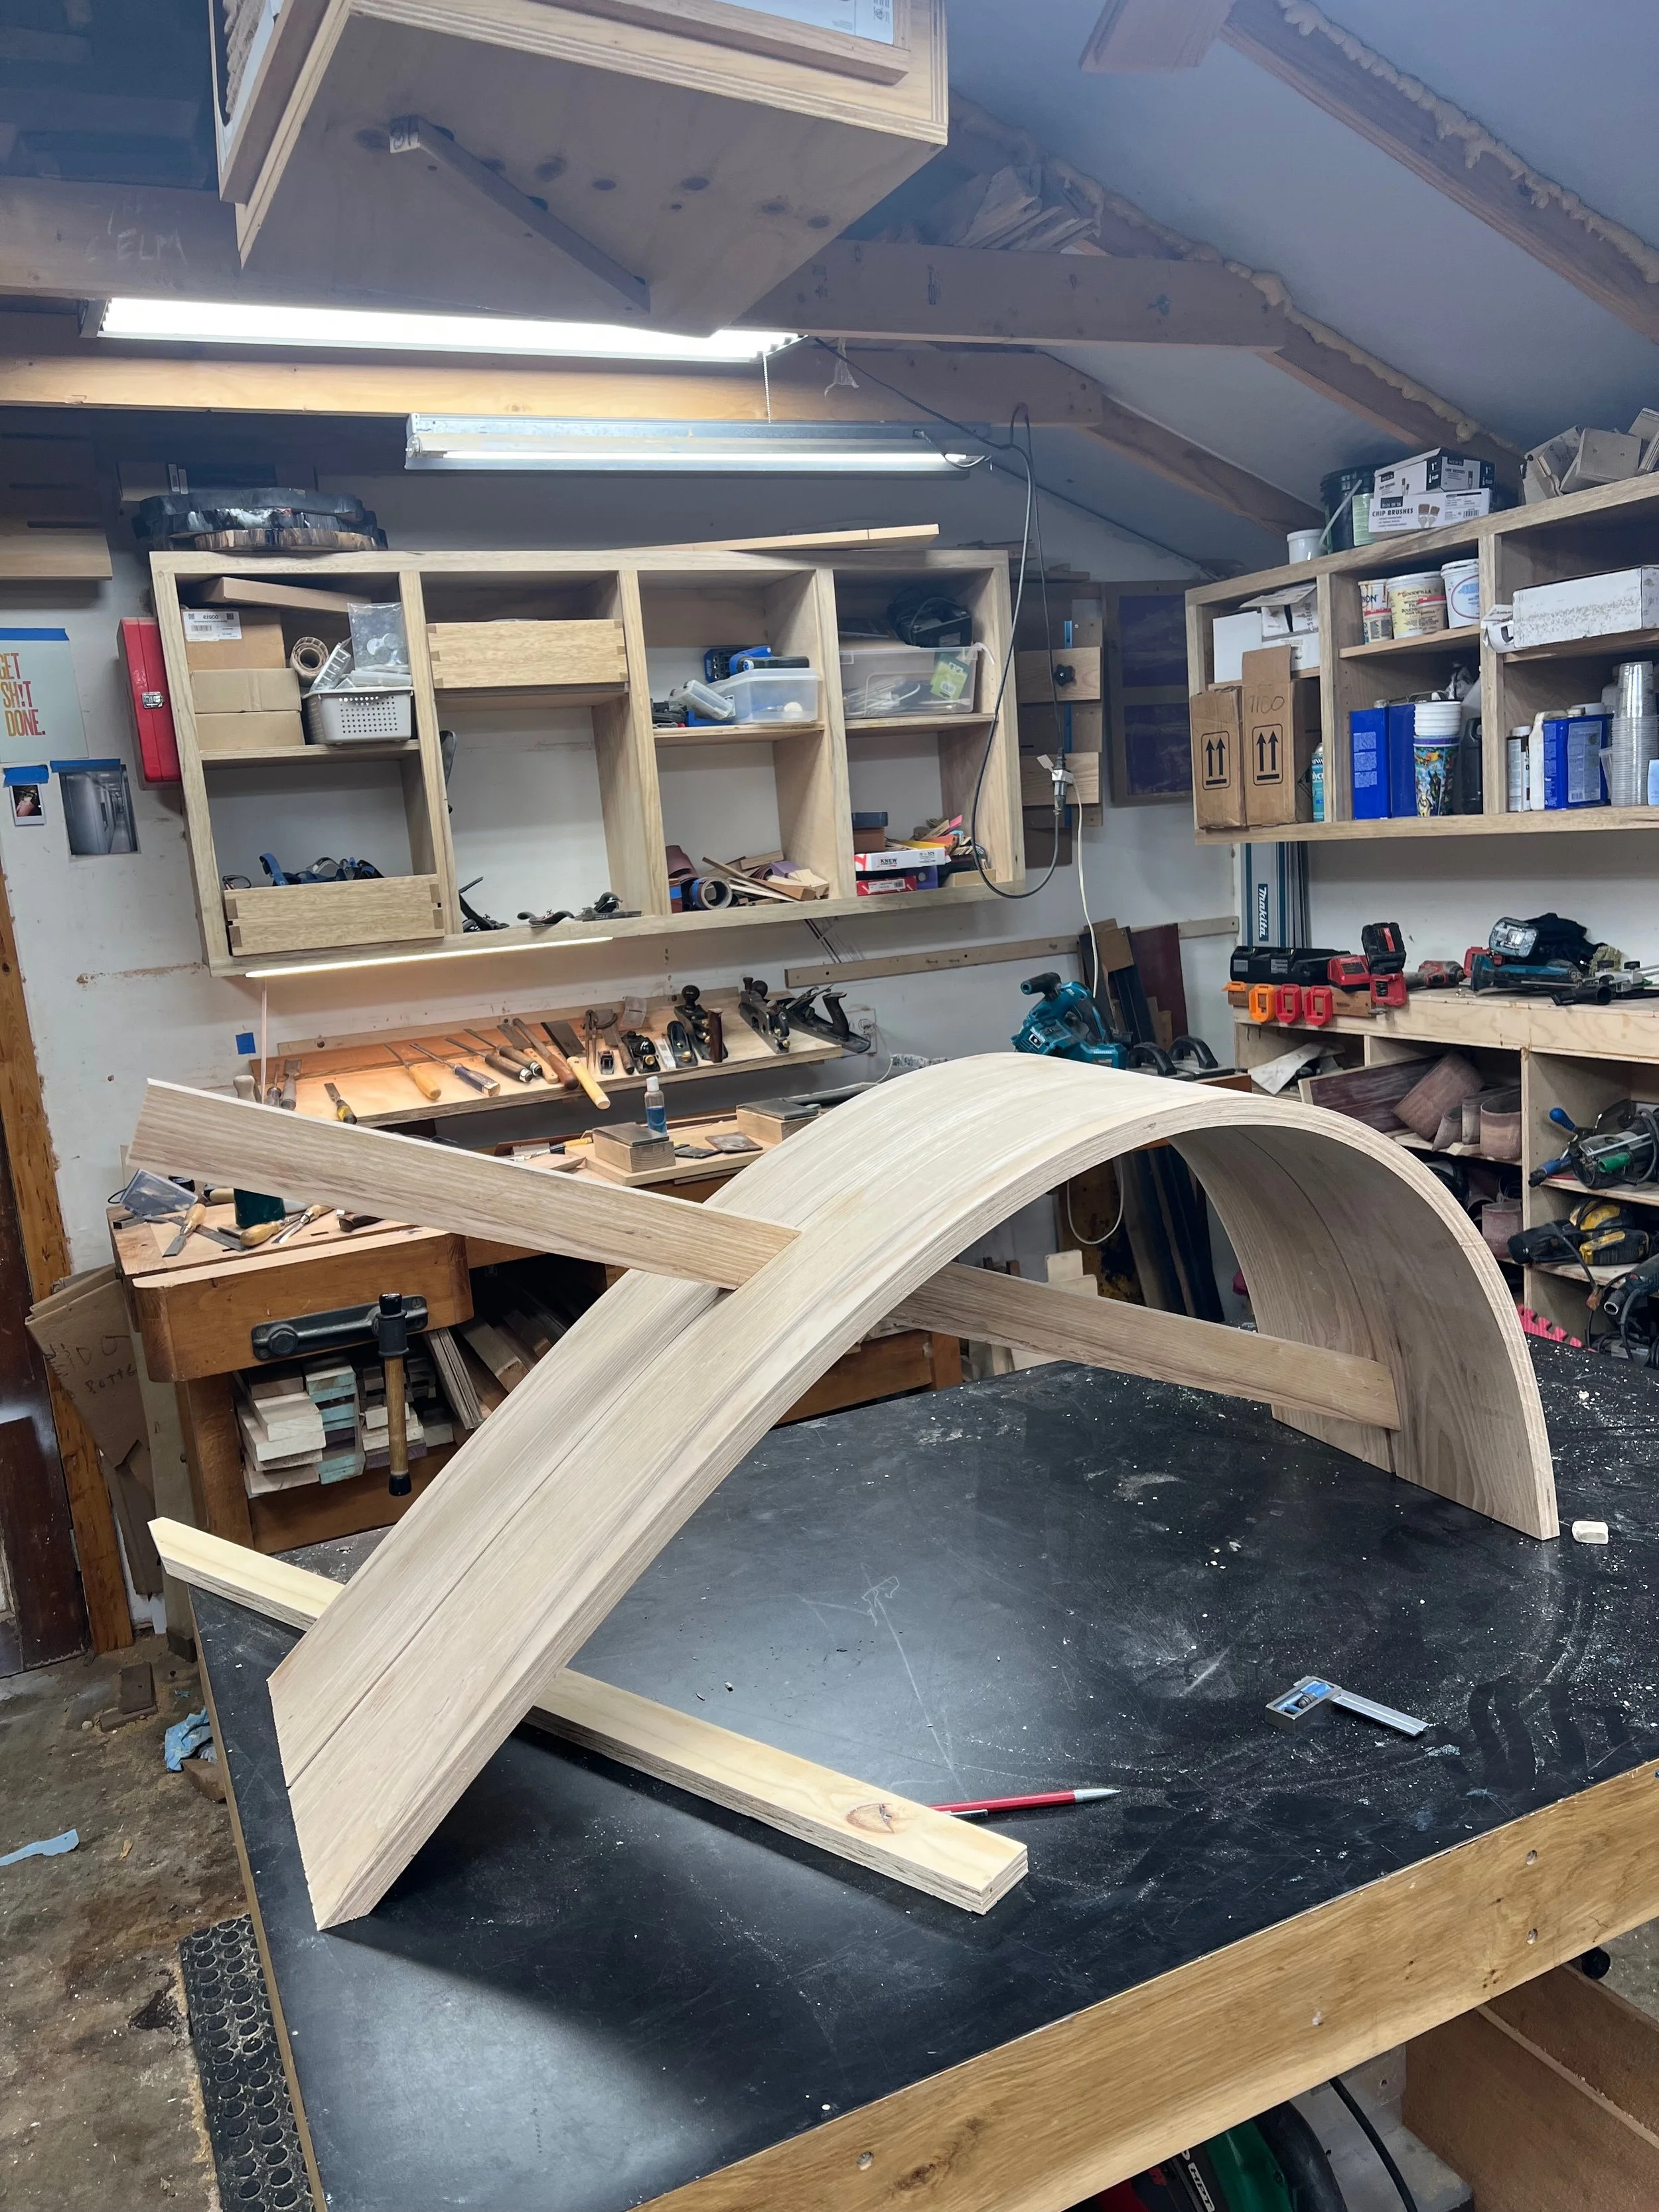
After finishing the slab top for this project, there was a lull in progress caused by a busy life/work stretch. Eventually, I was able to clear my head and my workspace and pick it back up. In the interim, I had done a quite a few analog and digital renderings of the design, so I was able to reference those as a visual starting point. I’ve found that curves can tend to look different proportionally in person, so I started modeling in full dimensions right away. I started off with the finished height I wanted for the table, minus the thickness of the slab, and a length just under the longest part of the slab. That gave me a rectangle in which I could draw in the curve, adjusting the shape and fulcrum/balance point of the slab to get the most pleasing result. I started drawing on paper, and once I had something I liked, I transferred that to cardboard to mock it up. From there, I used 3 points (the two ends and the fulcrum) and a flexible drawing stick to transfer the curve onto the plywood that would serve as the bending form. I included a few inches of run out on the form, to give myself some room to work and cutoff material. Cross bracing was installed between the two plywood sides, and my form was complete.
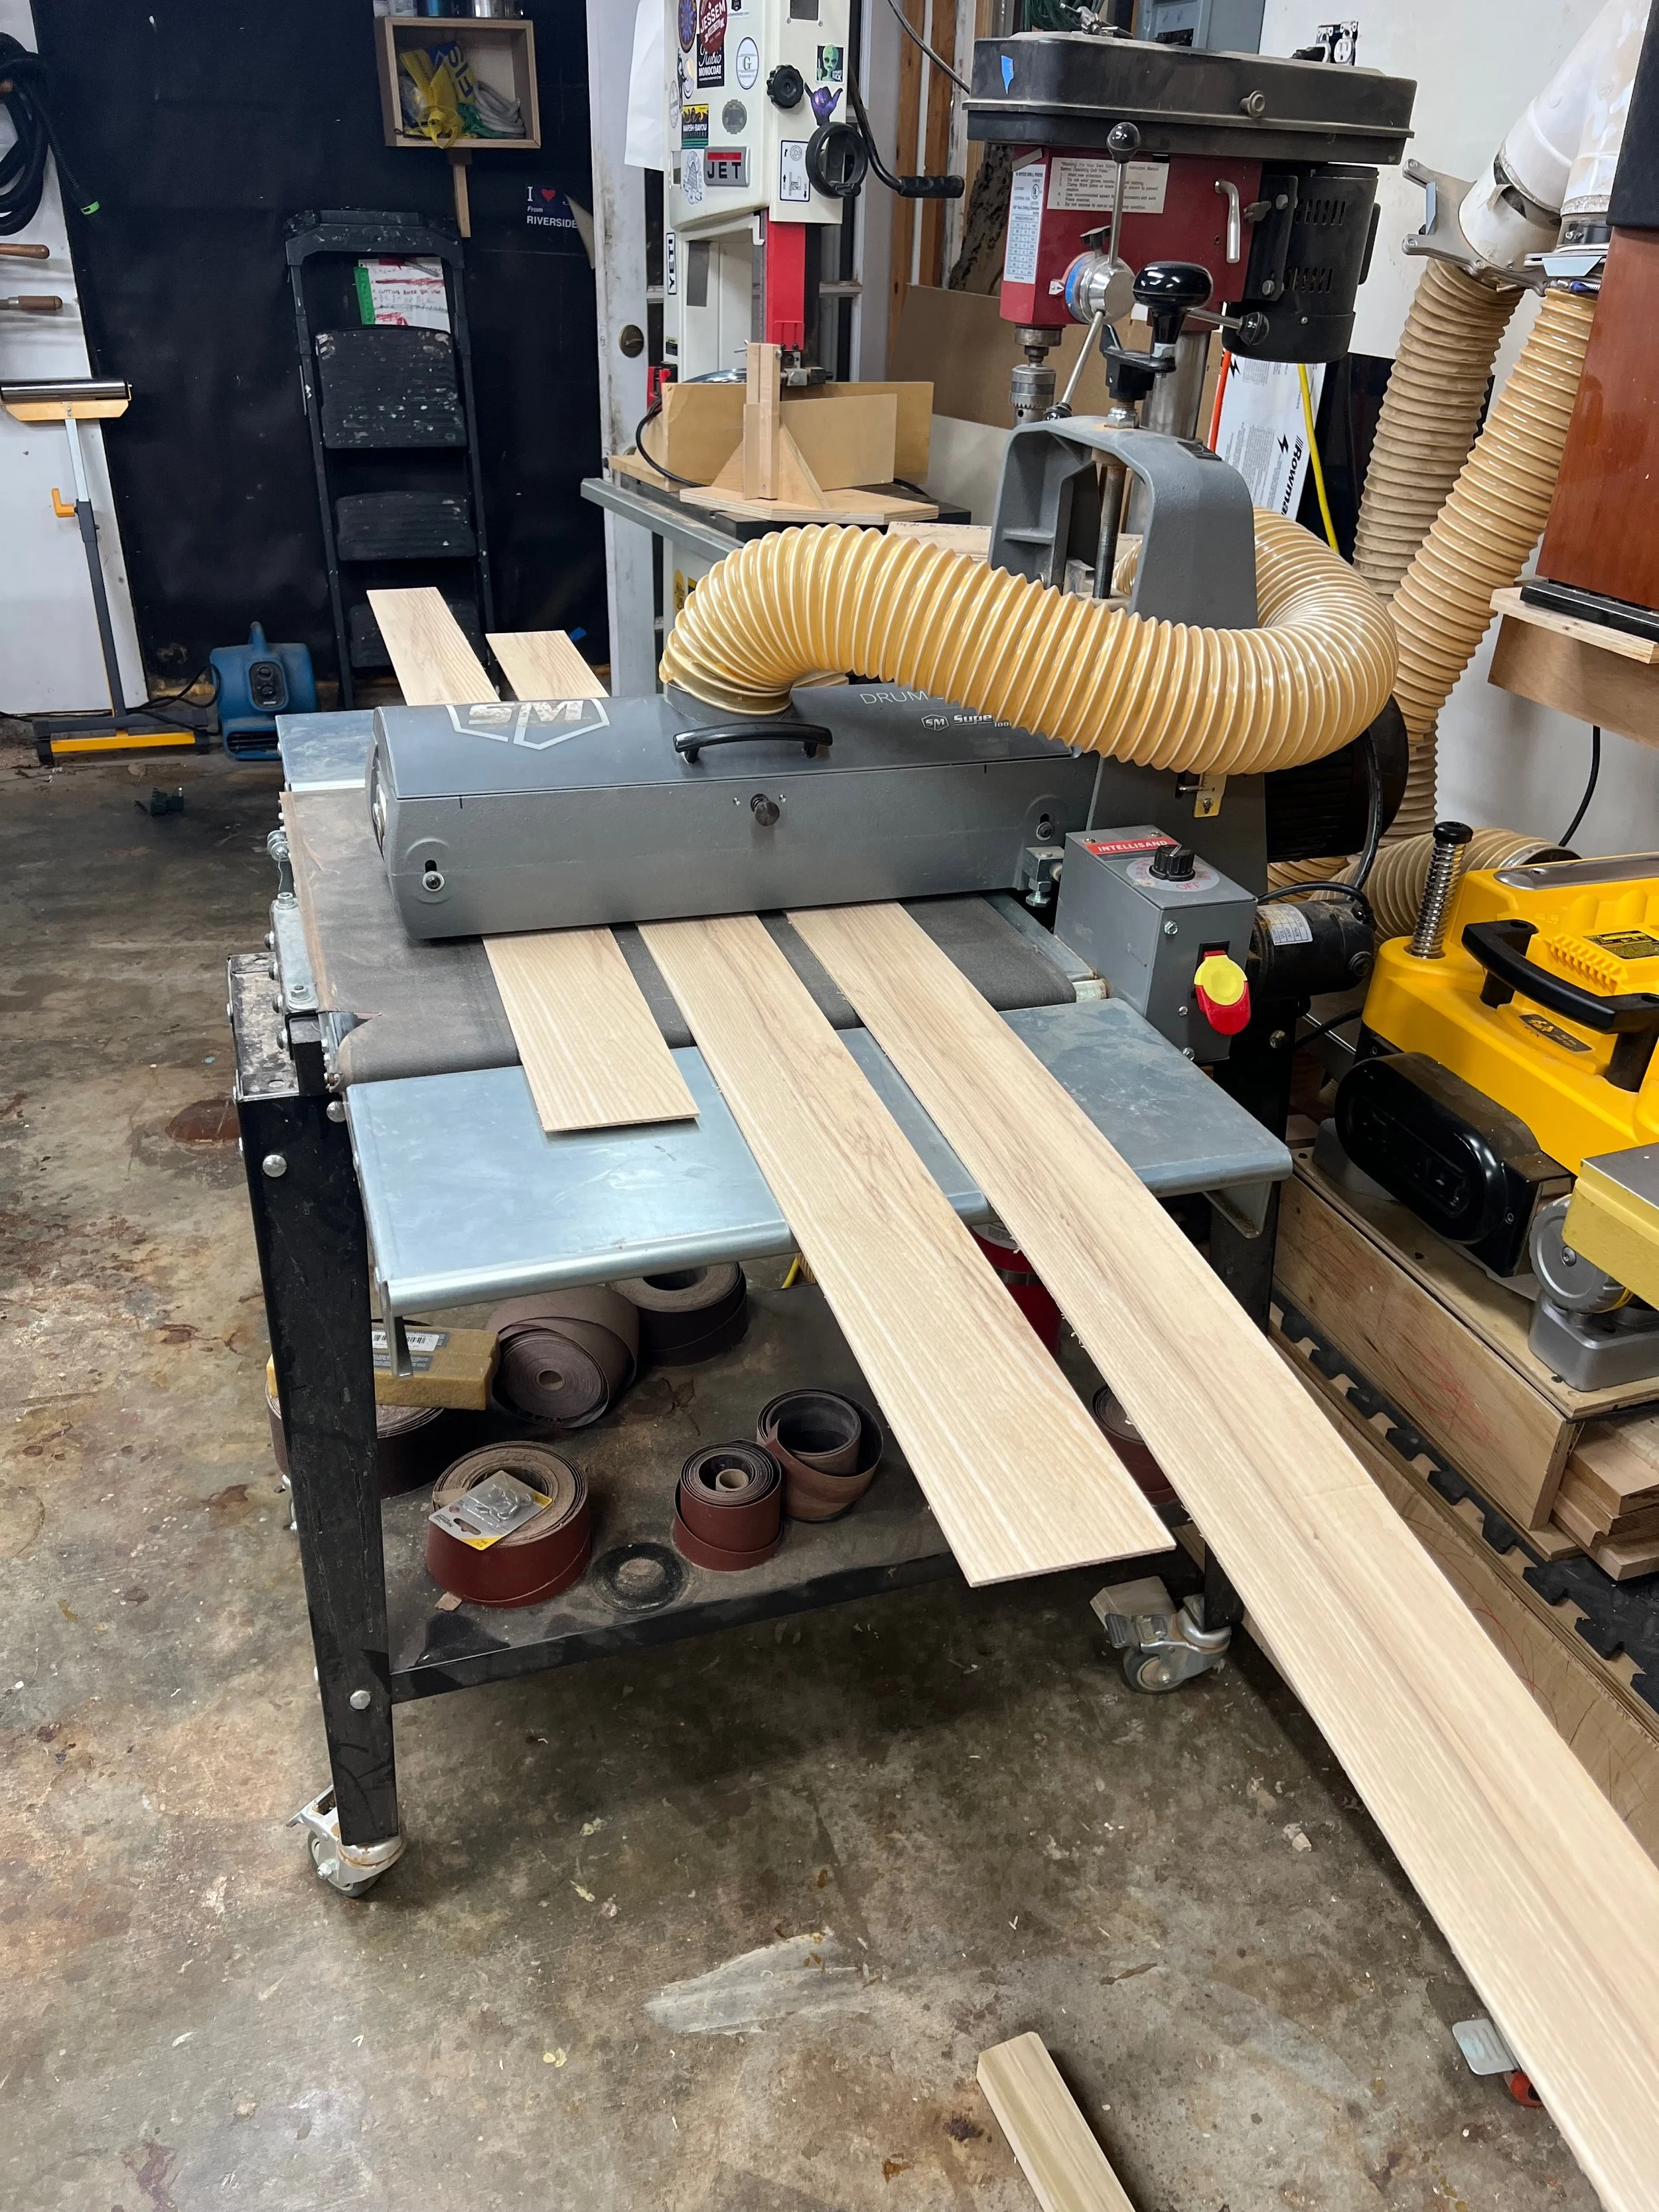
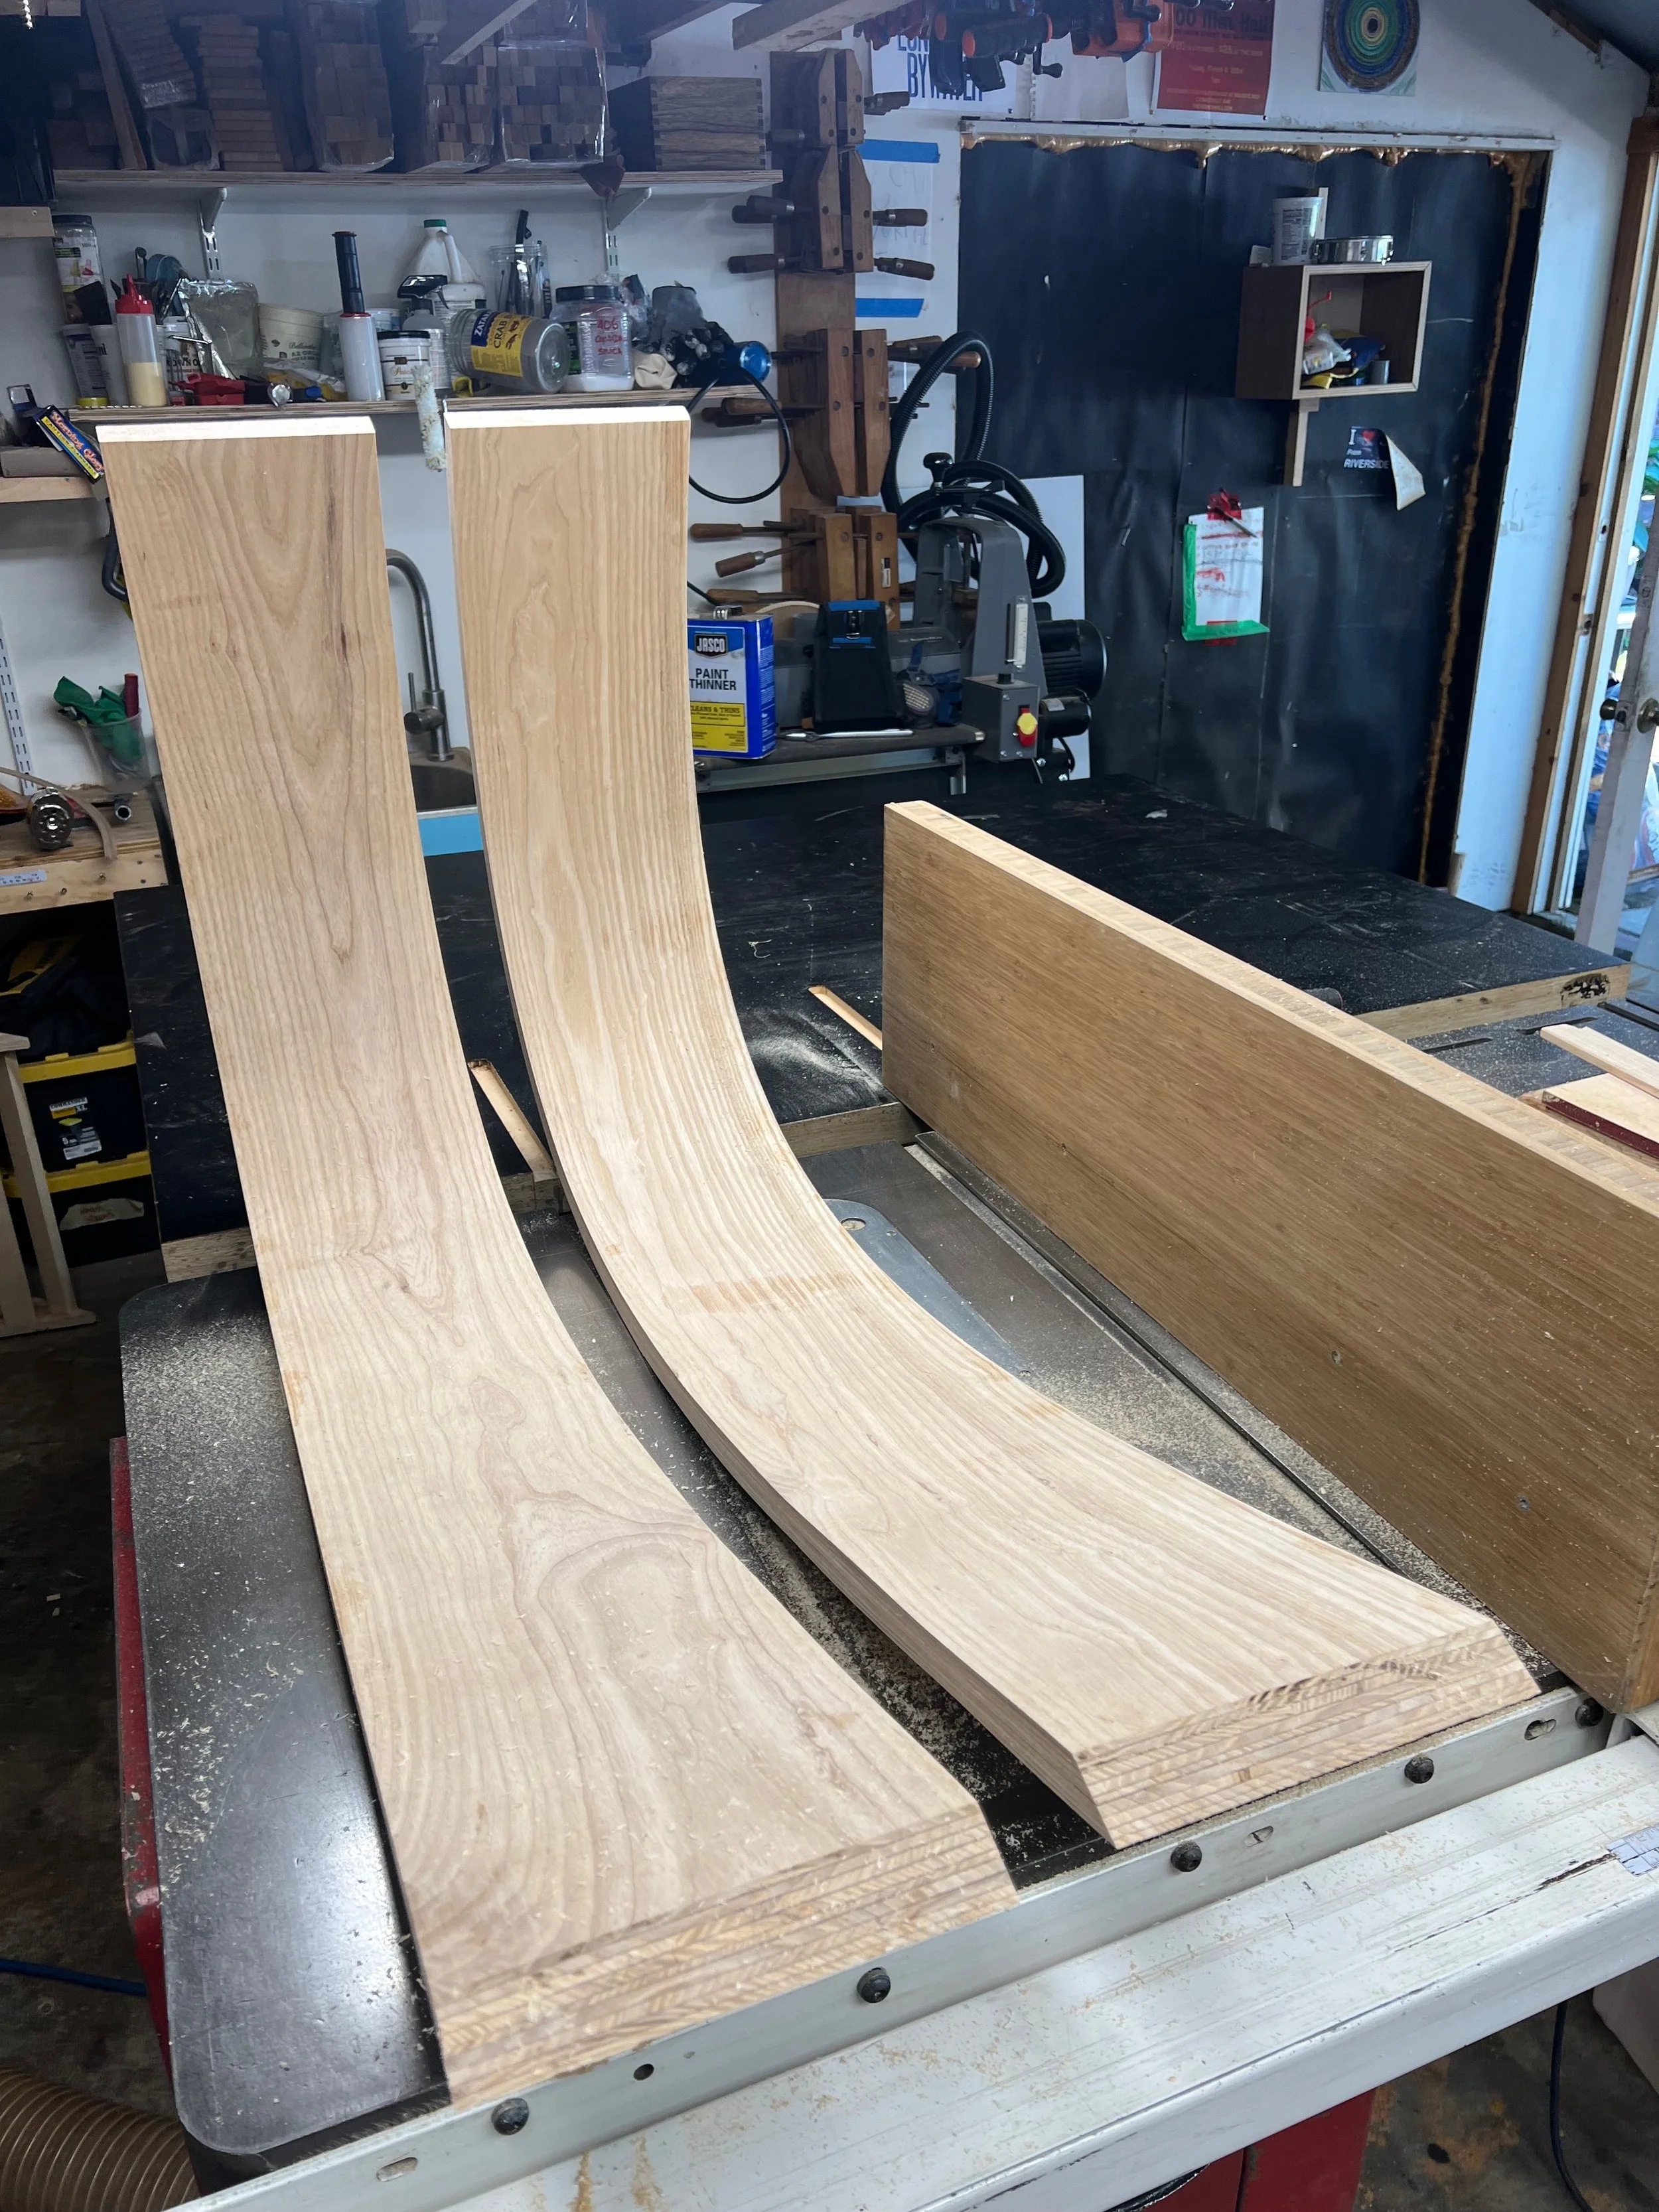
With the form complete, I could move on to making the laminates that would be stacked and bent into the shape of the base. I selected ash as the material, because it bends well and because I was pre-visualizing a finish that took advantage of the grain structure. I selected sections that had mostly straight quarter sawn grain, resawed them, and sanded them to equal thickness on my drum sander. In order to create panels the width I needed, it was necessary to join two pieces together for each panel. I had given this some consideration ahead of time, and created veneers of two different widths. Glueing a wider piece and a narrower piece together allowed me to stagger the glue joints so that they didn’t all line up in the same place, dead in the center. Perhaps a minor issue, but worth avoiding. Shout out to Heinz Gautschi for bringing up that particular attention to detail during the process of laminating parts for the winding staircase we are building at his shop. Doing those bent laminations was a definite catalyst for me deciding to make this base with the same technique.
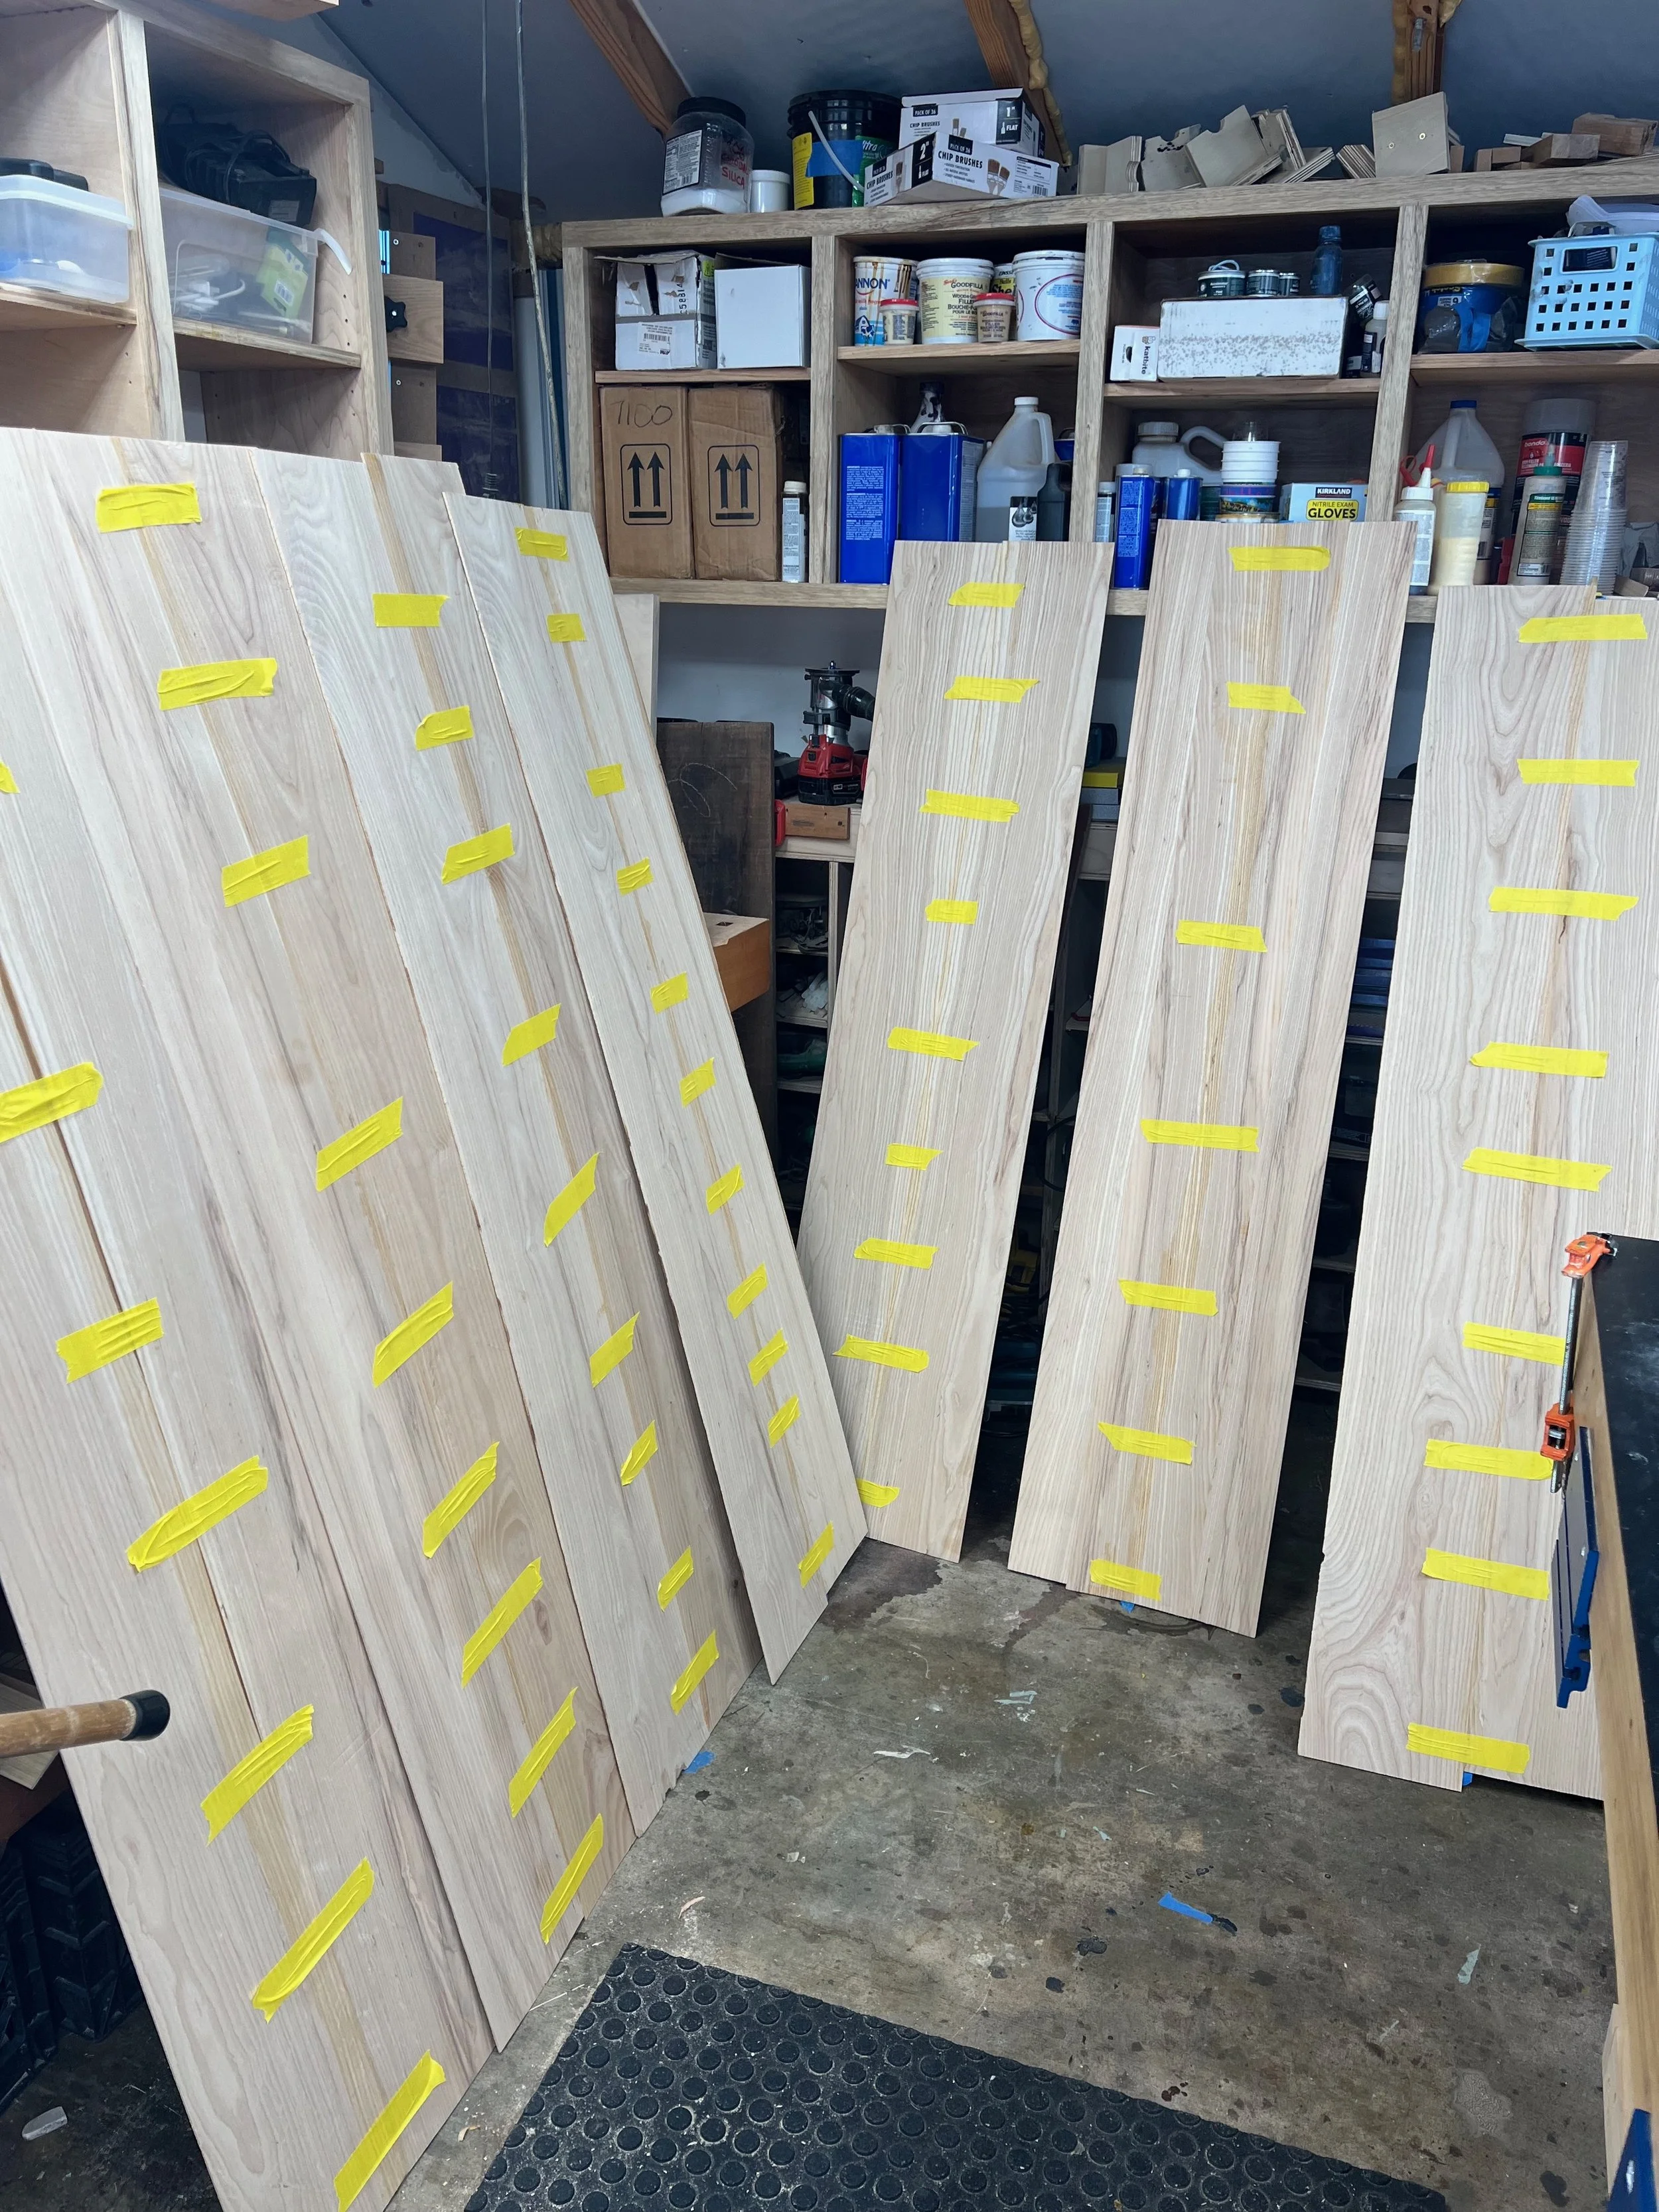
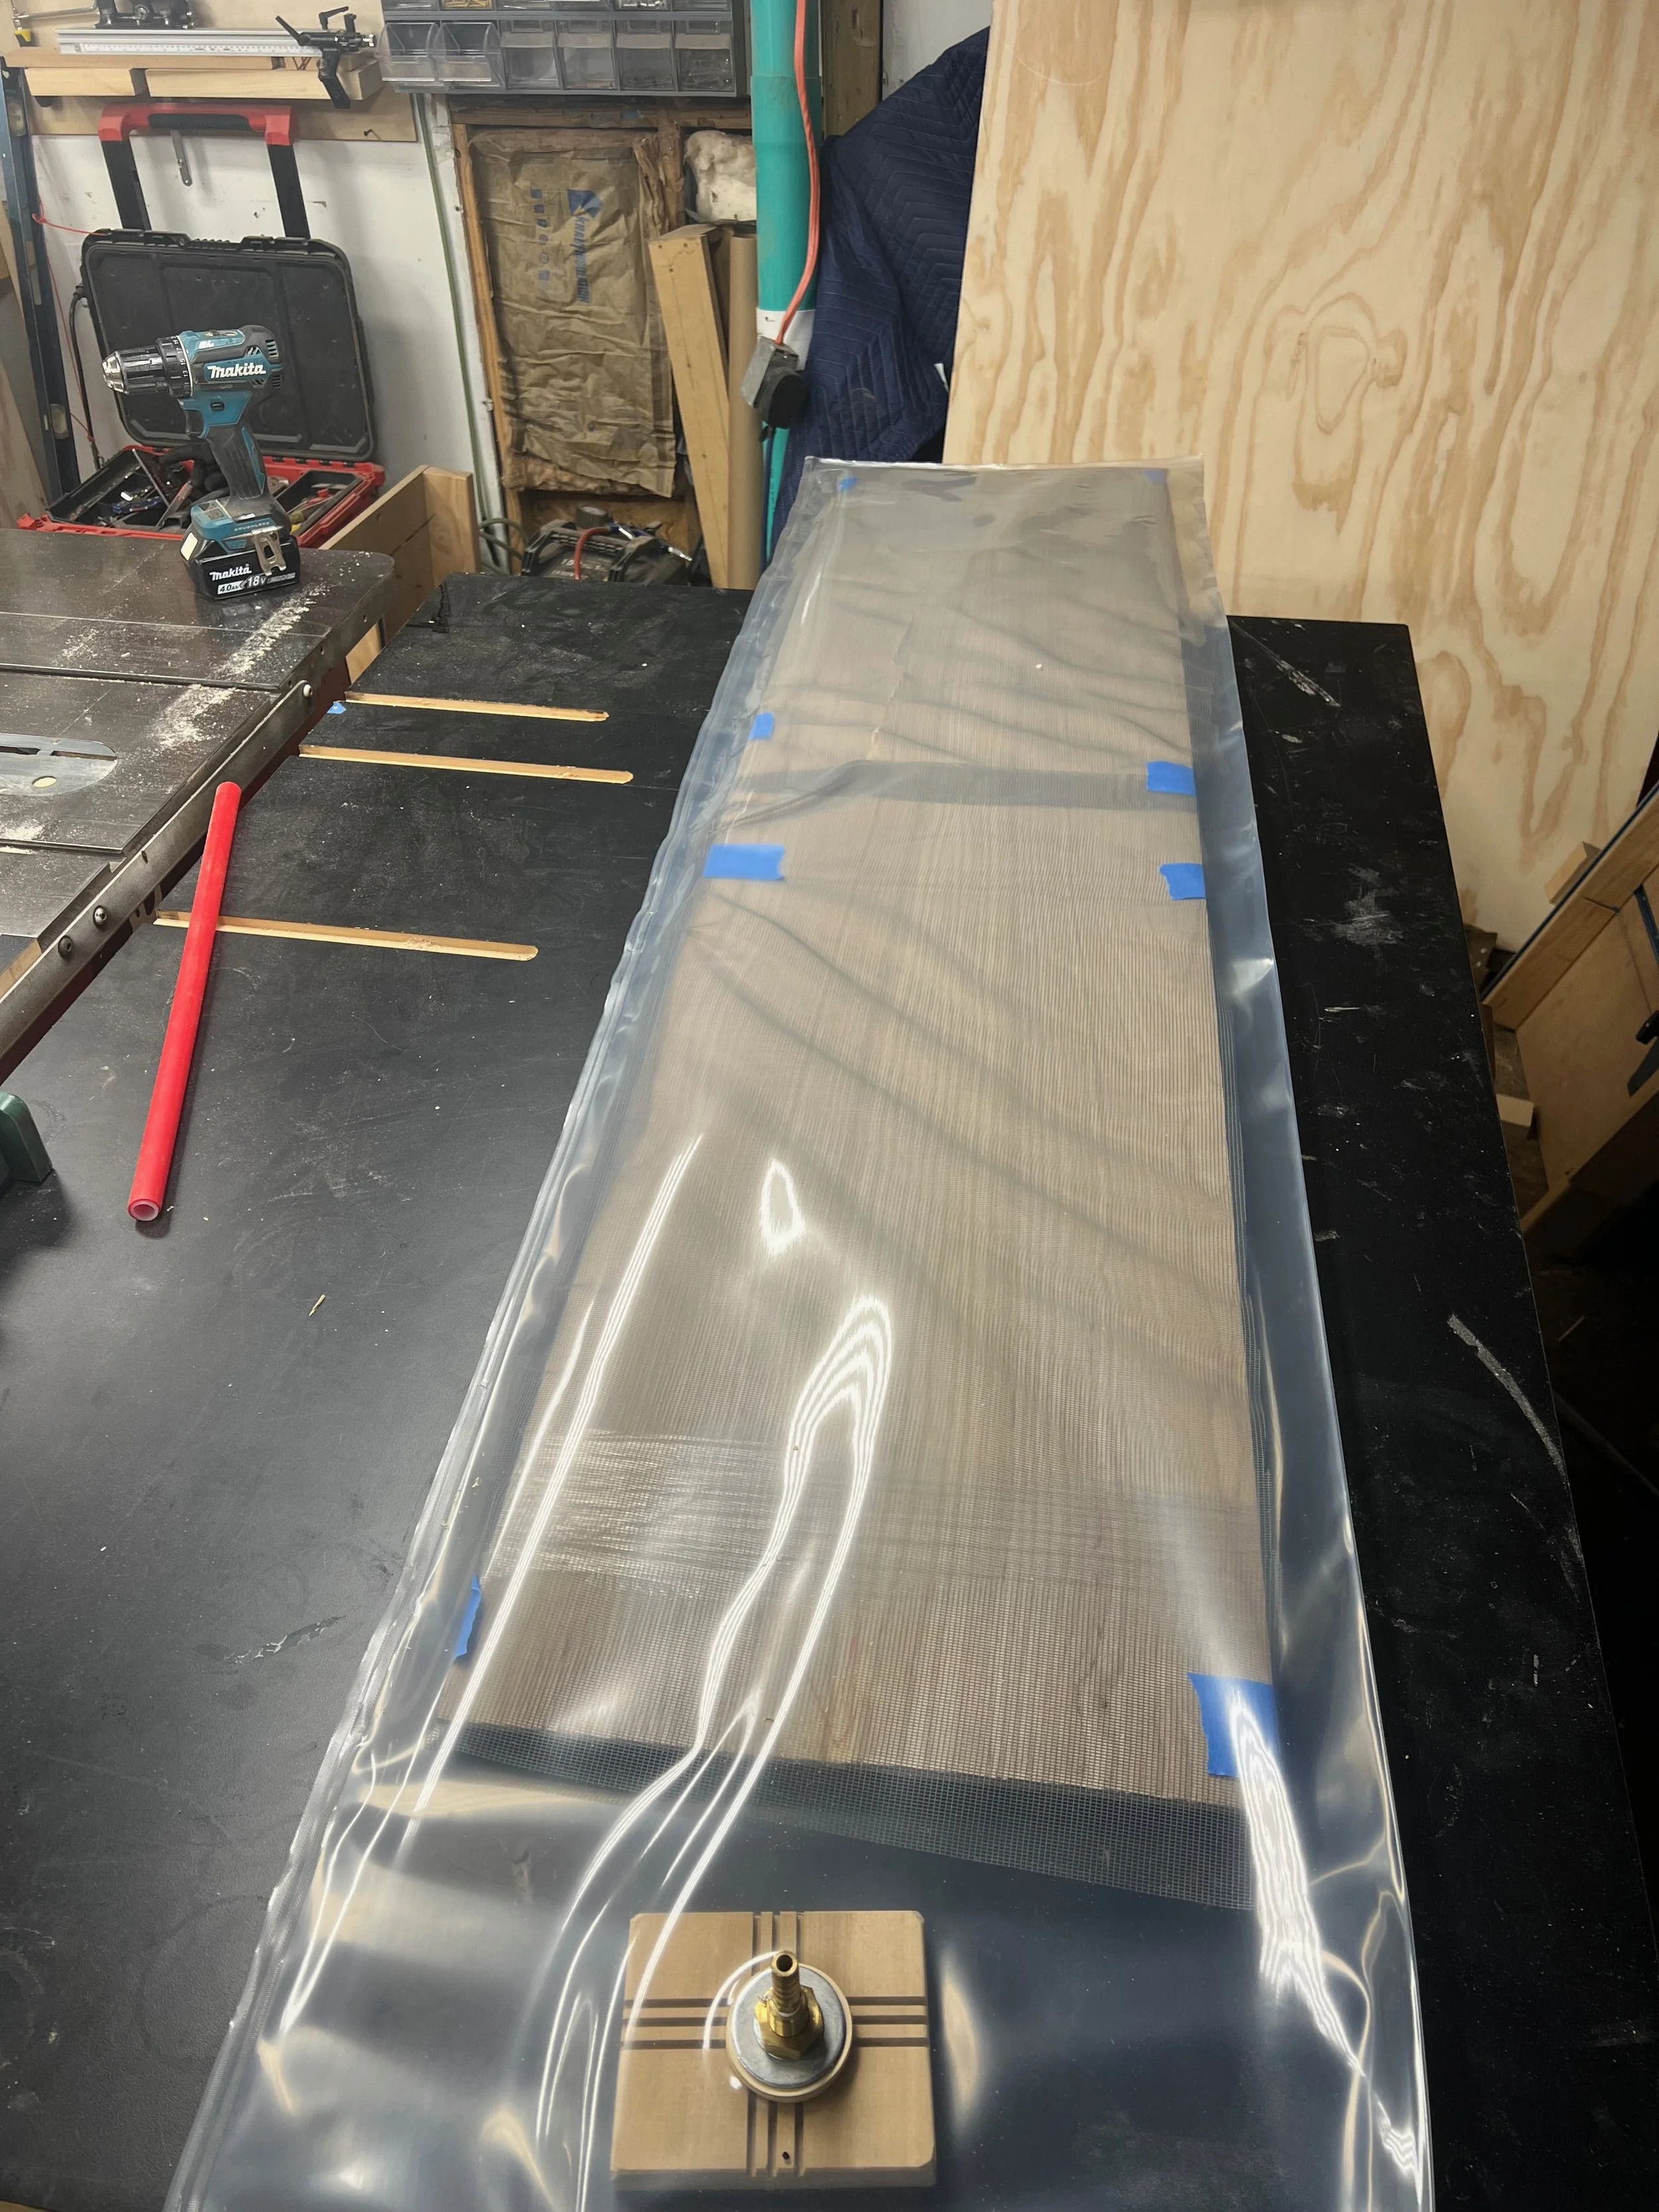
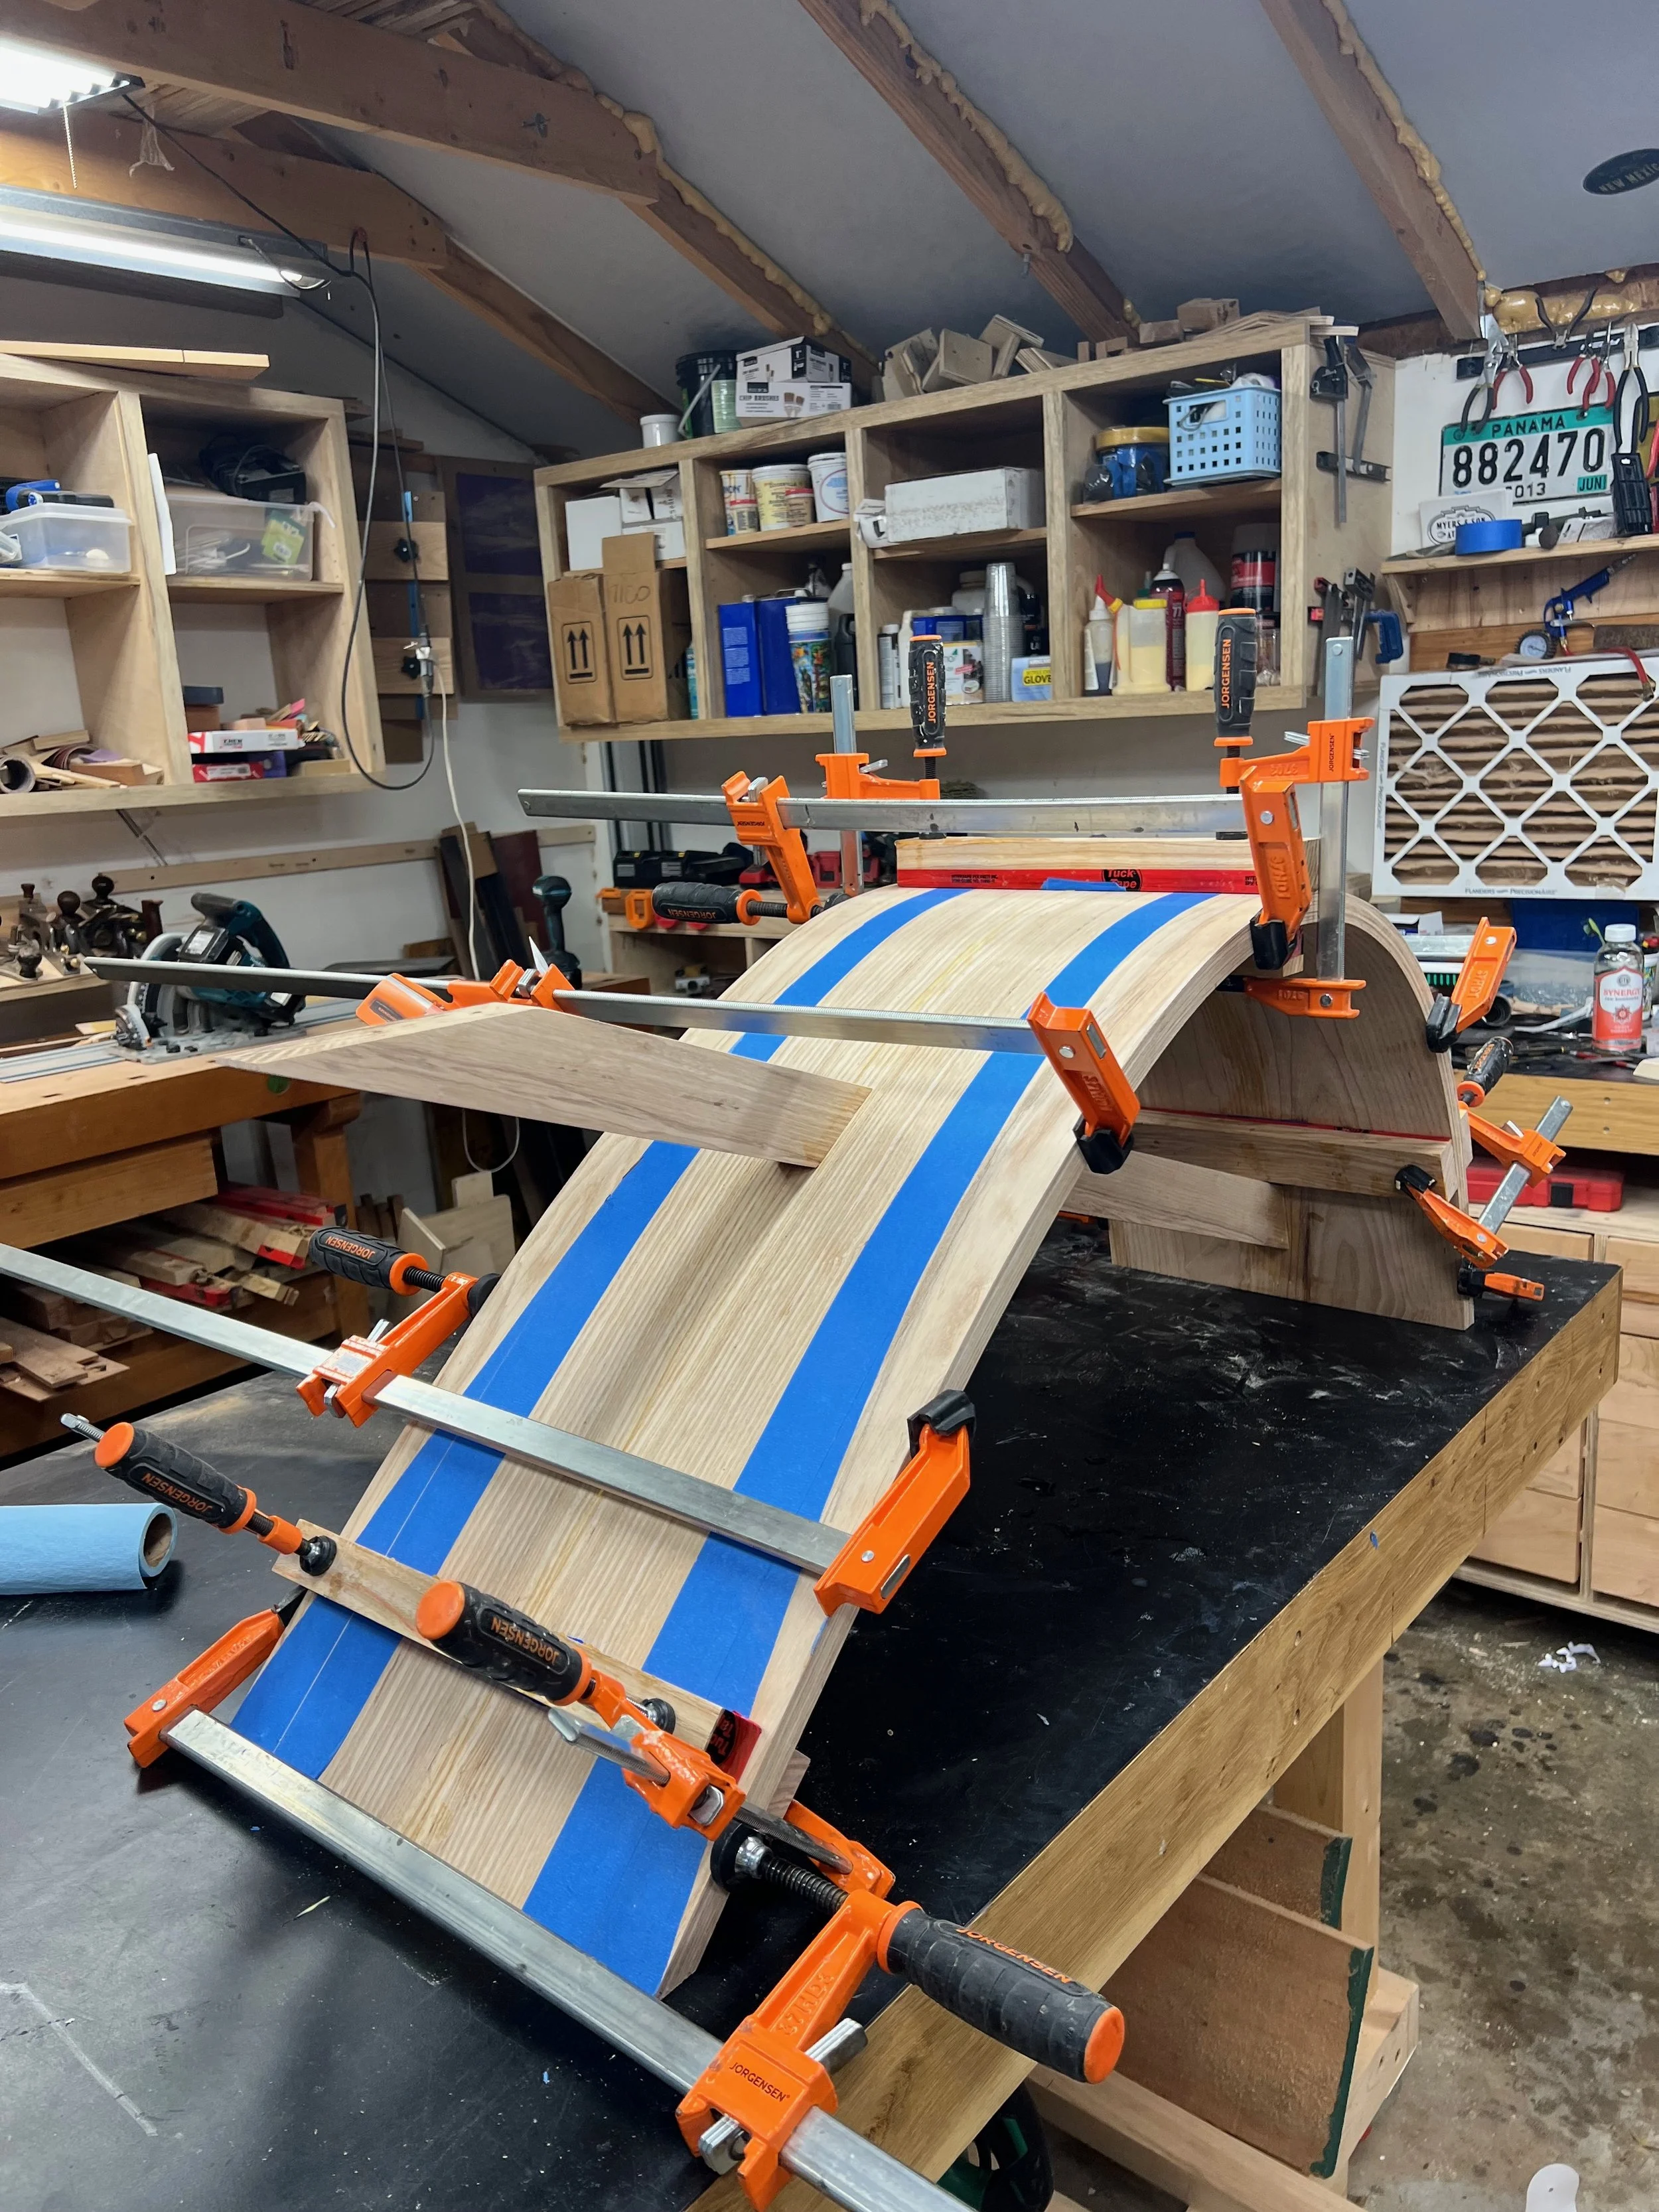
Once the panels were complete, I was able to start testing out their pliability on the form. There wasn’t an exact thickness I was shooting for with this lamination, but I needed to make sure that they weren’t too stiff to be physically able to clamp down to the form. The thinner the individual laminates, the easier it is to bend them, but by the same token, the more laminates you need in order to hit a specific thickness. After a bit of testing, it was clear that I needed to sand down the panels by just a bit in order to get the flexibility I needed. With all that worked out, I had to face it - it was time to do the glue up. For this project, I chose epoxy, wanting both a fairly rigid glue line and a long open time, since I was doing the glue up on my own. Open time refers to the estimated amount of time you have to assemble the project before the glue hardens too much to be able to work with. After a dry run with no epoxy, I went ahead with the glue up. The epoxy is spread, the pack of laminates is taped together and wrapped in plastic wrap, then inserted into the bag with a screen mesh that helps make sure that the air can flow out the valve. The vacuum bag and pump provide the force that presses the laminates together, while the clamping forces the whole assembly onto the form. Glue ups are always stressful, and this one took some pretty good muscle to get the last couple of clamps on, but it all came together.
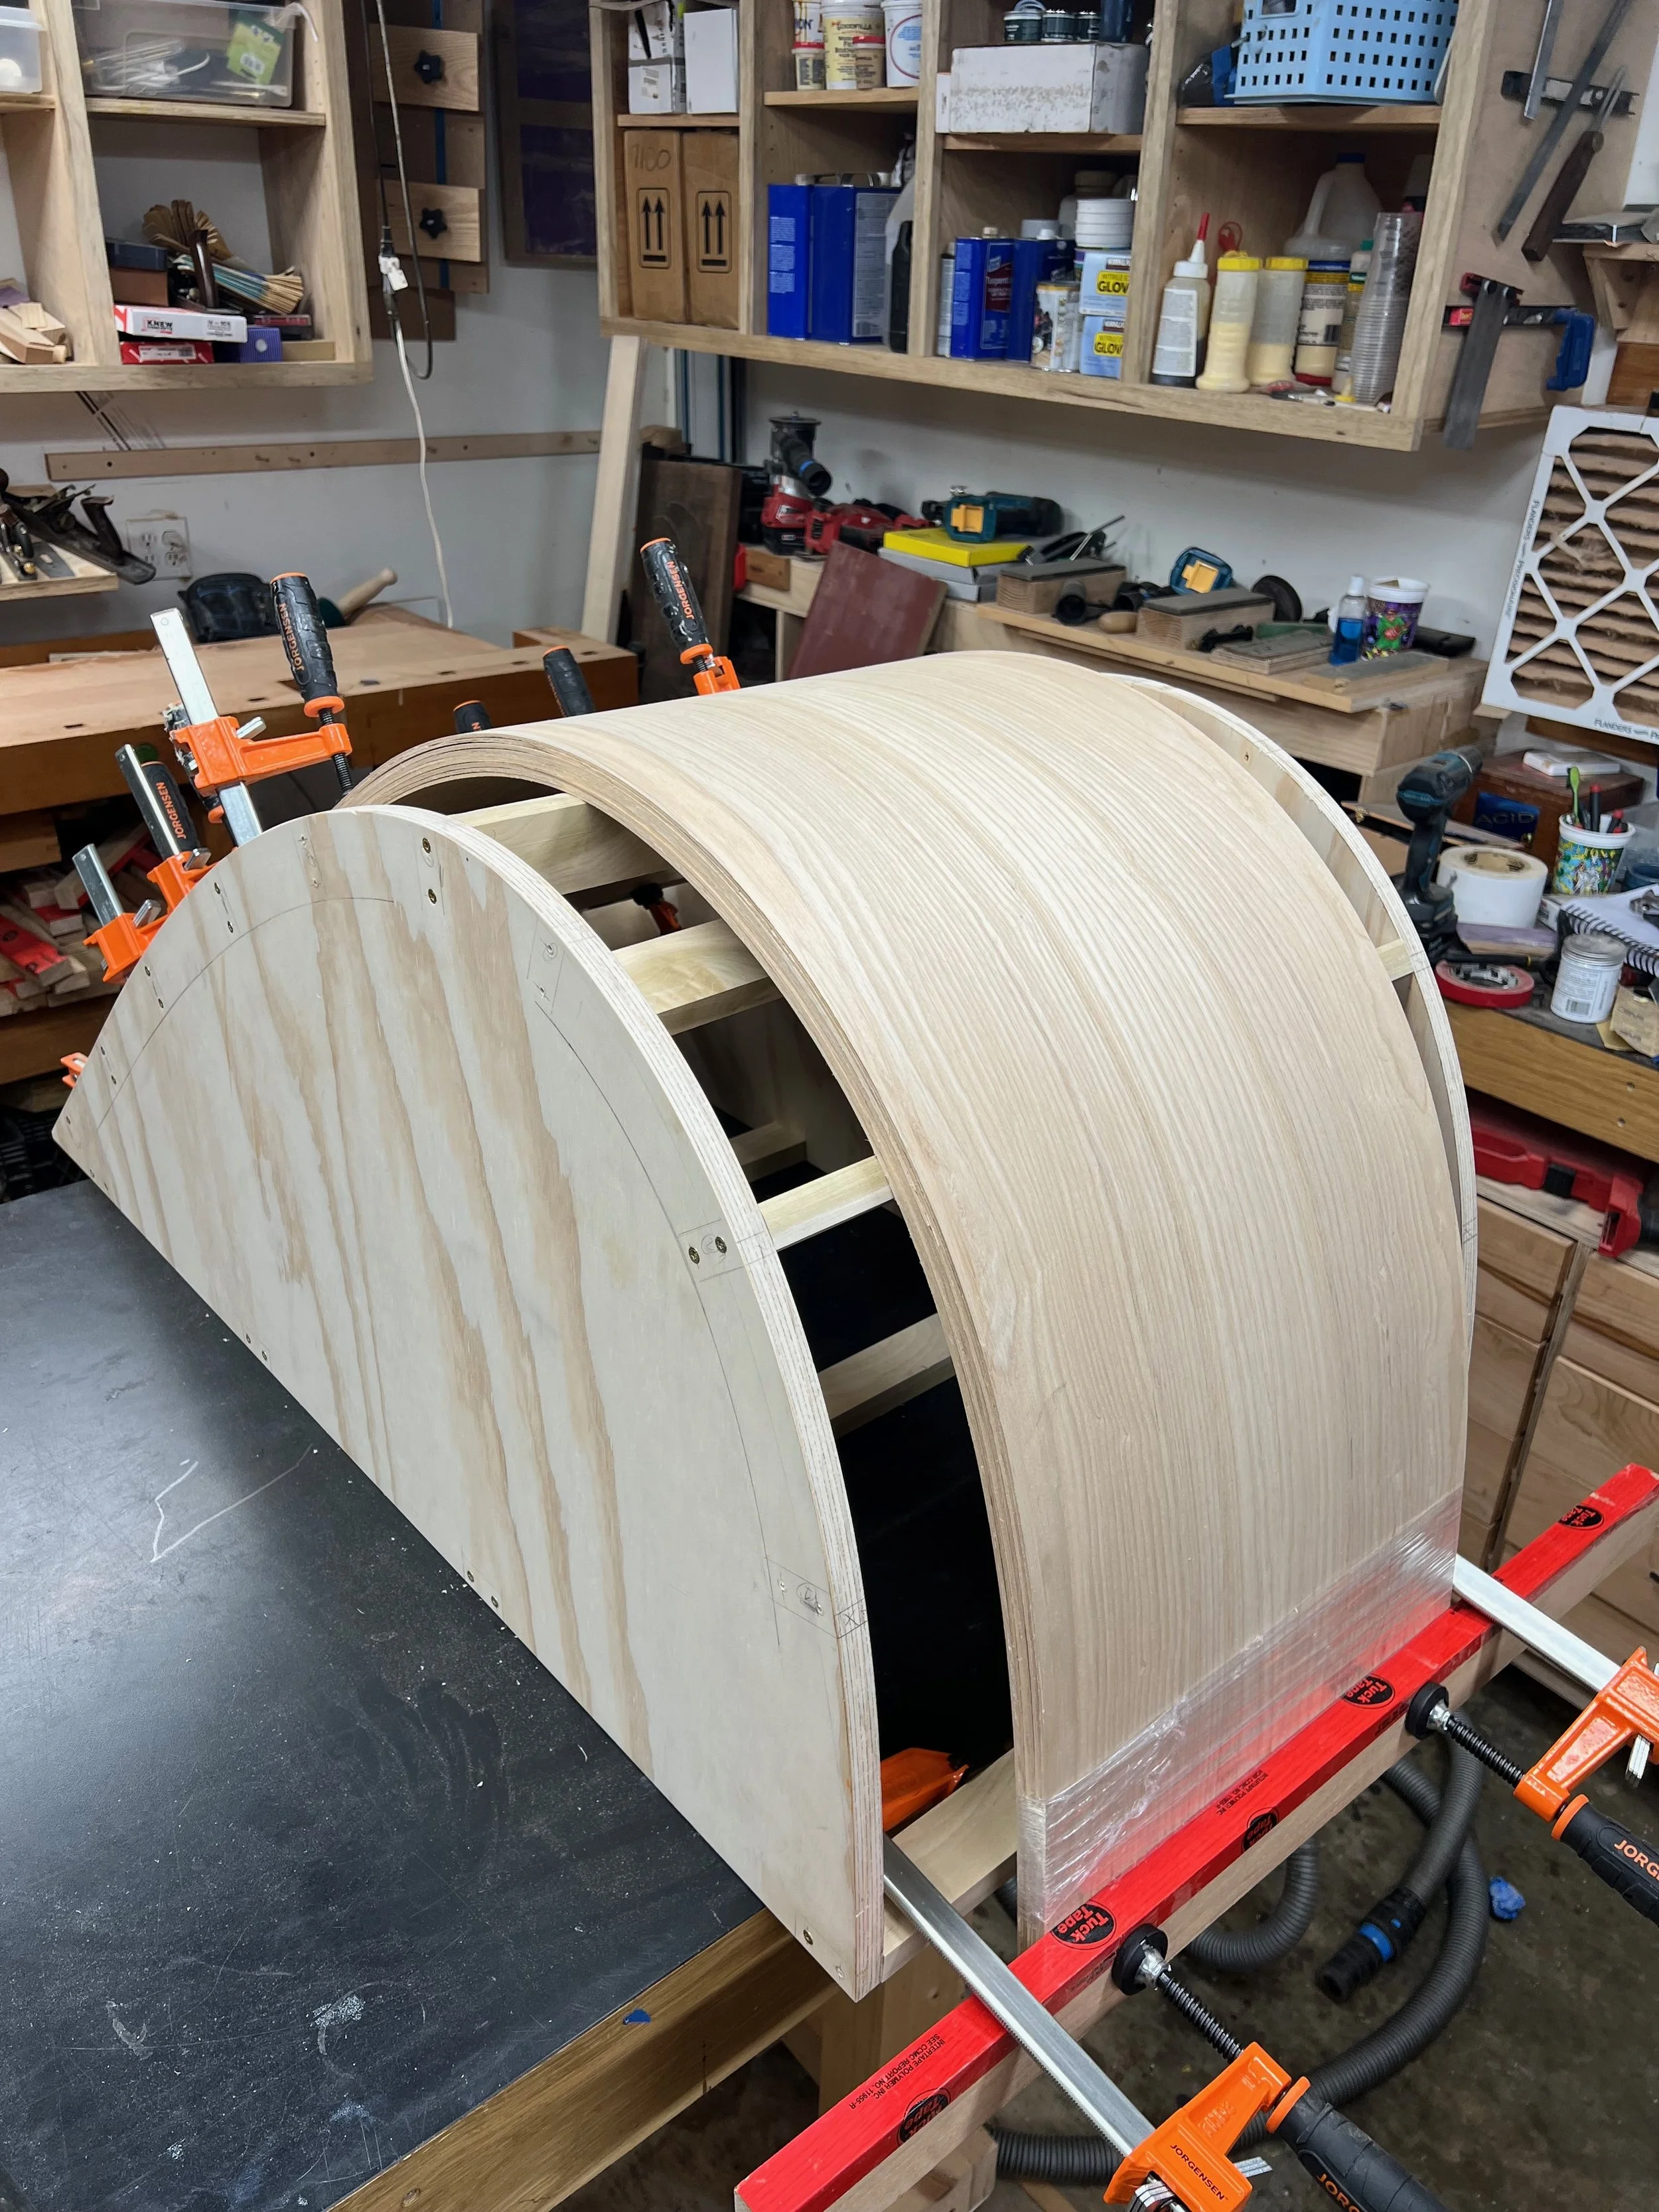
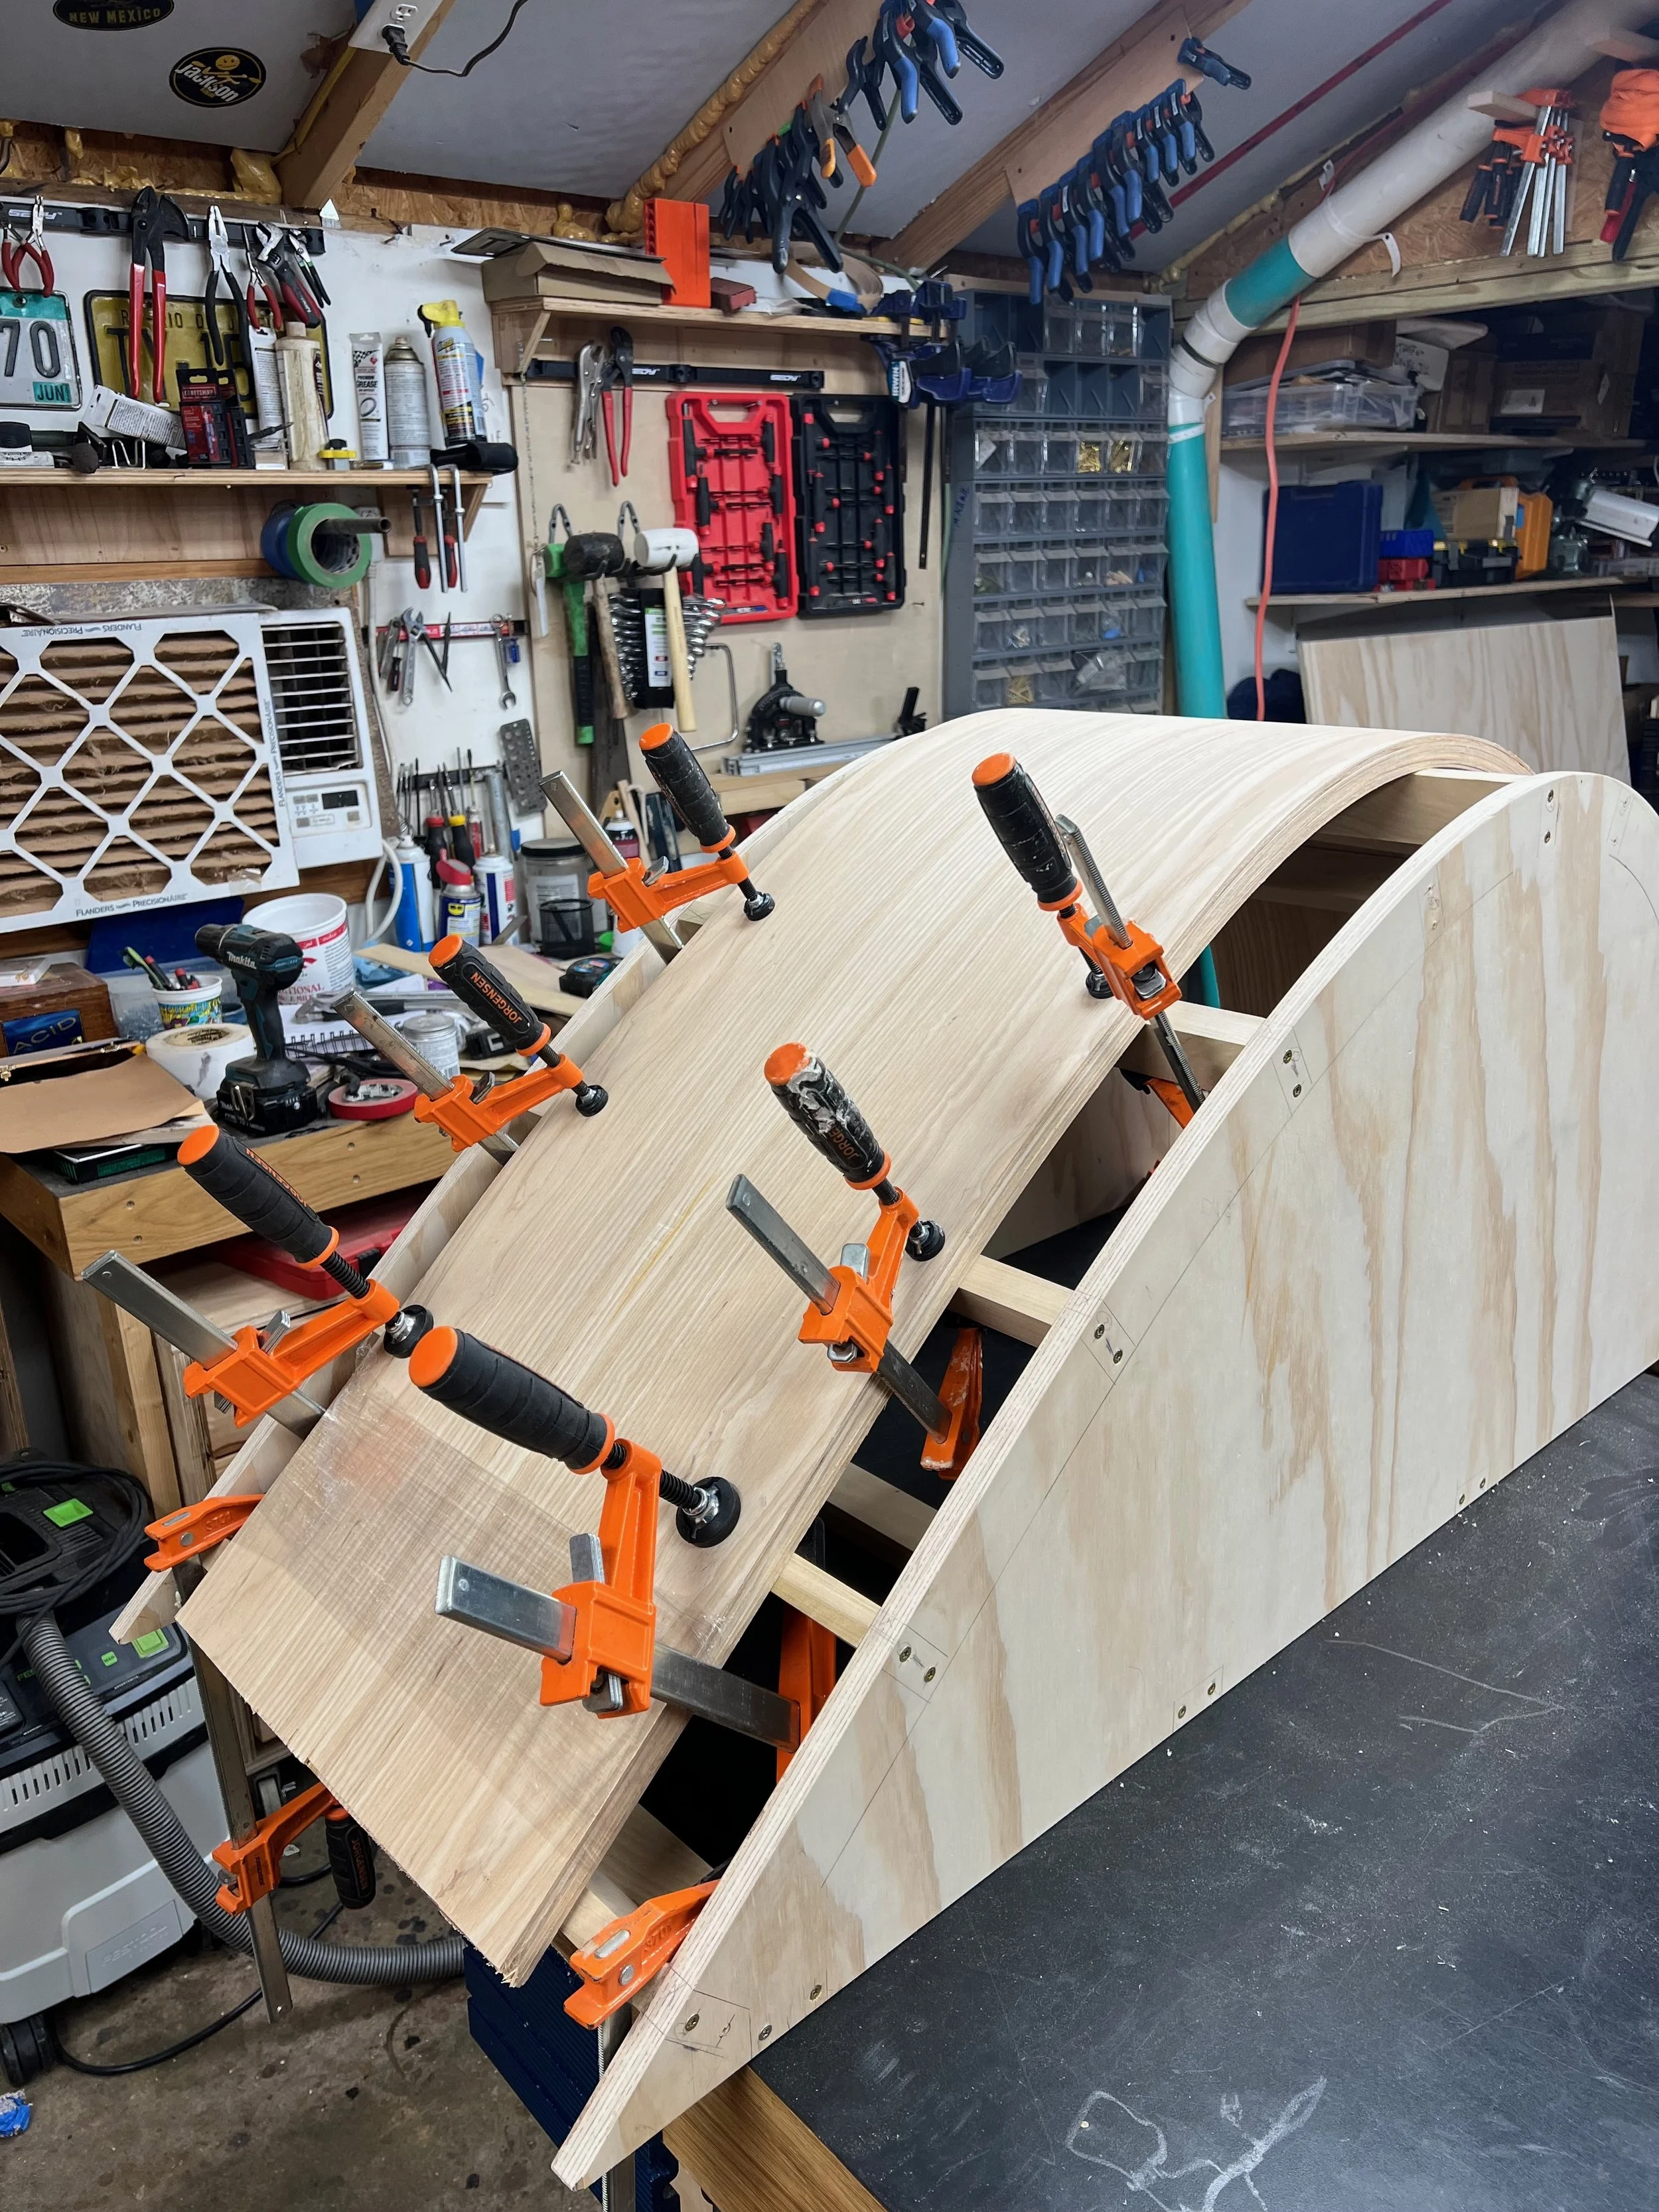

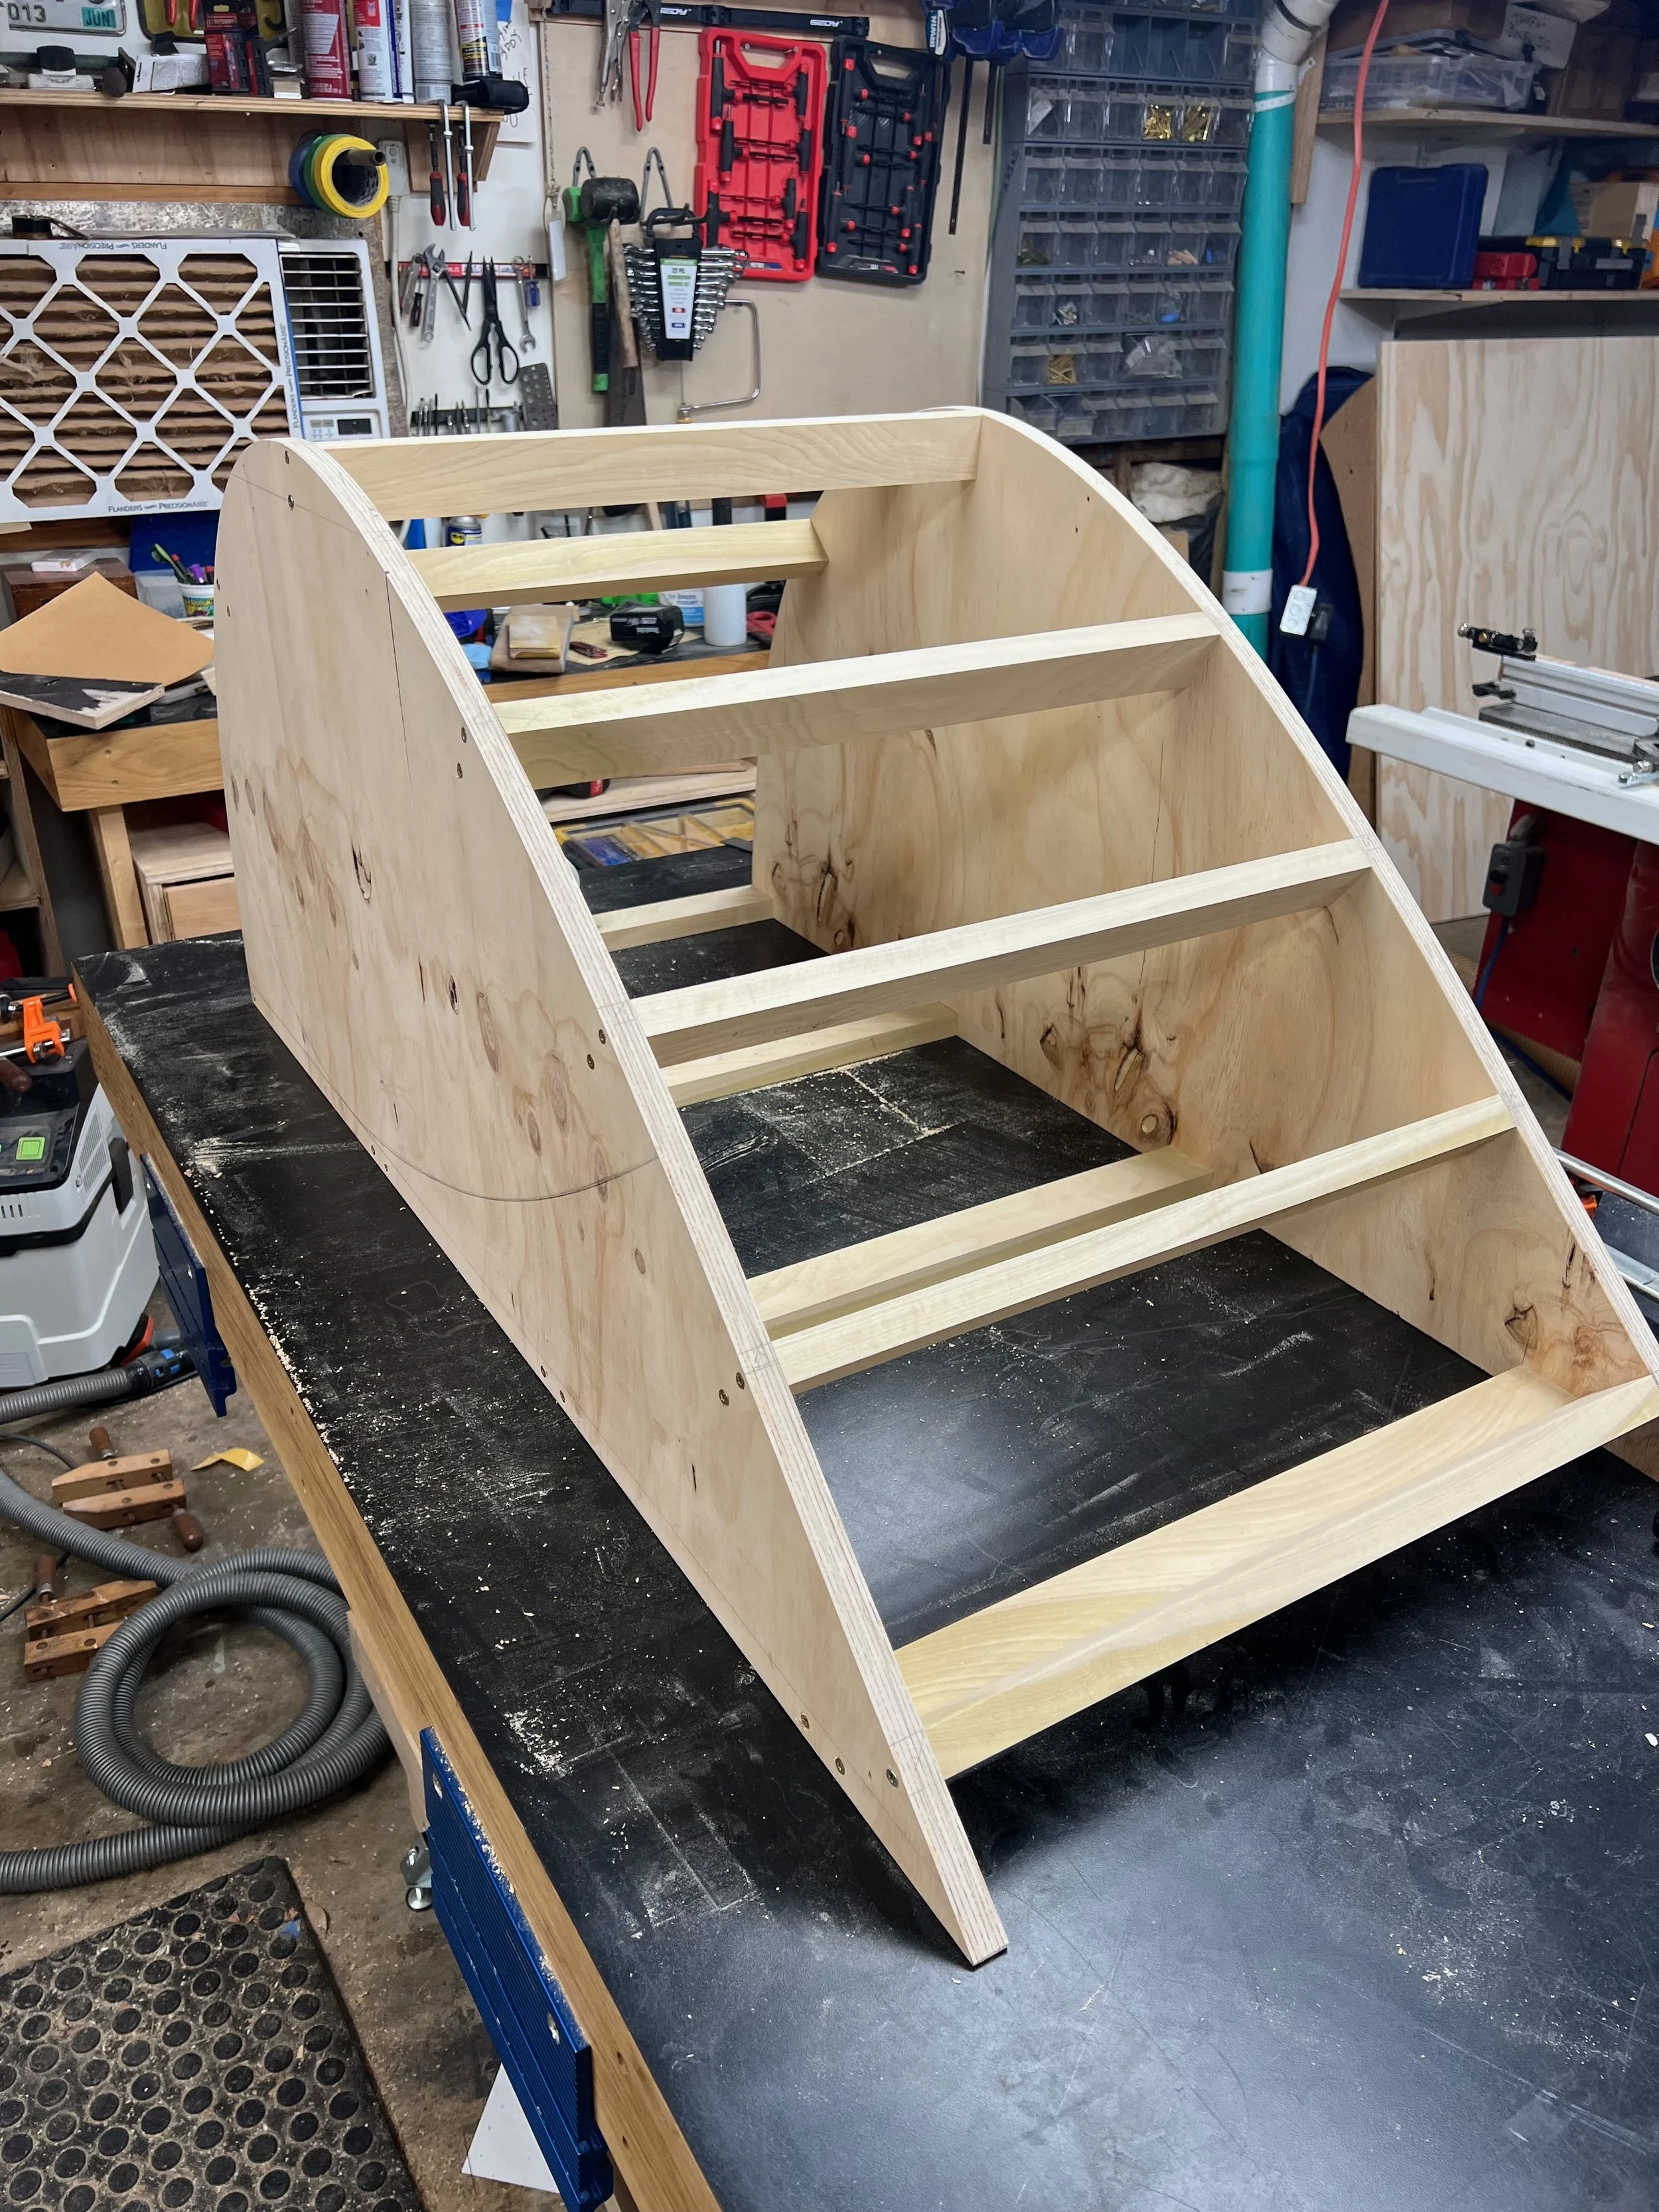
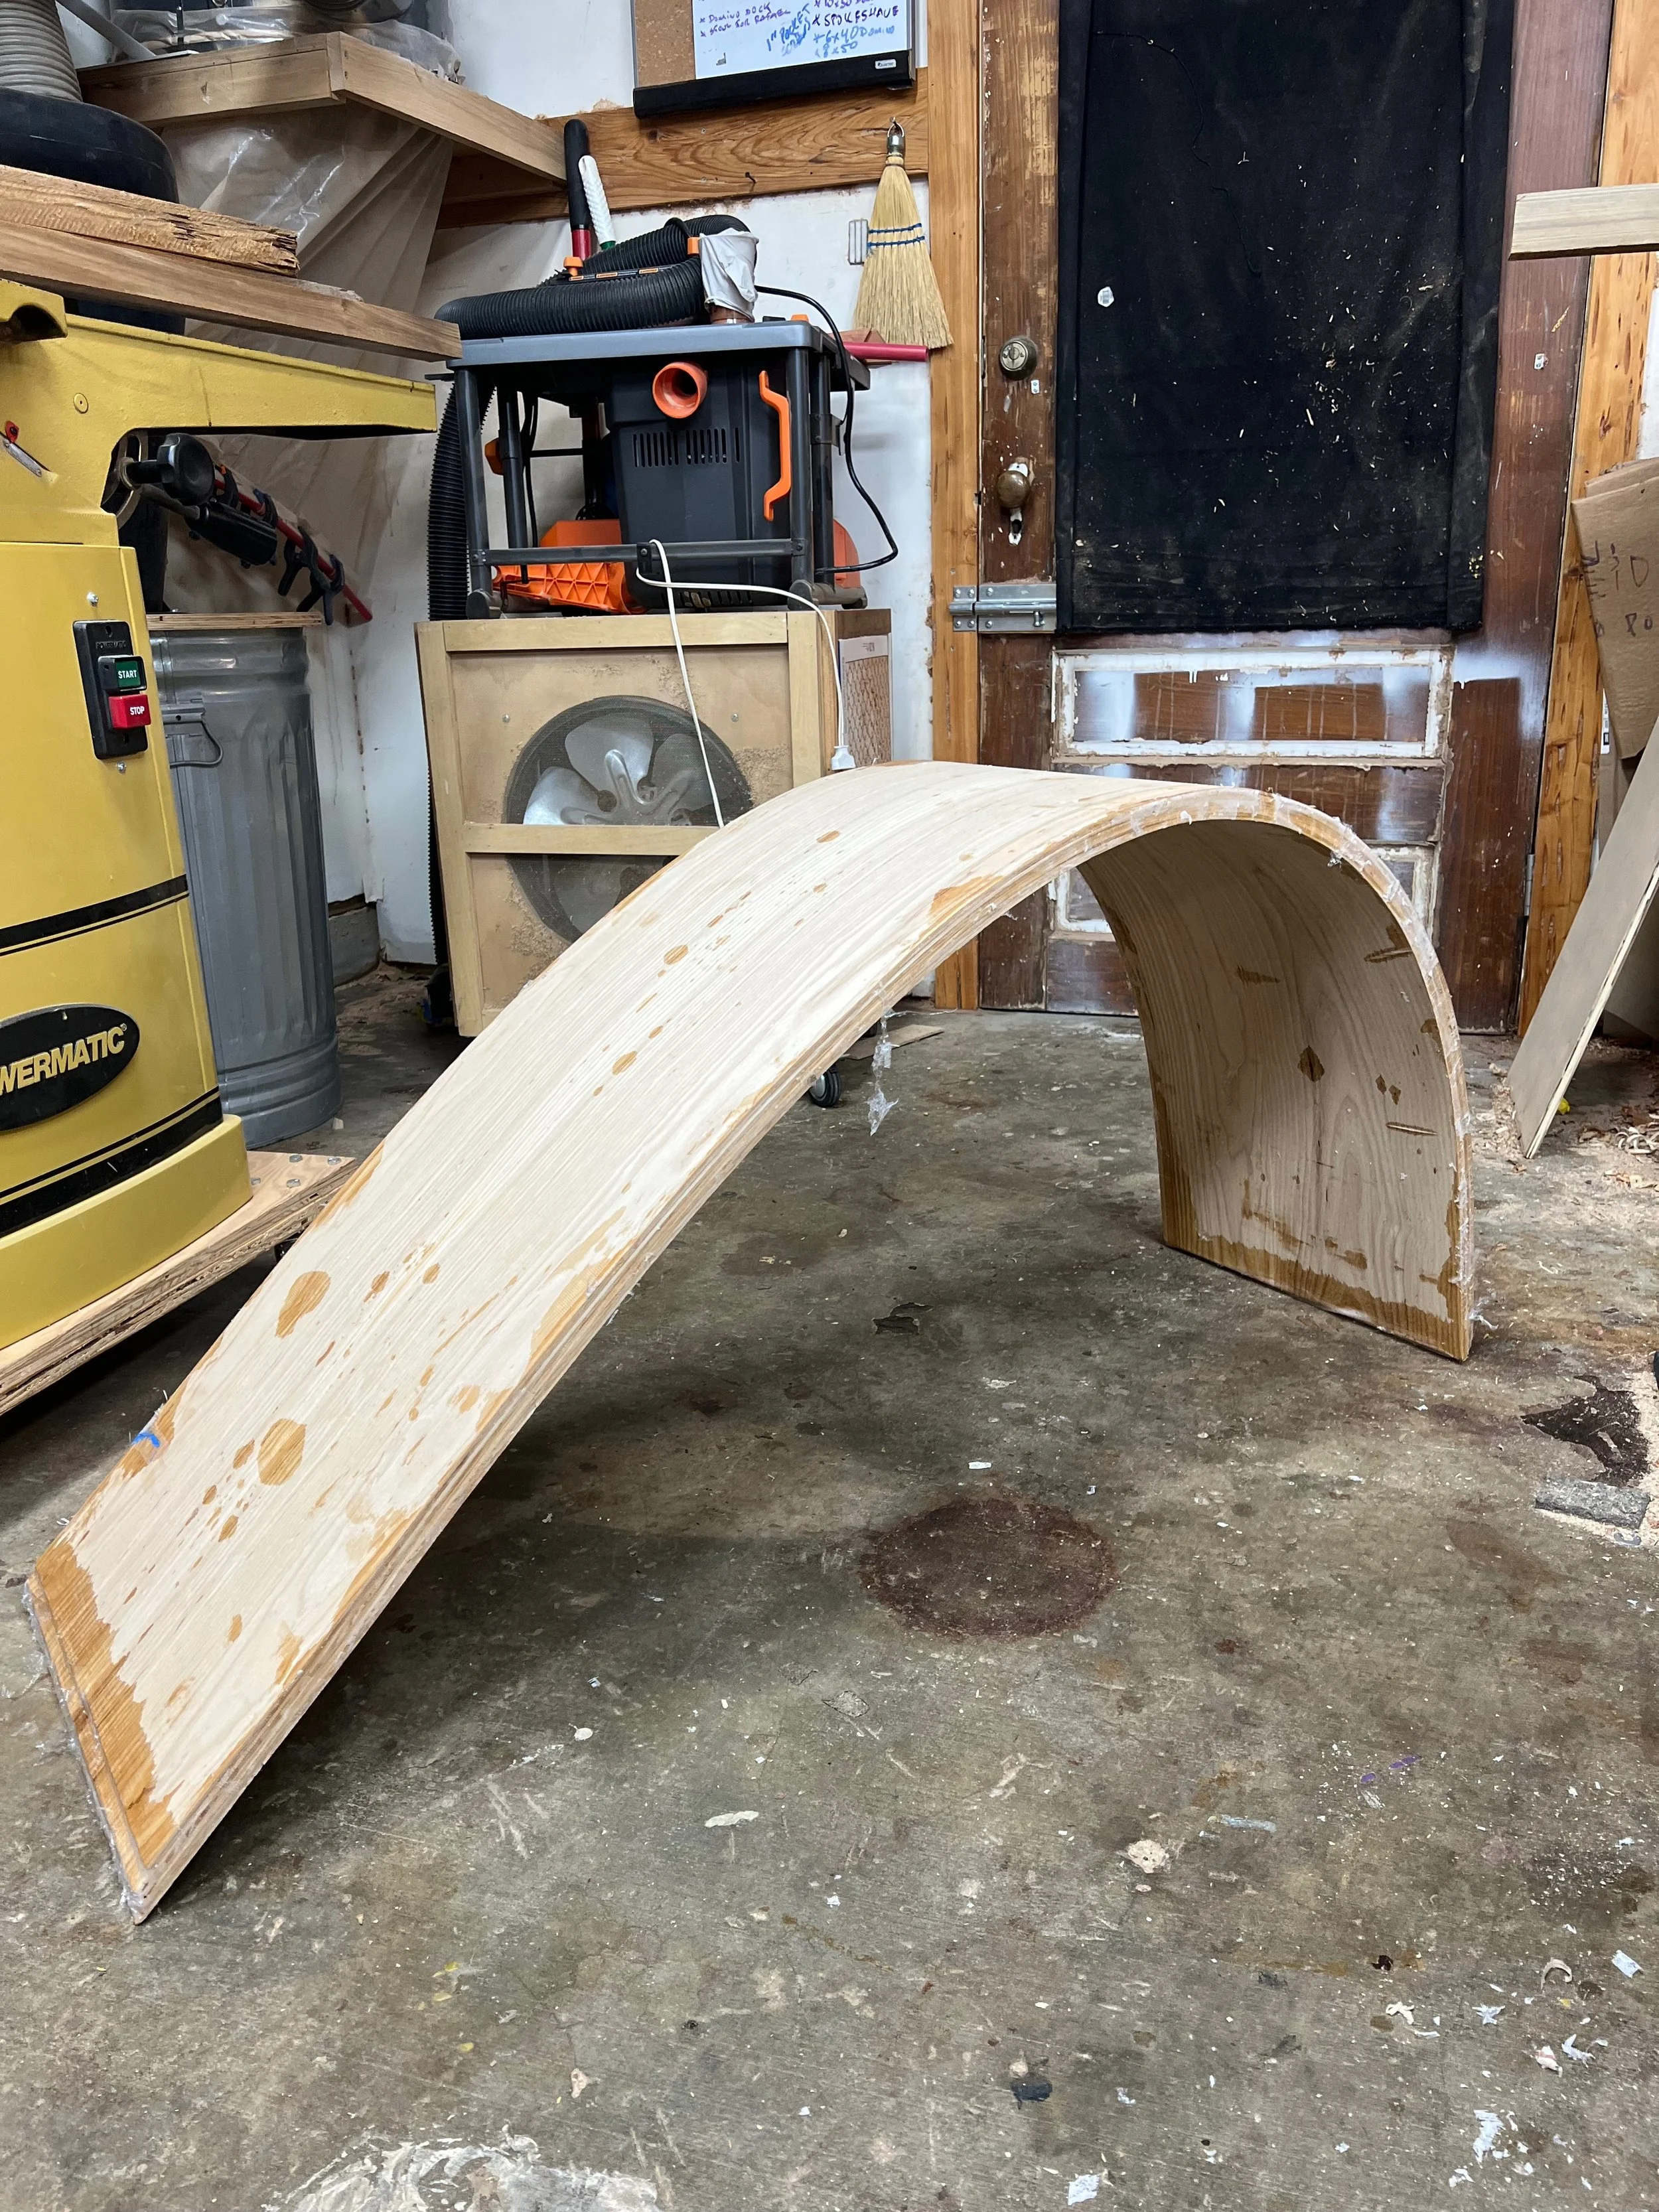
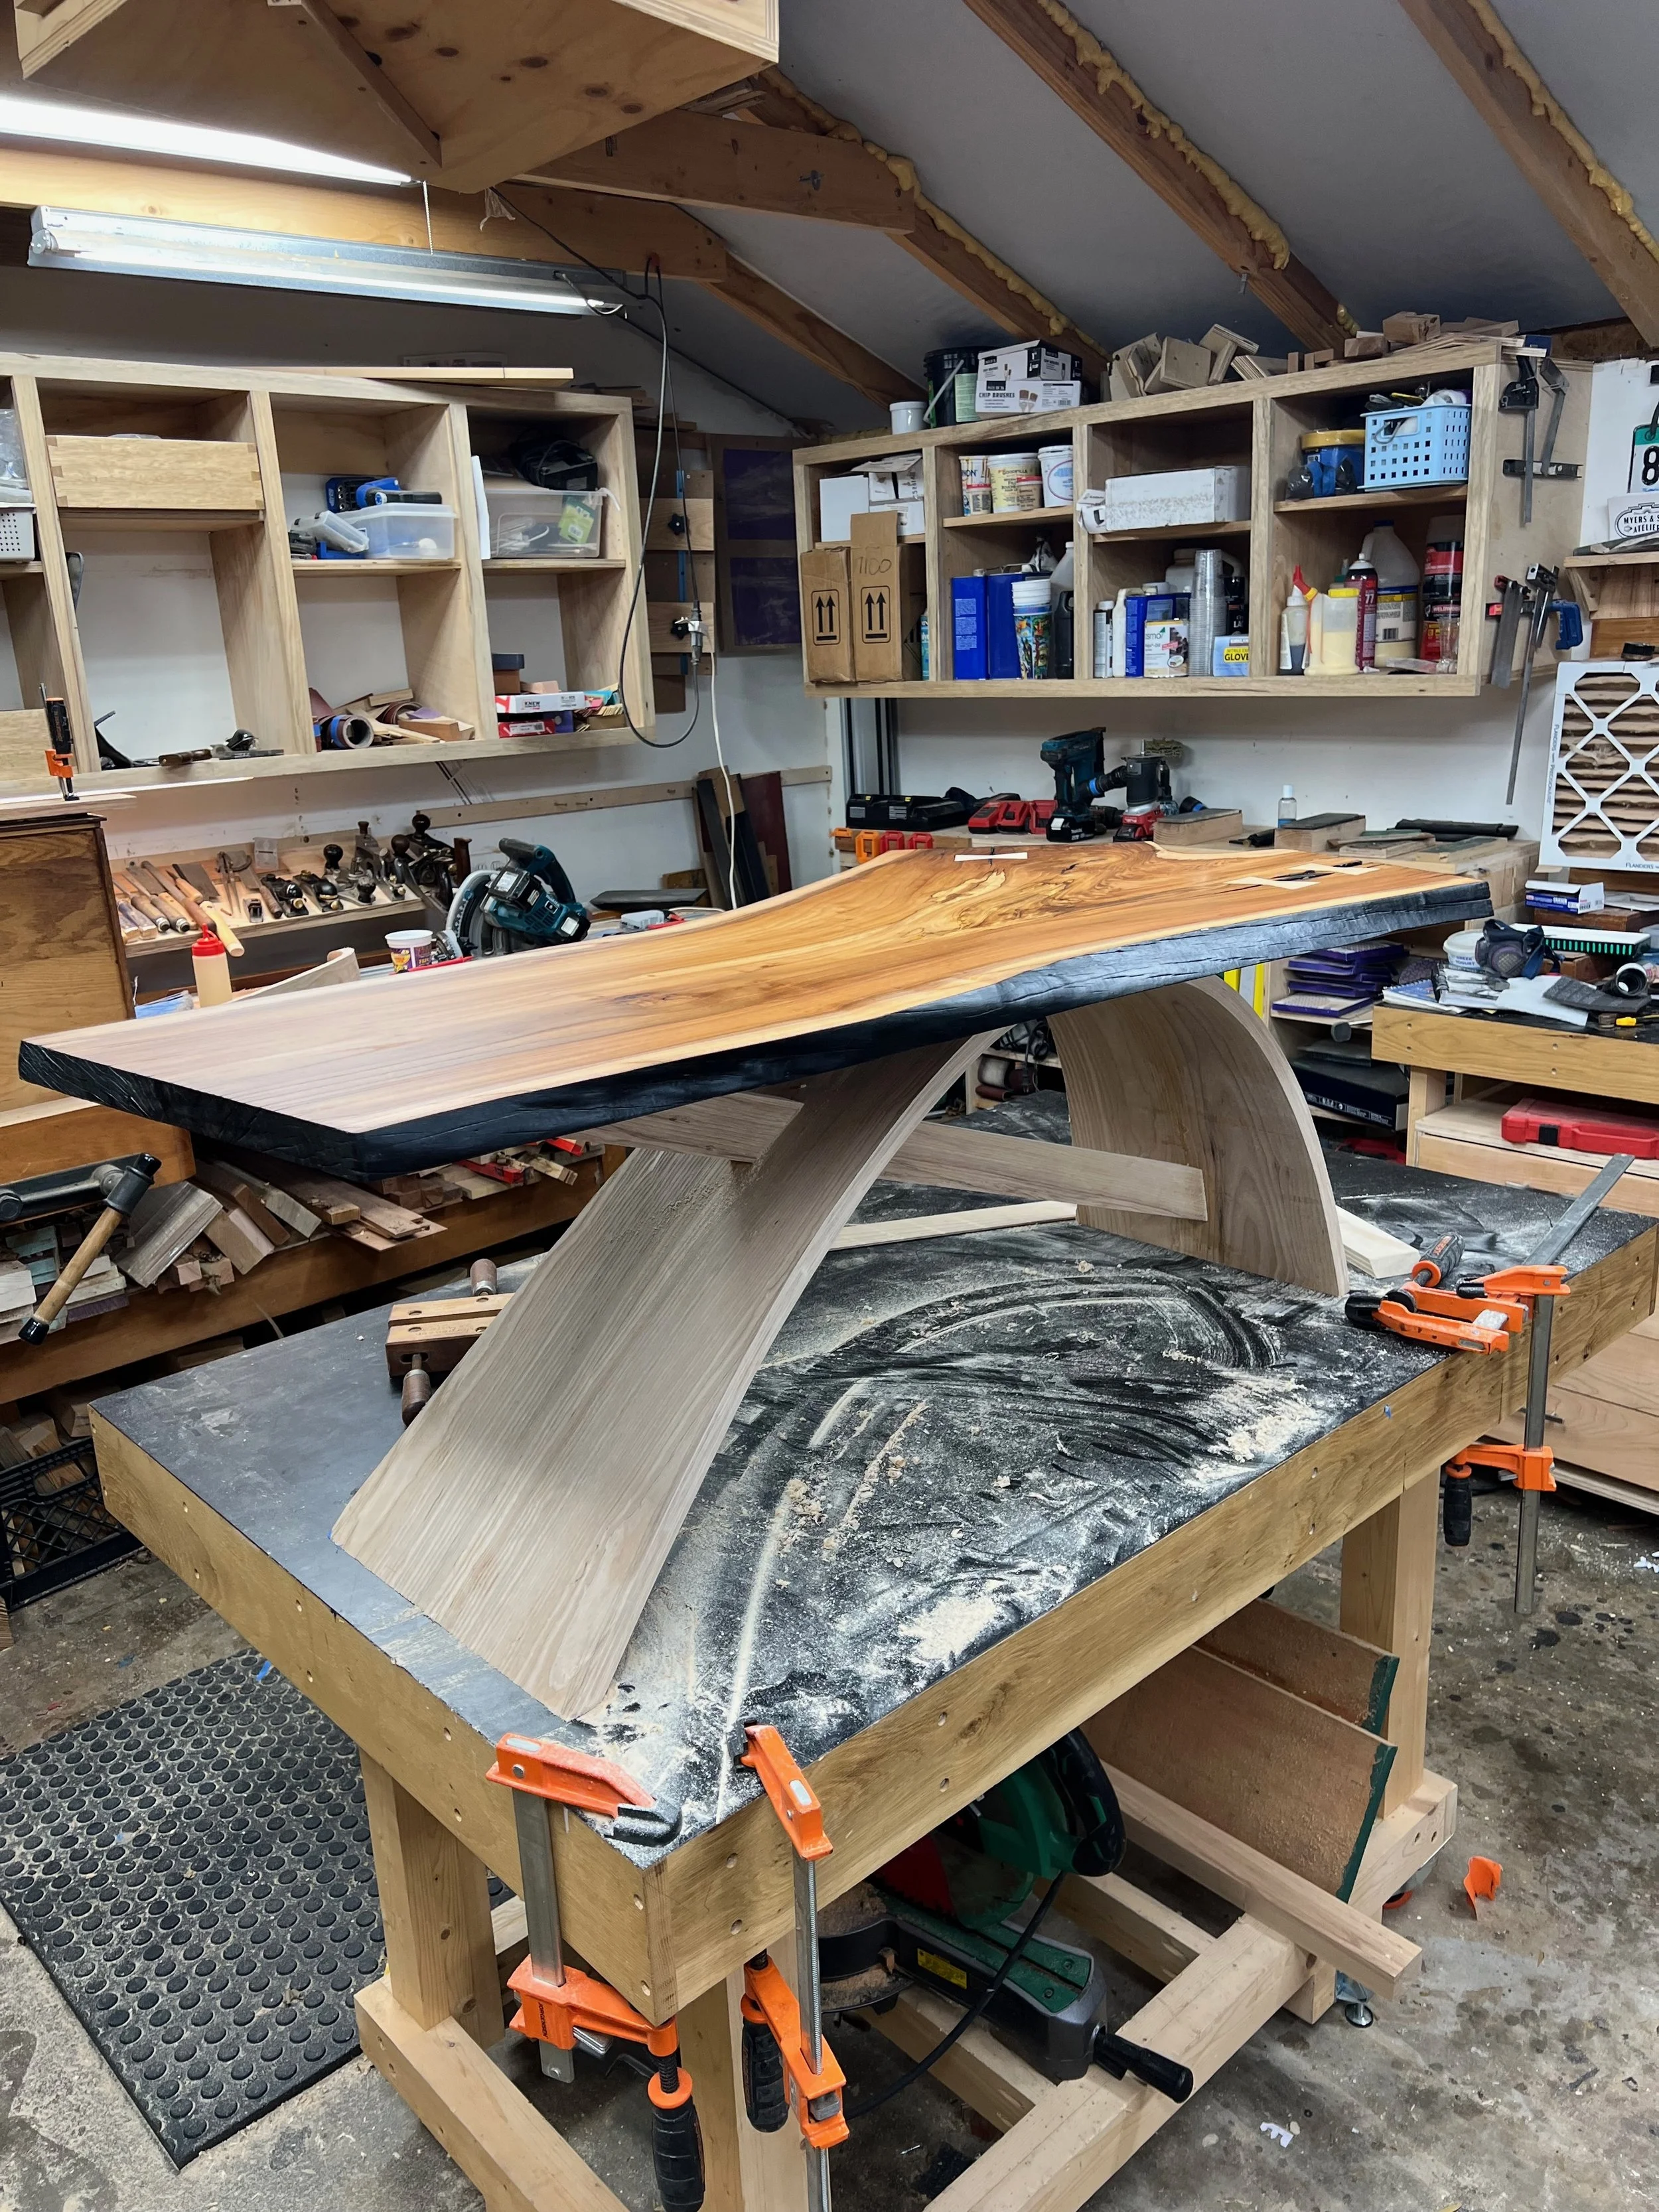
I was anxious to pull the assembly out of the bag, which is where I hit the first snag. Despite having wrapped the whole thing in plasic wrap, a bit of epoxy had leaked out and fouled up the bag and the mesh screen. On top of that, the newly rigid curve made it hard to wiggle the whole thing out of the bag. Suffice to say, it was a struggle, but it got done. The glue up was overall a success, with some imperfections in thickness in a few places. The next time I use this form, I’ll make a few changes - eliminate the blue tape holding the pack together, make the laminates thinner so there is more flexibility, apply less epoxy, and wrap the plastic wrap more thoroughly. In any case, it just resulted in way more sanding than I wanted, which we all know is the universe’s way of punishing woodworkers for mistakes. I did a mix of hand and power sanding , using flexible sanding strips and my orbital sander with a soft foam pad. Once that was all sorted out, I could move on to finalizing the fulcrum point, and the overall length/height of the base, cutting the bottoms to the angle necessary to sit flush on the floor. To accomplish that, I flipped the whole thing upside down, clamped it to the table at the fulcrum point, and clamped on a straight edge at the height I wanted, which allowed me to draw on the correct angles. There would eventually be some fine tuning of height and angles, but this got me extremely close and allowed me to put the top and and start gauging how I liked the look. At this point, I also jointed one edge, and ripped the other one parallel on the table saw.
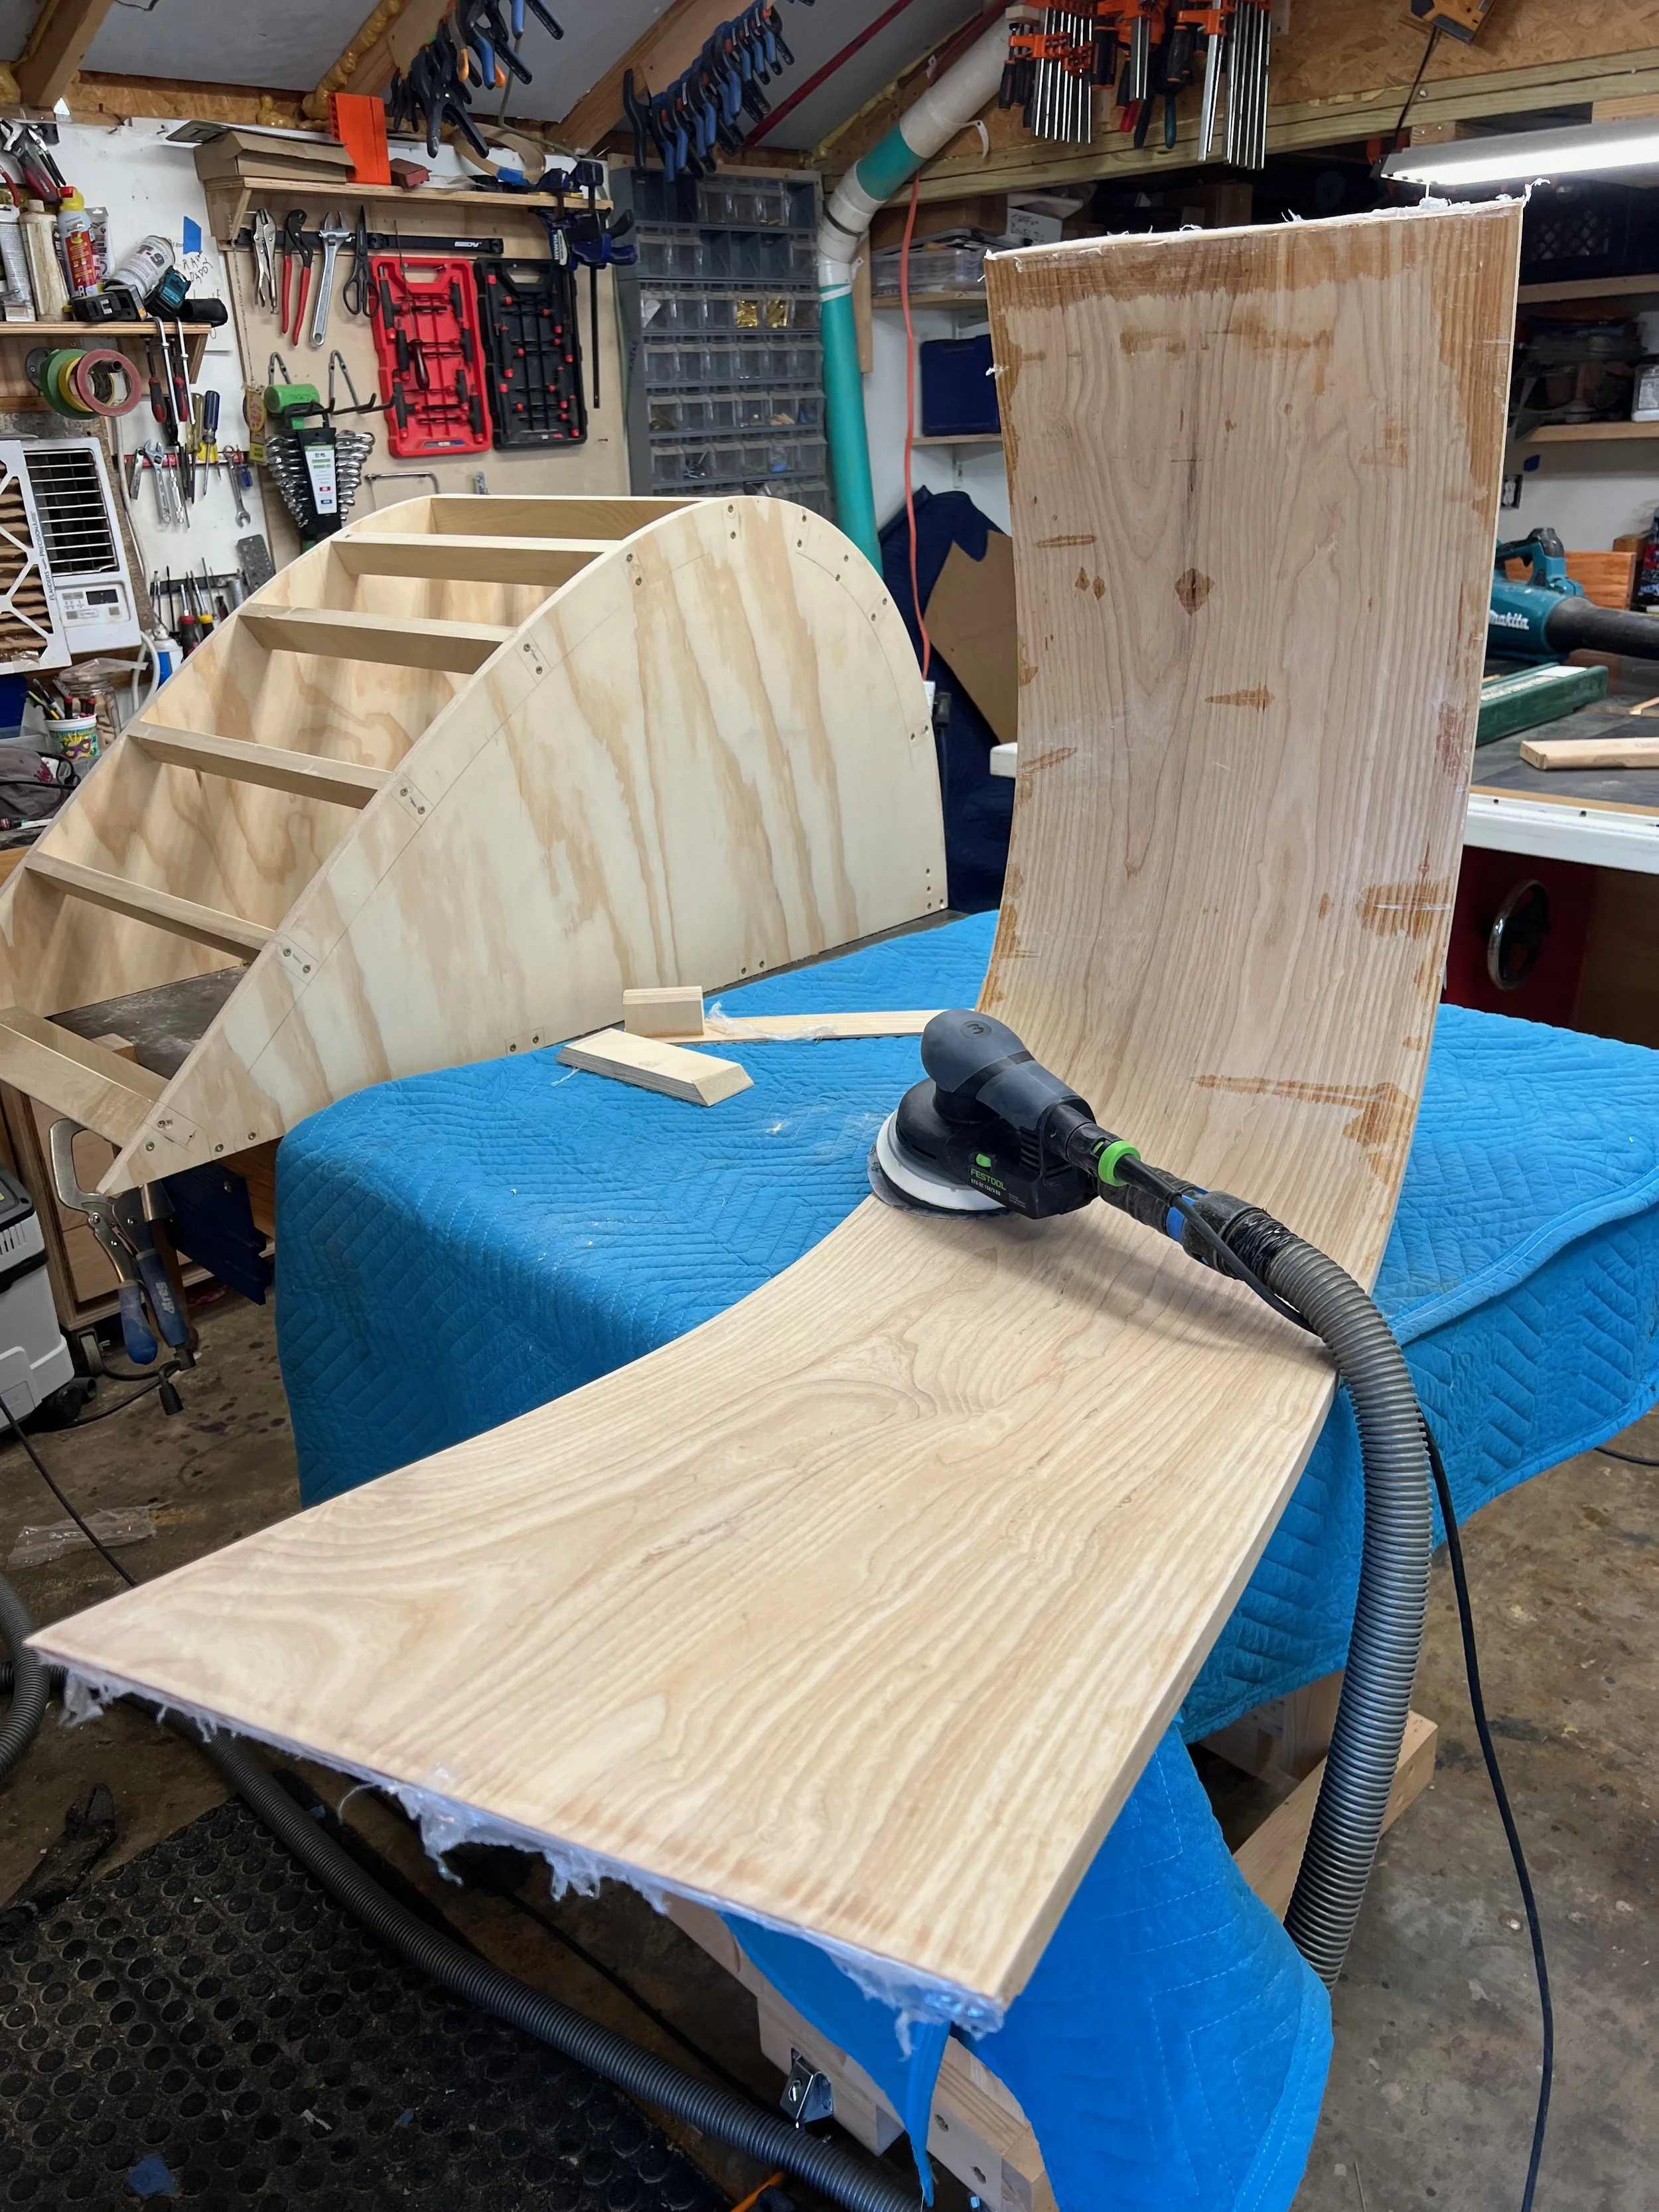
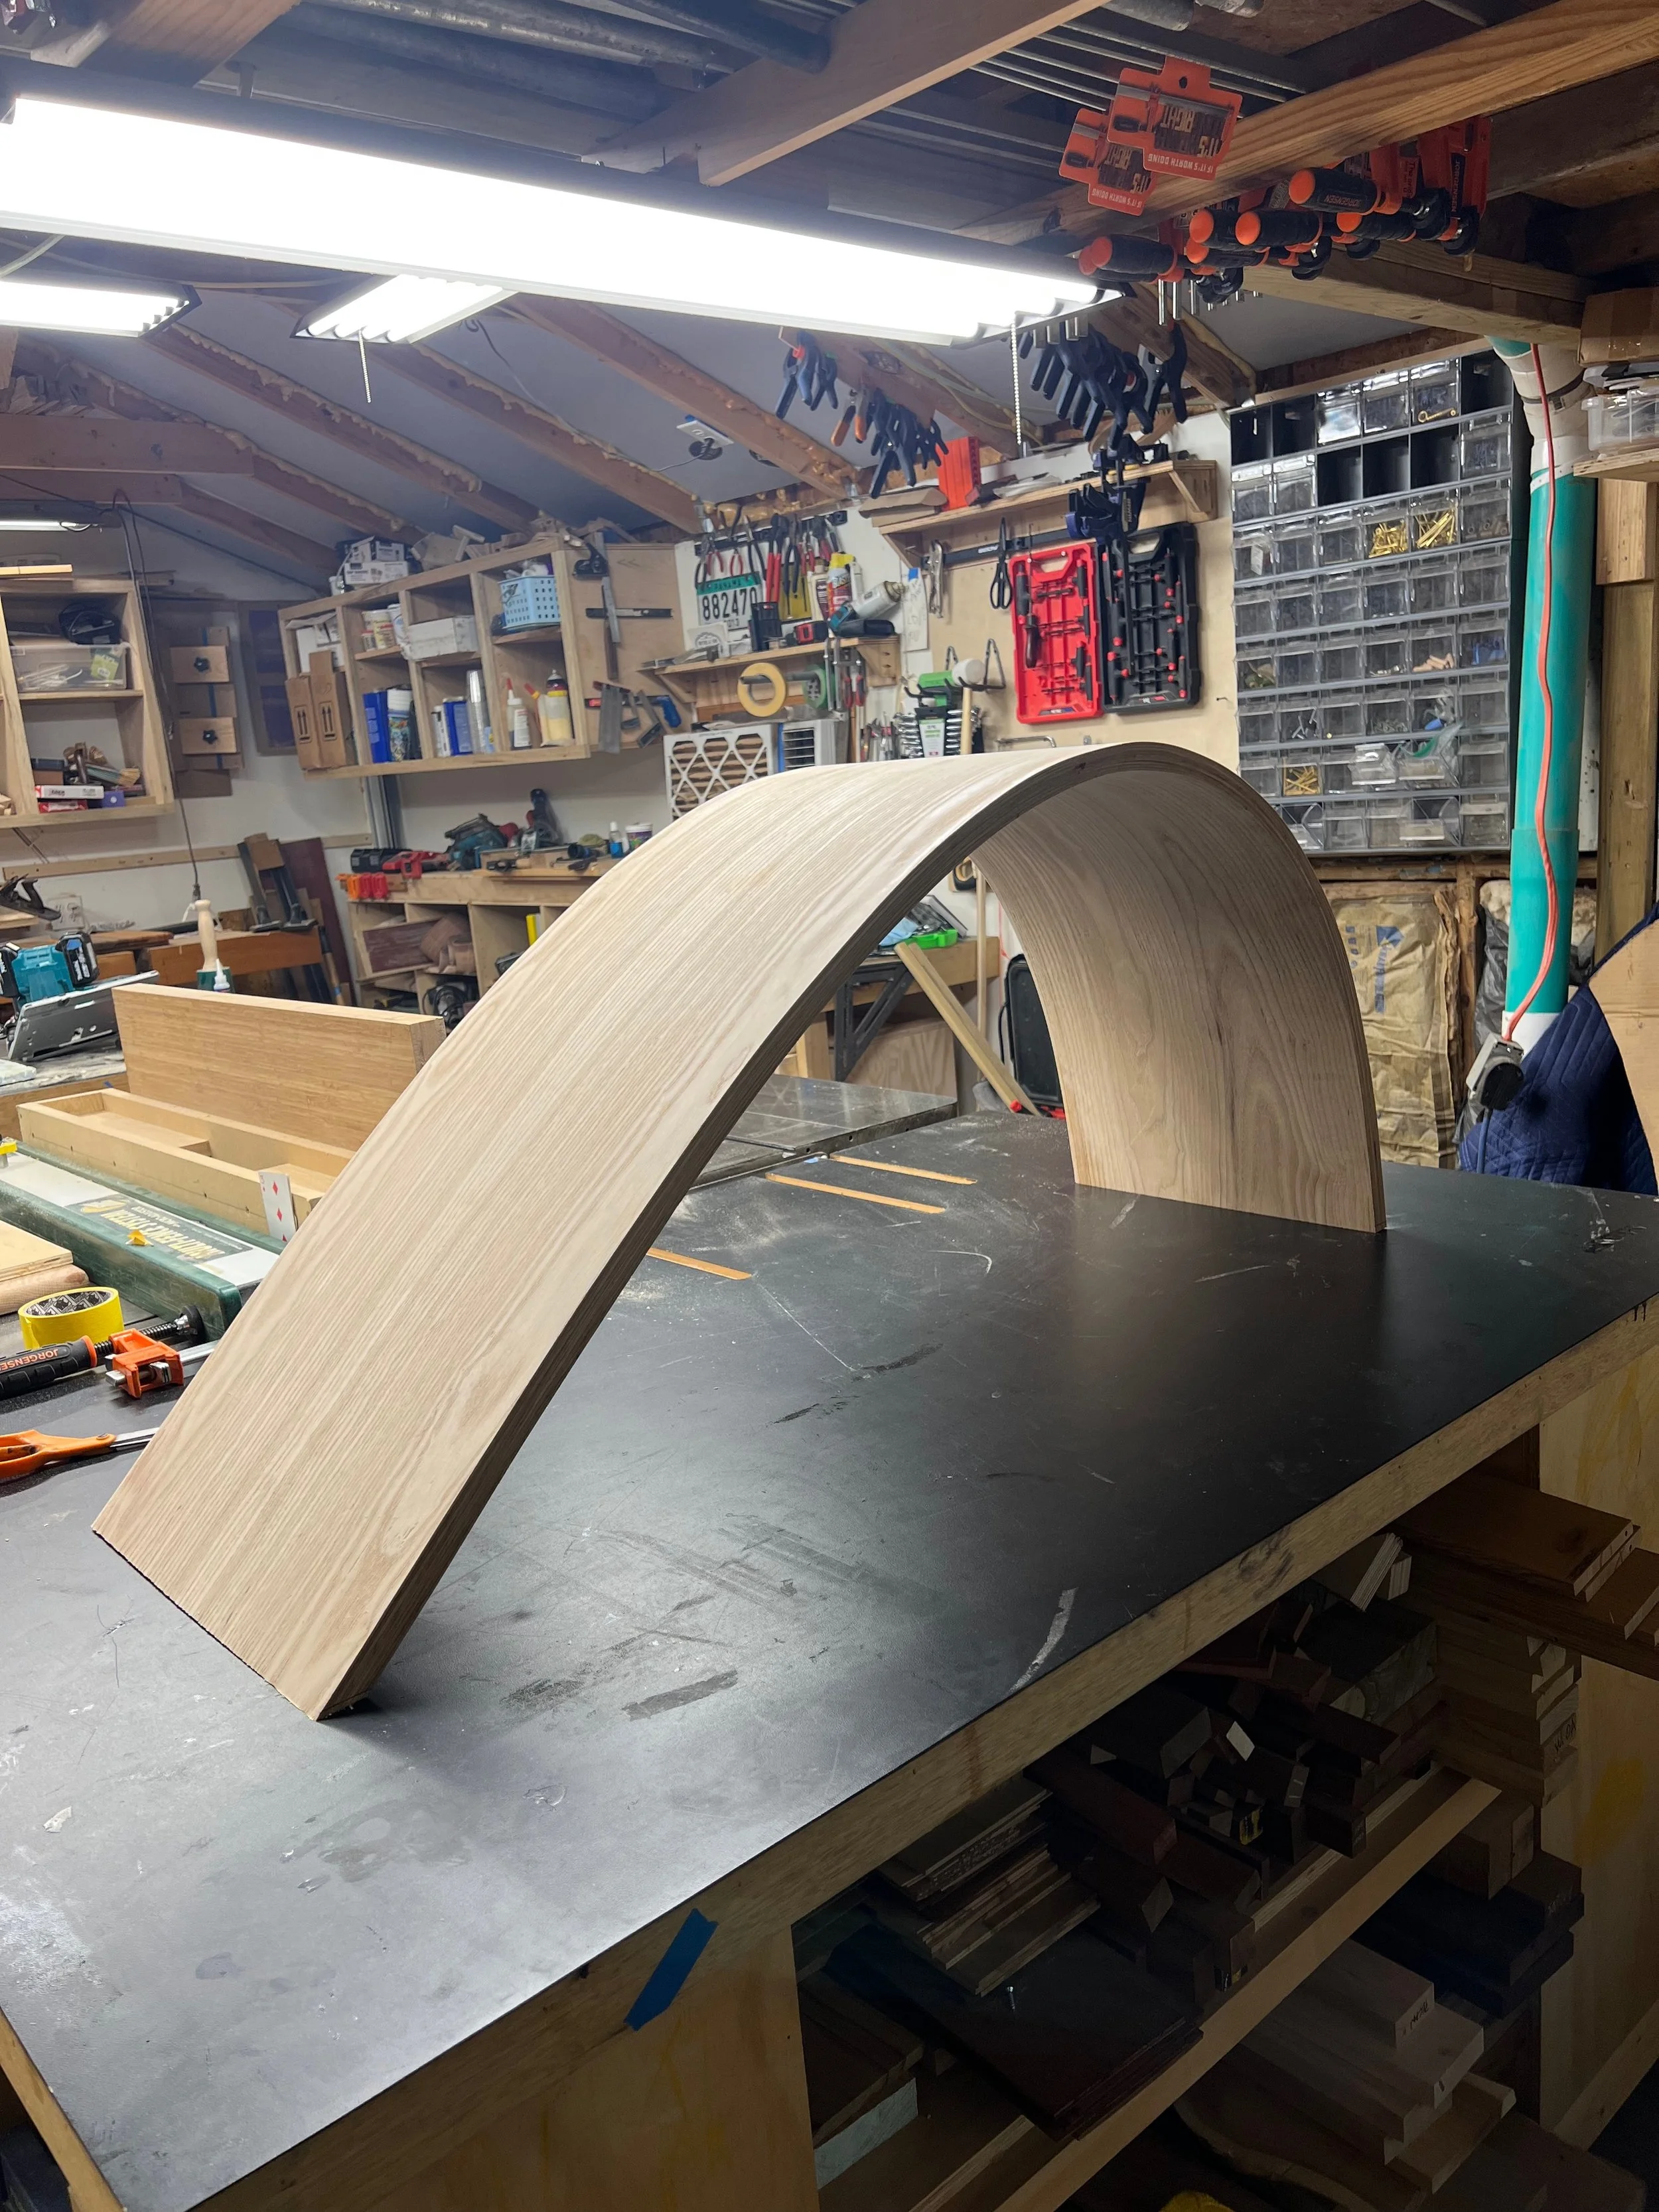
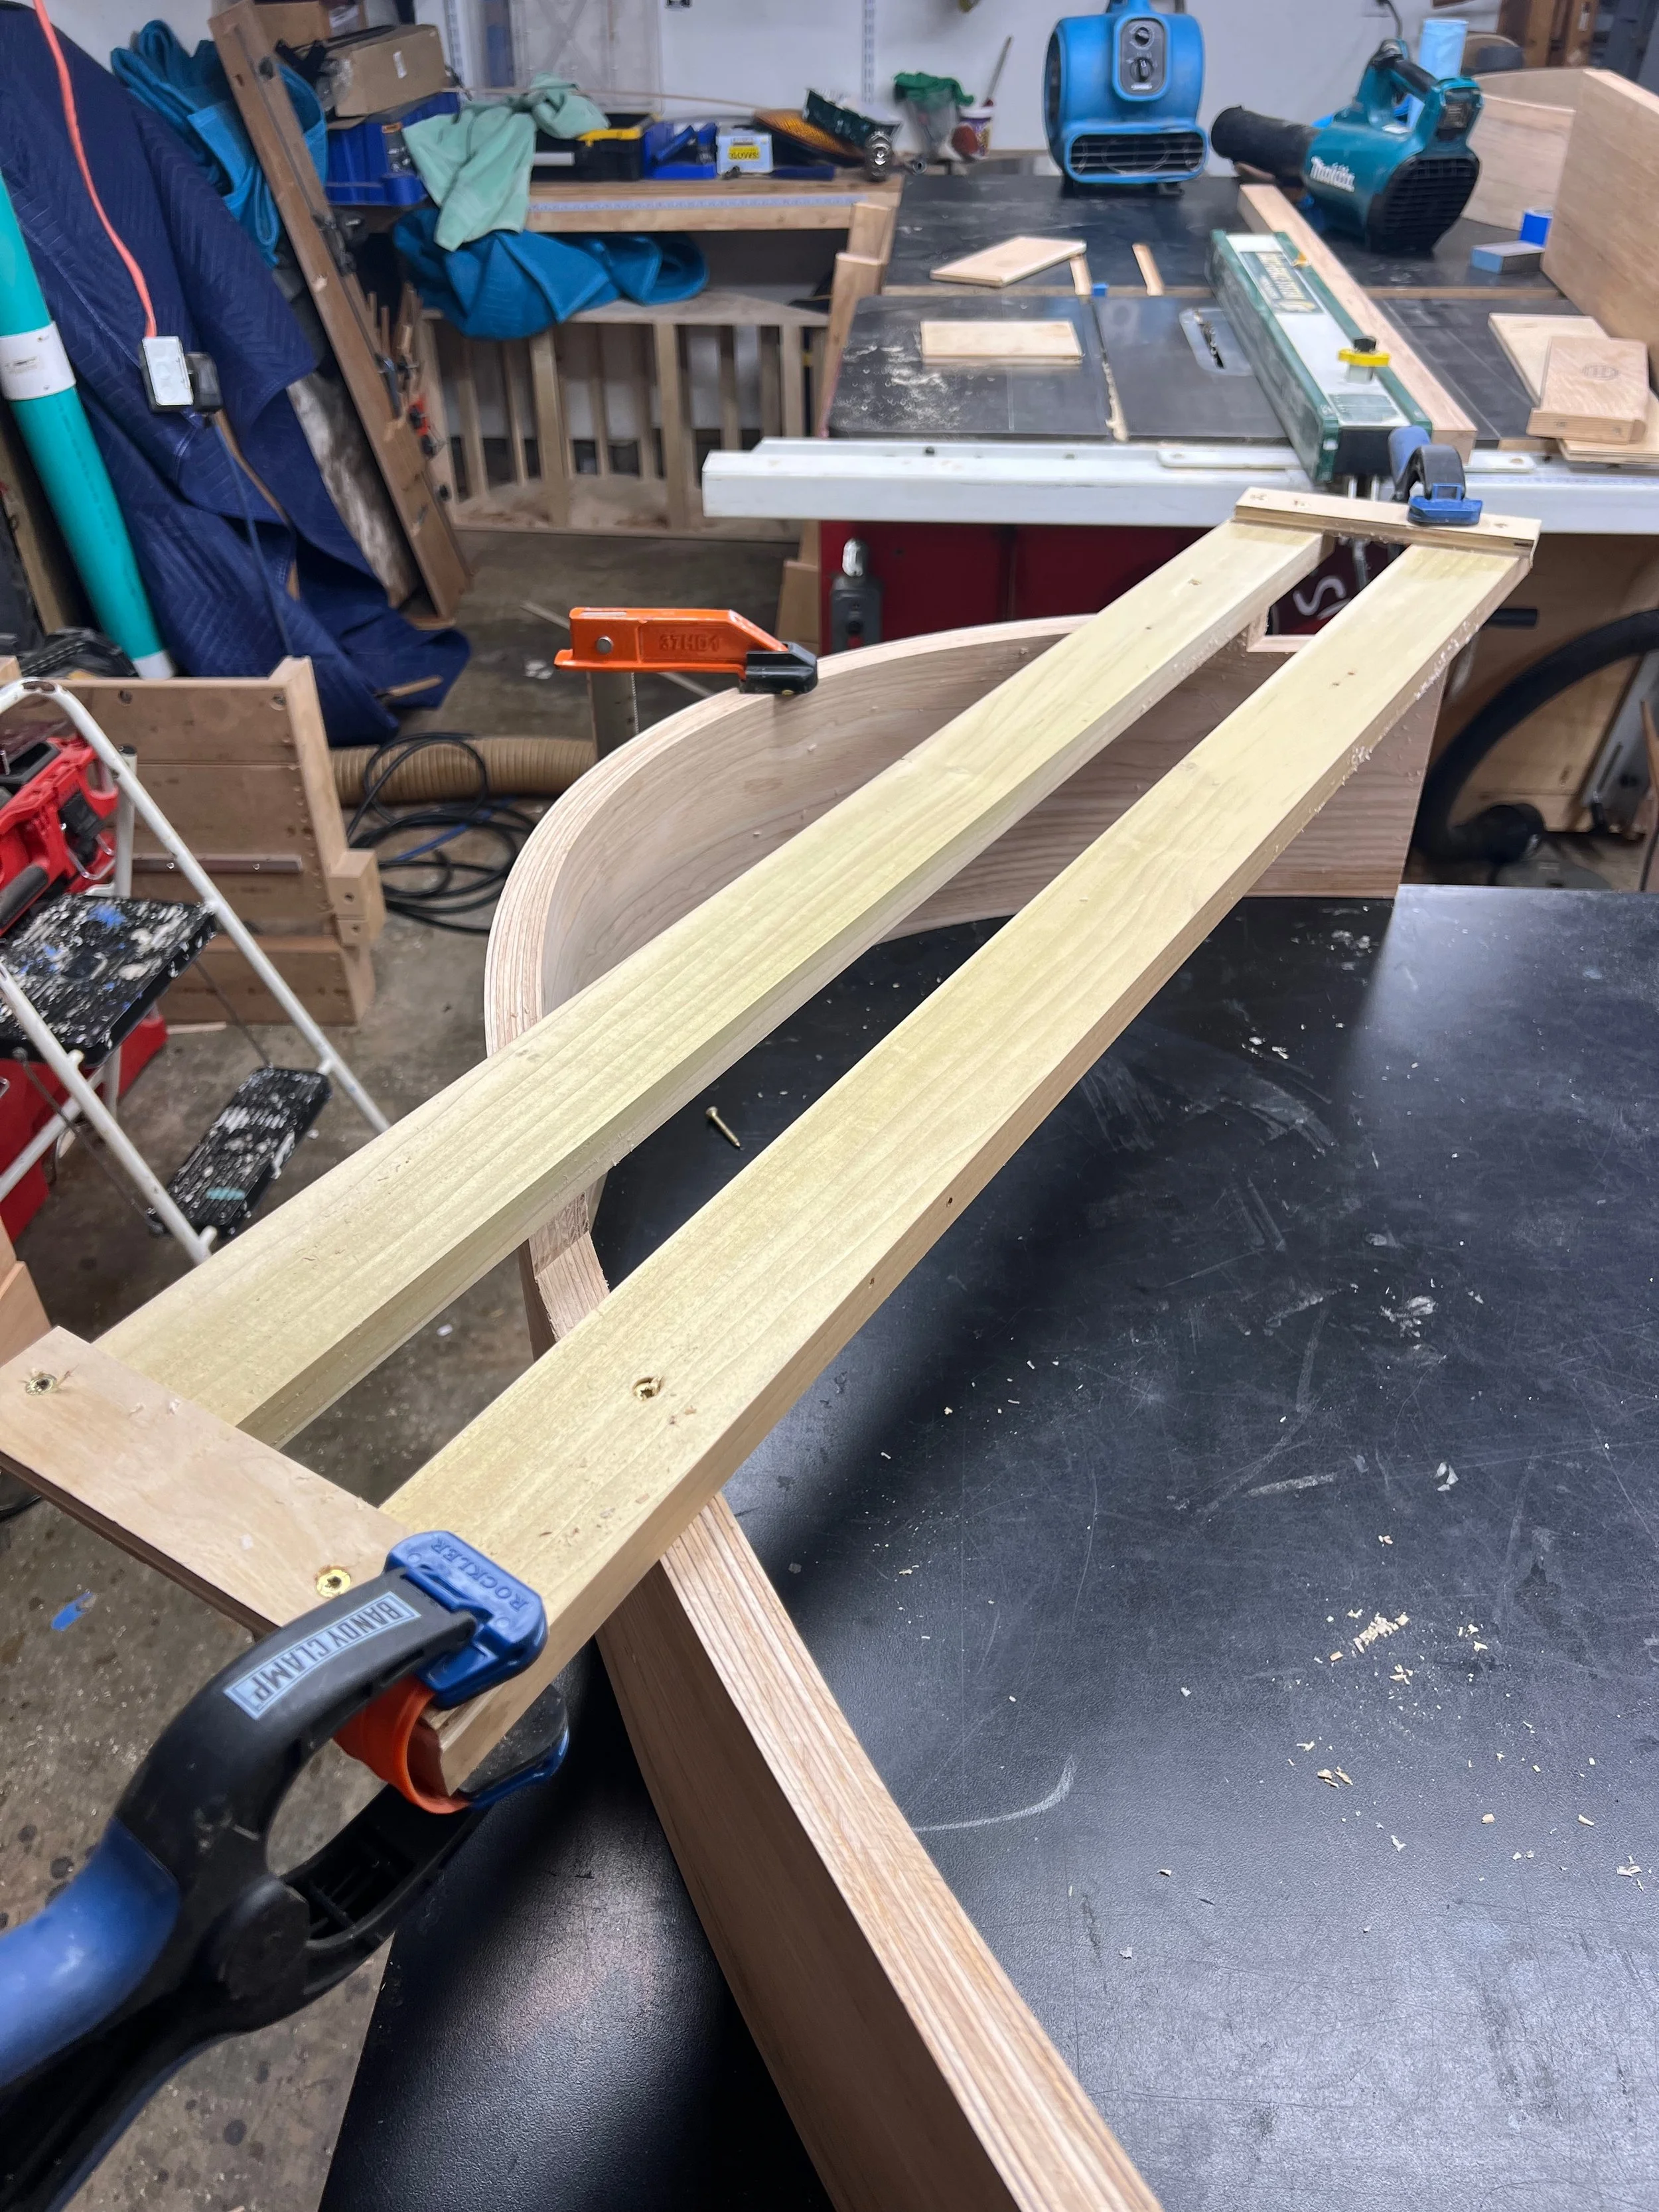
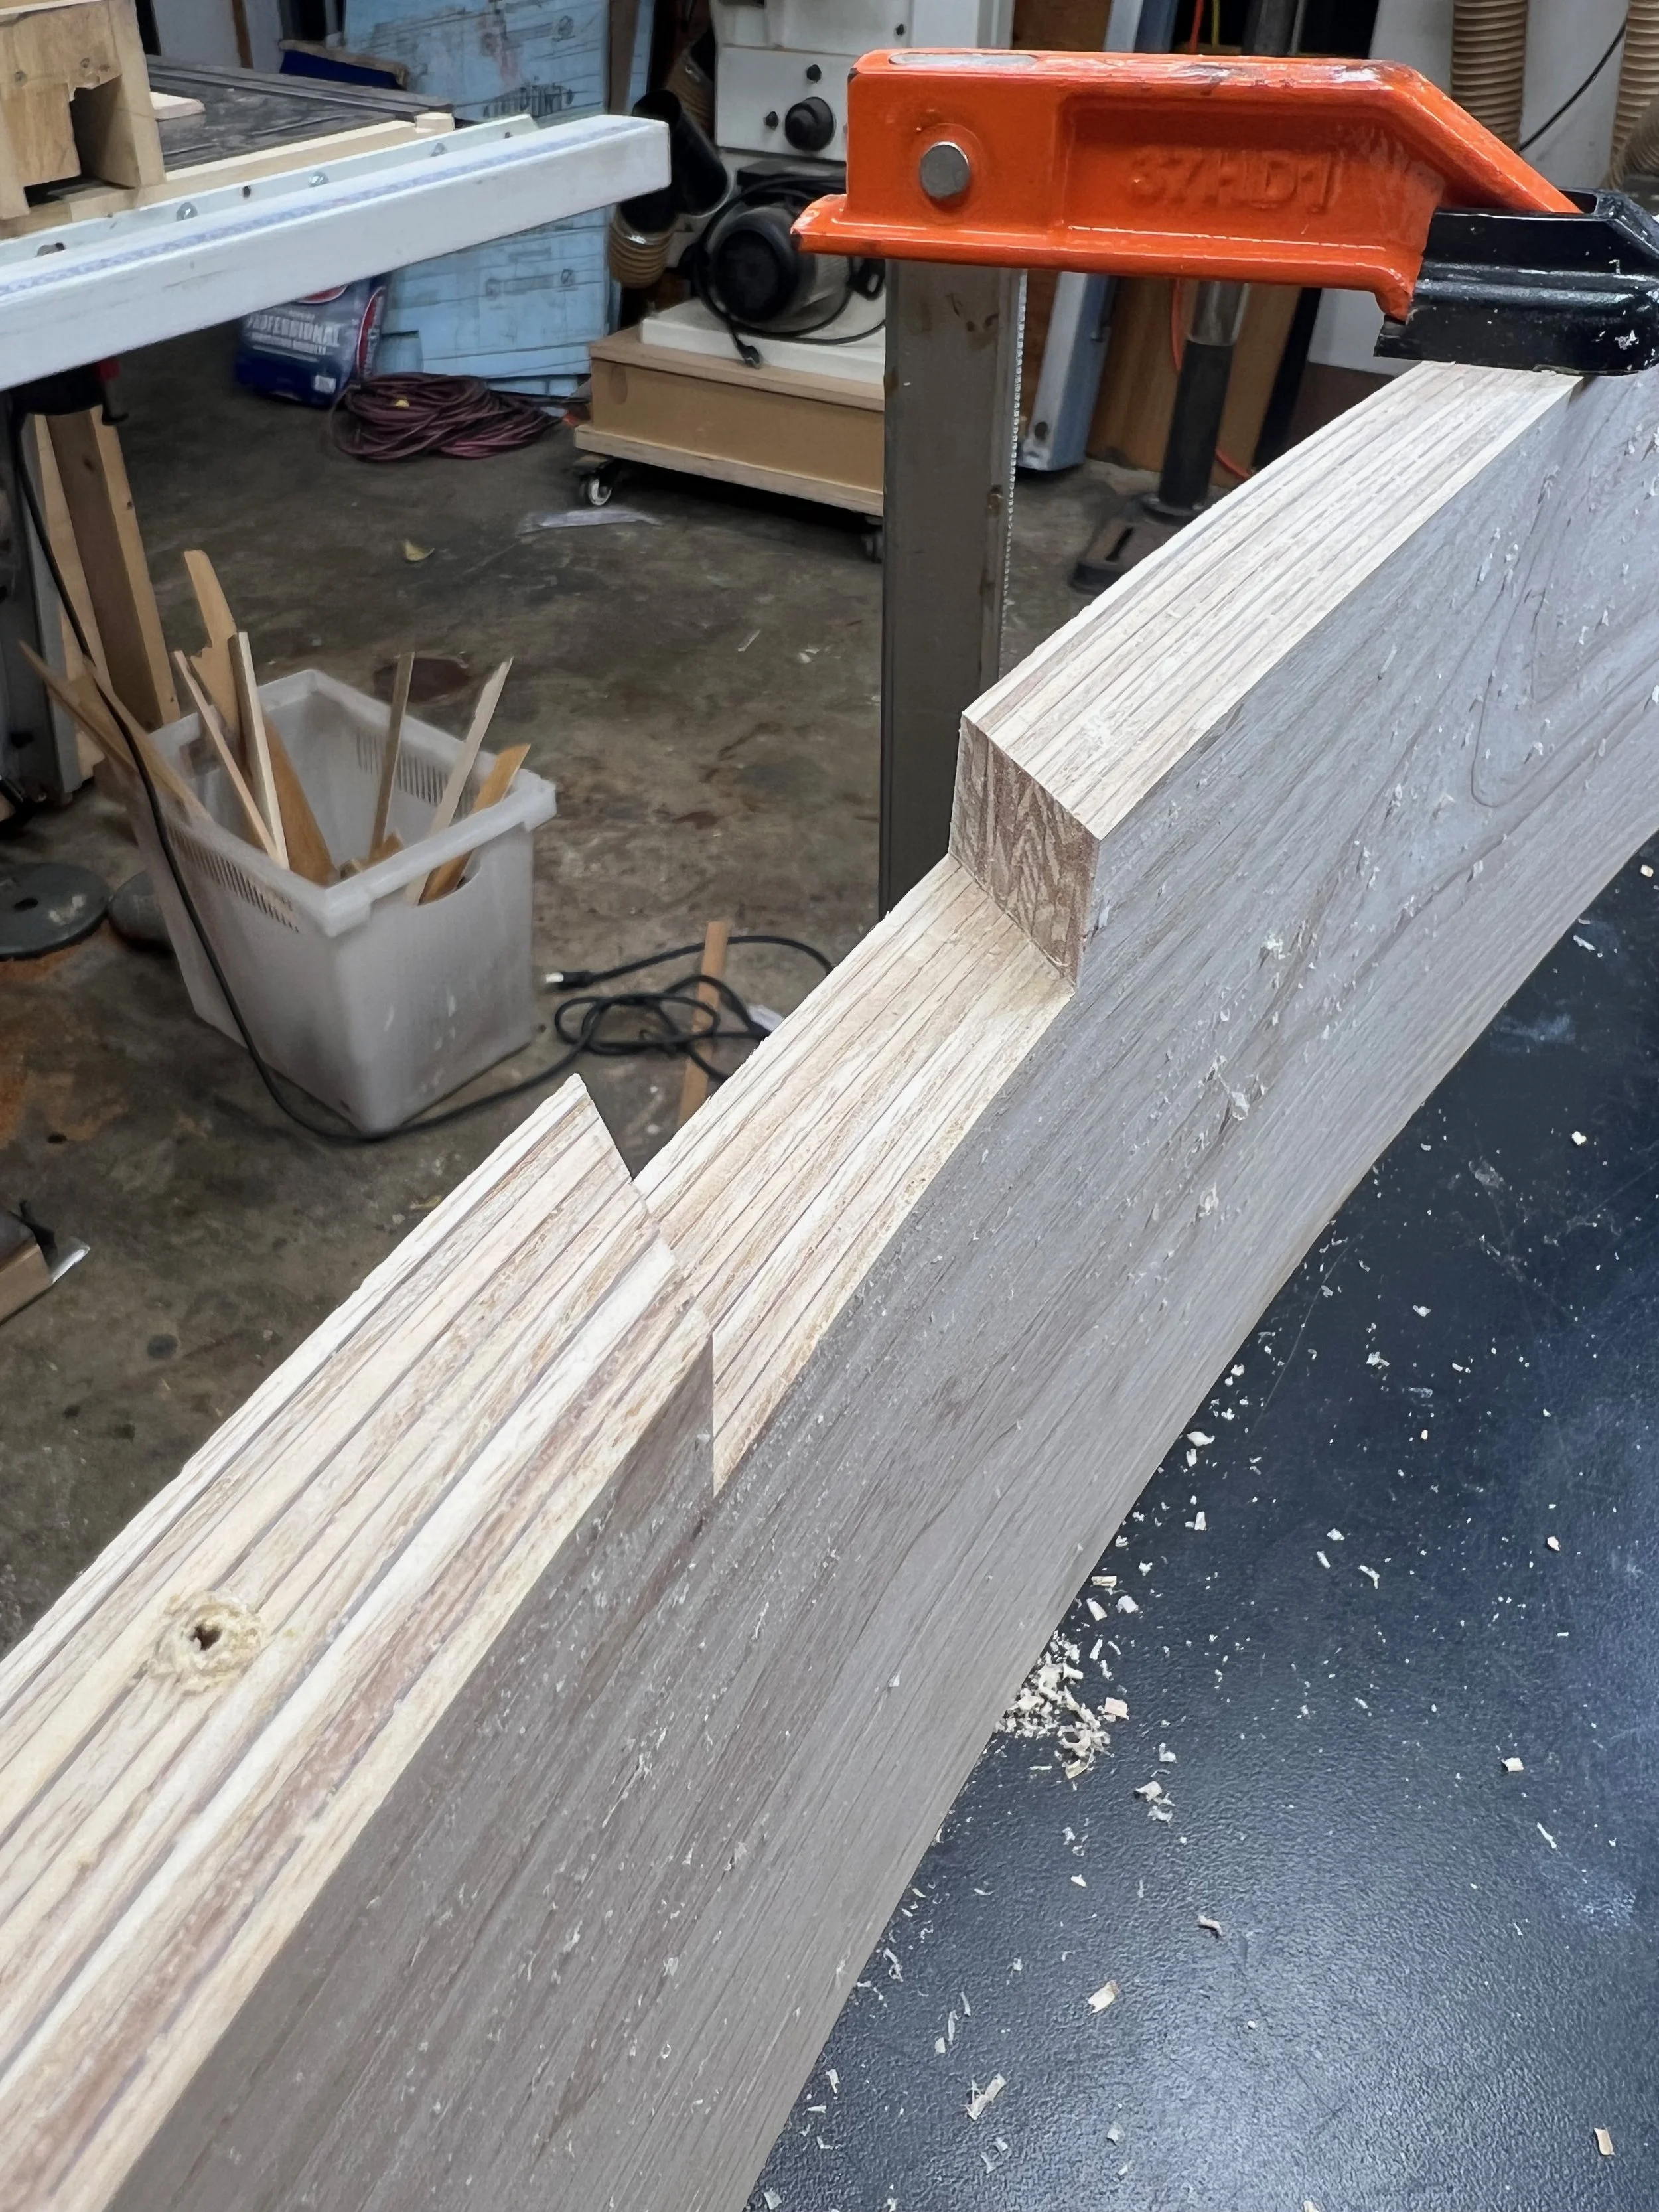
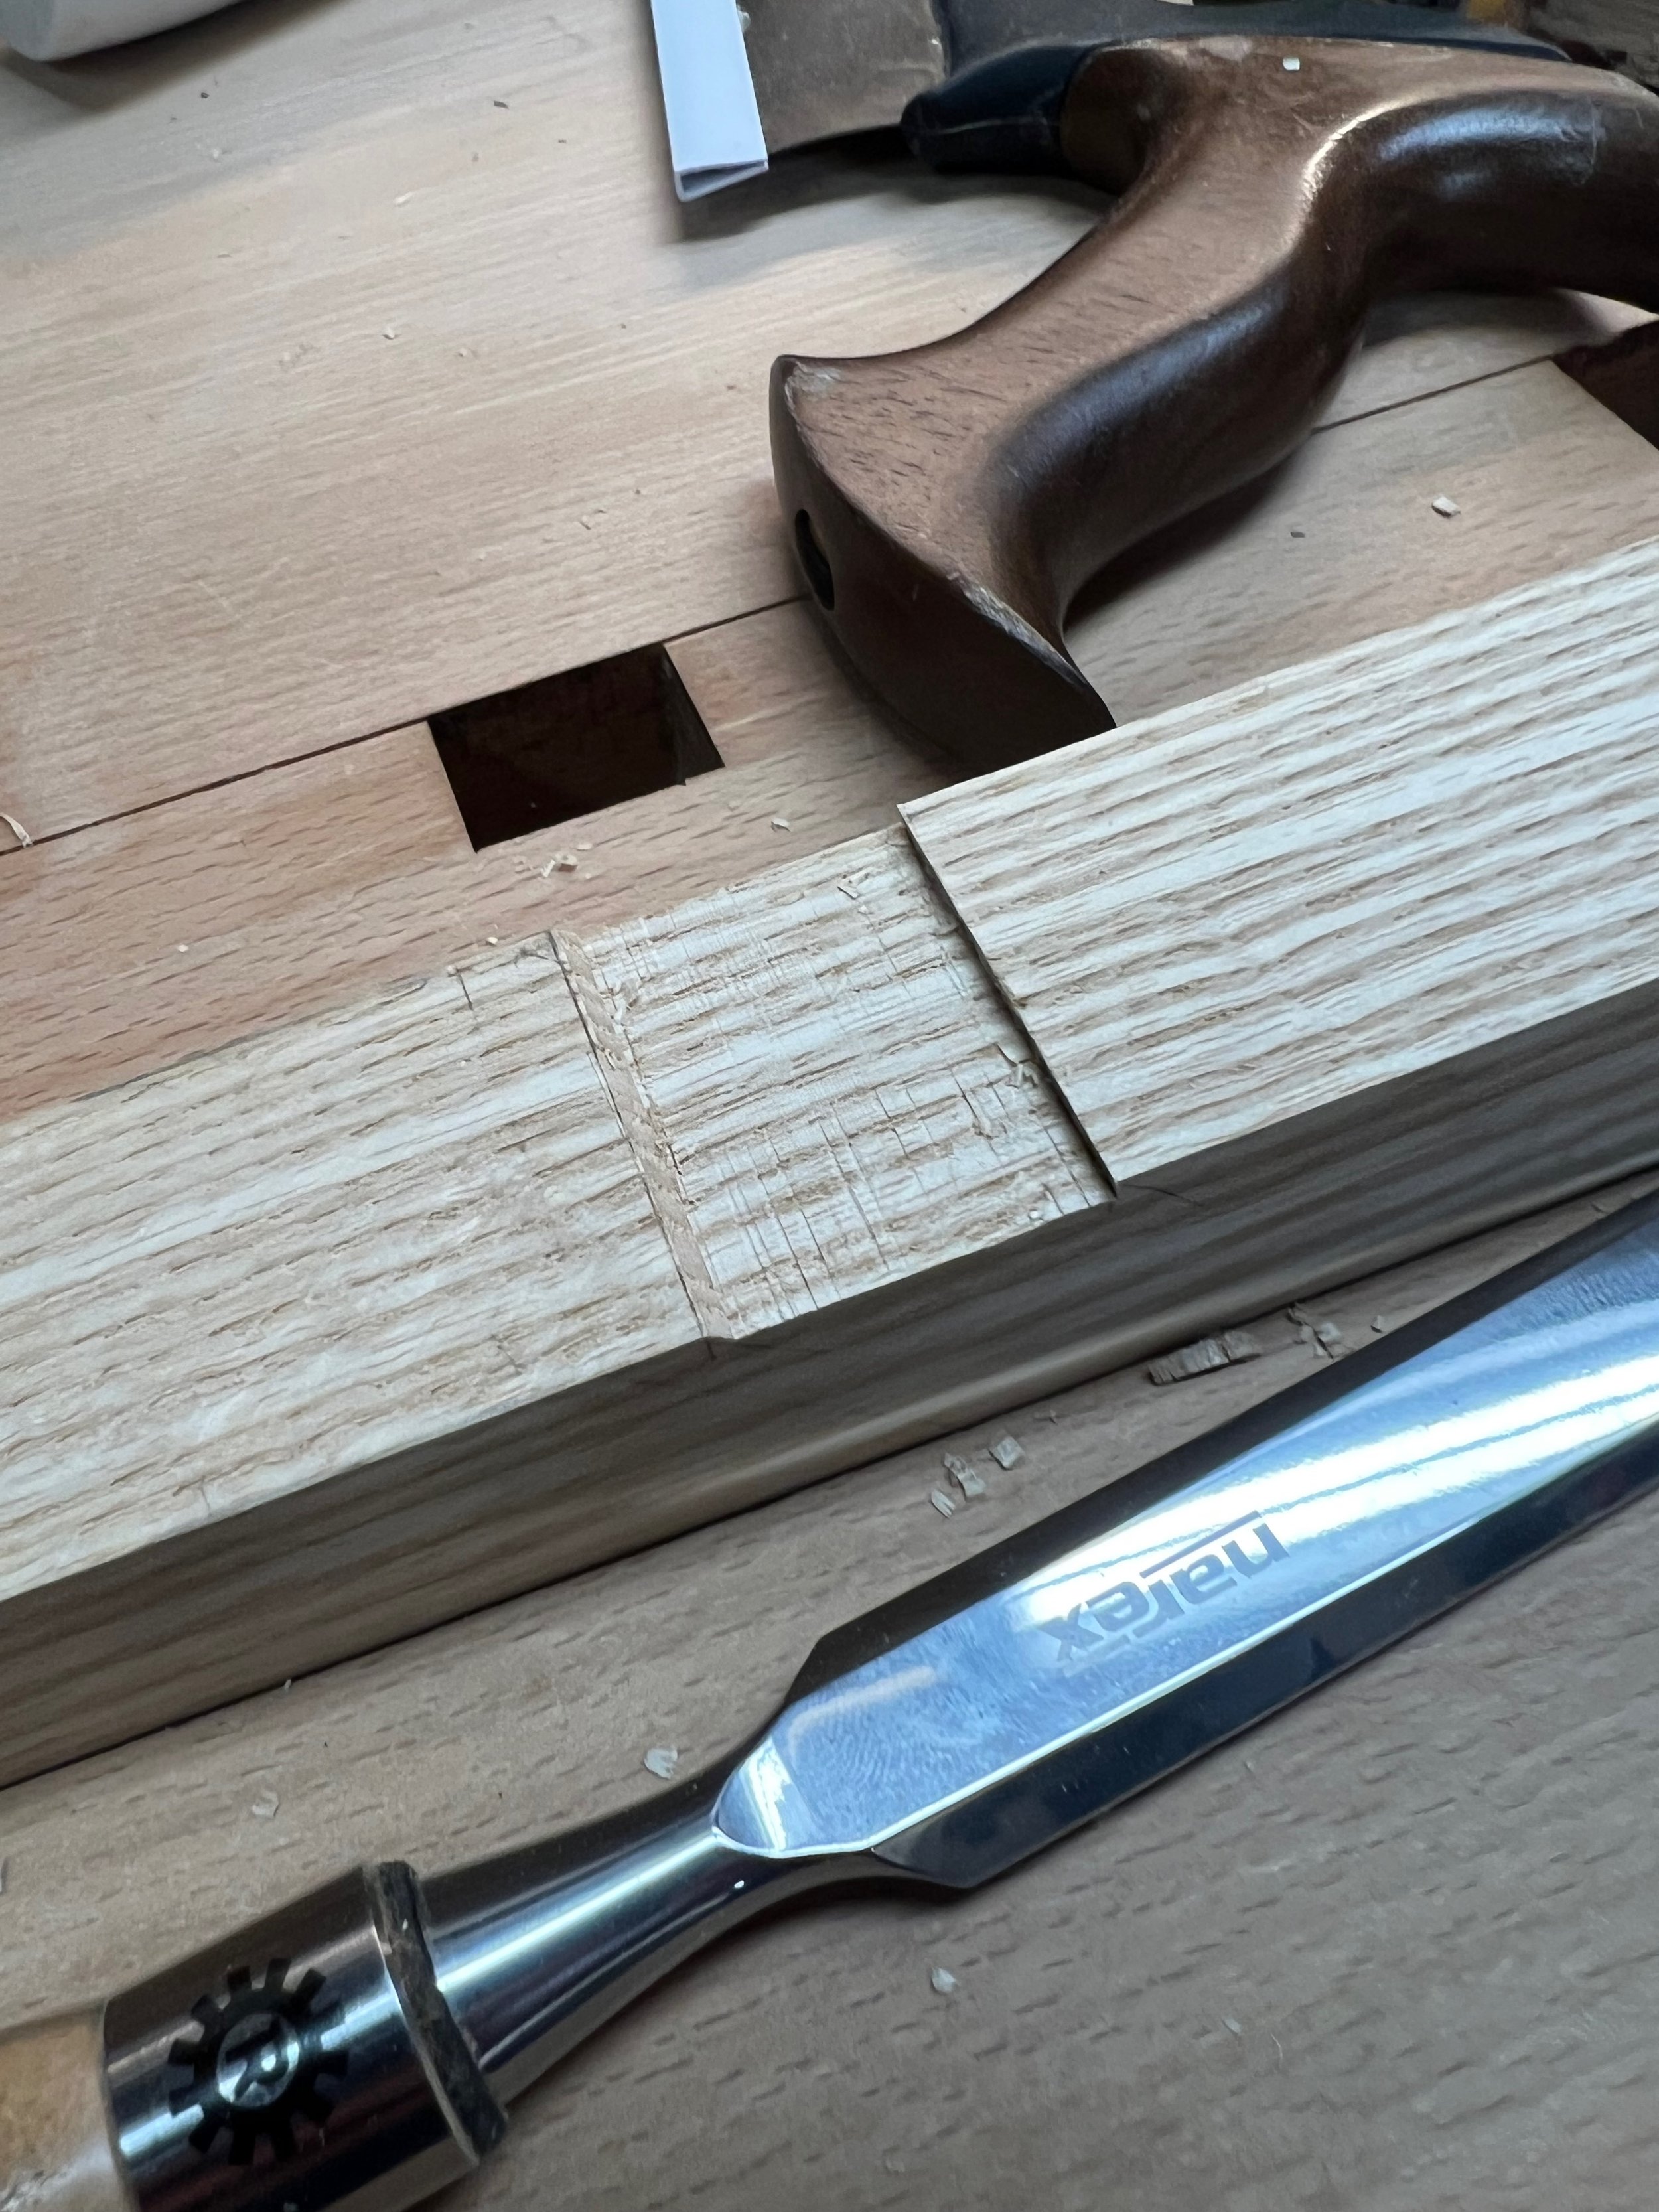
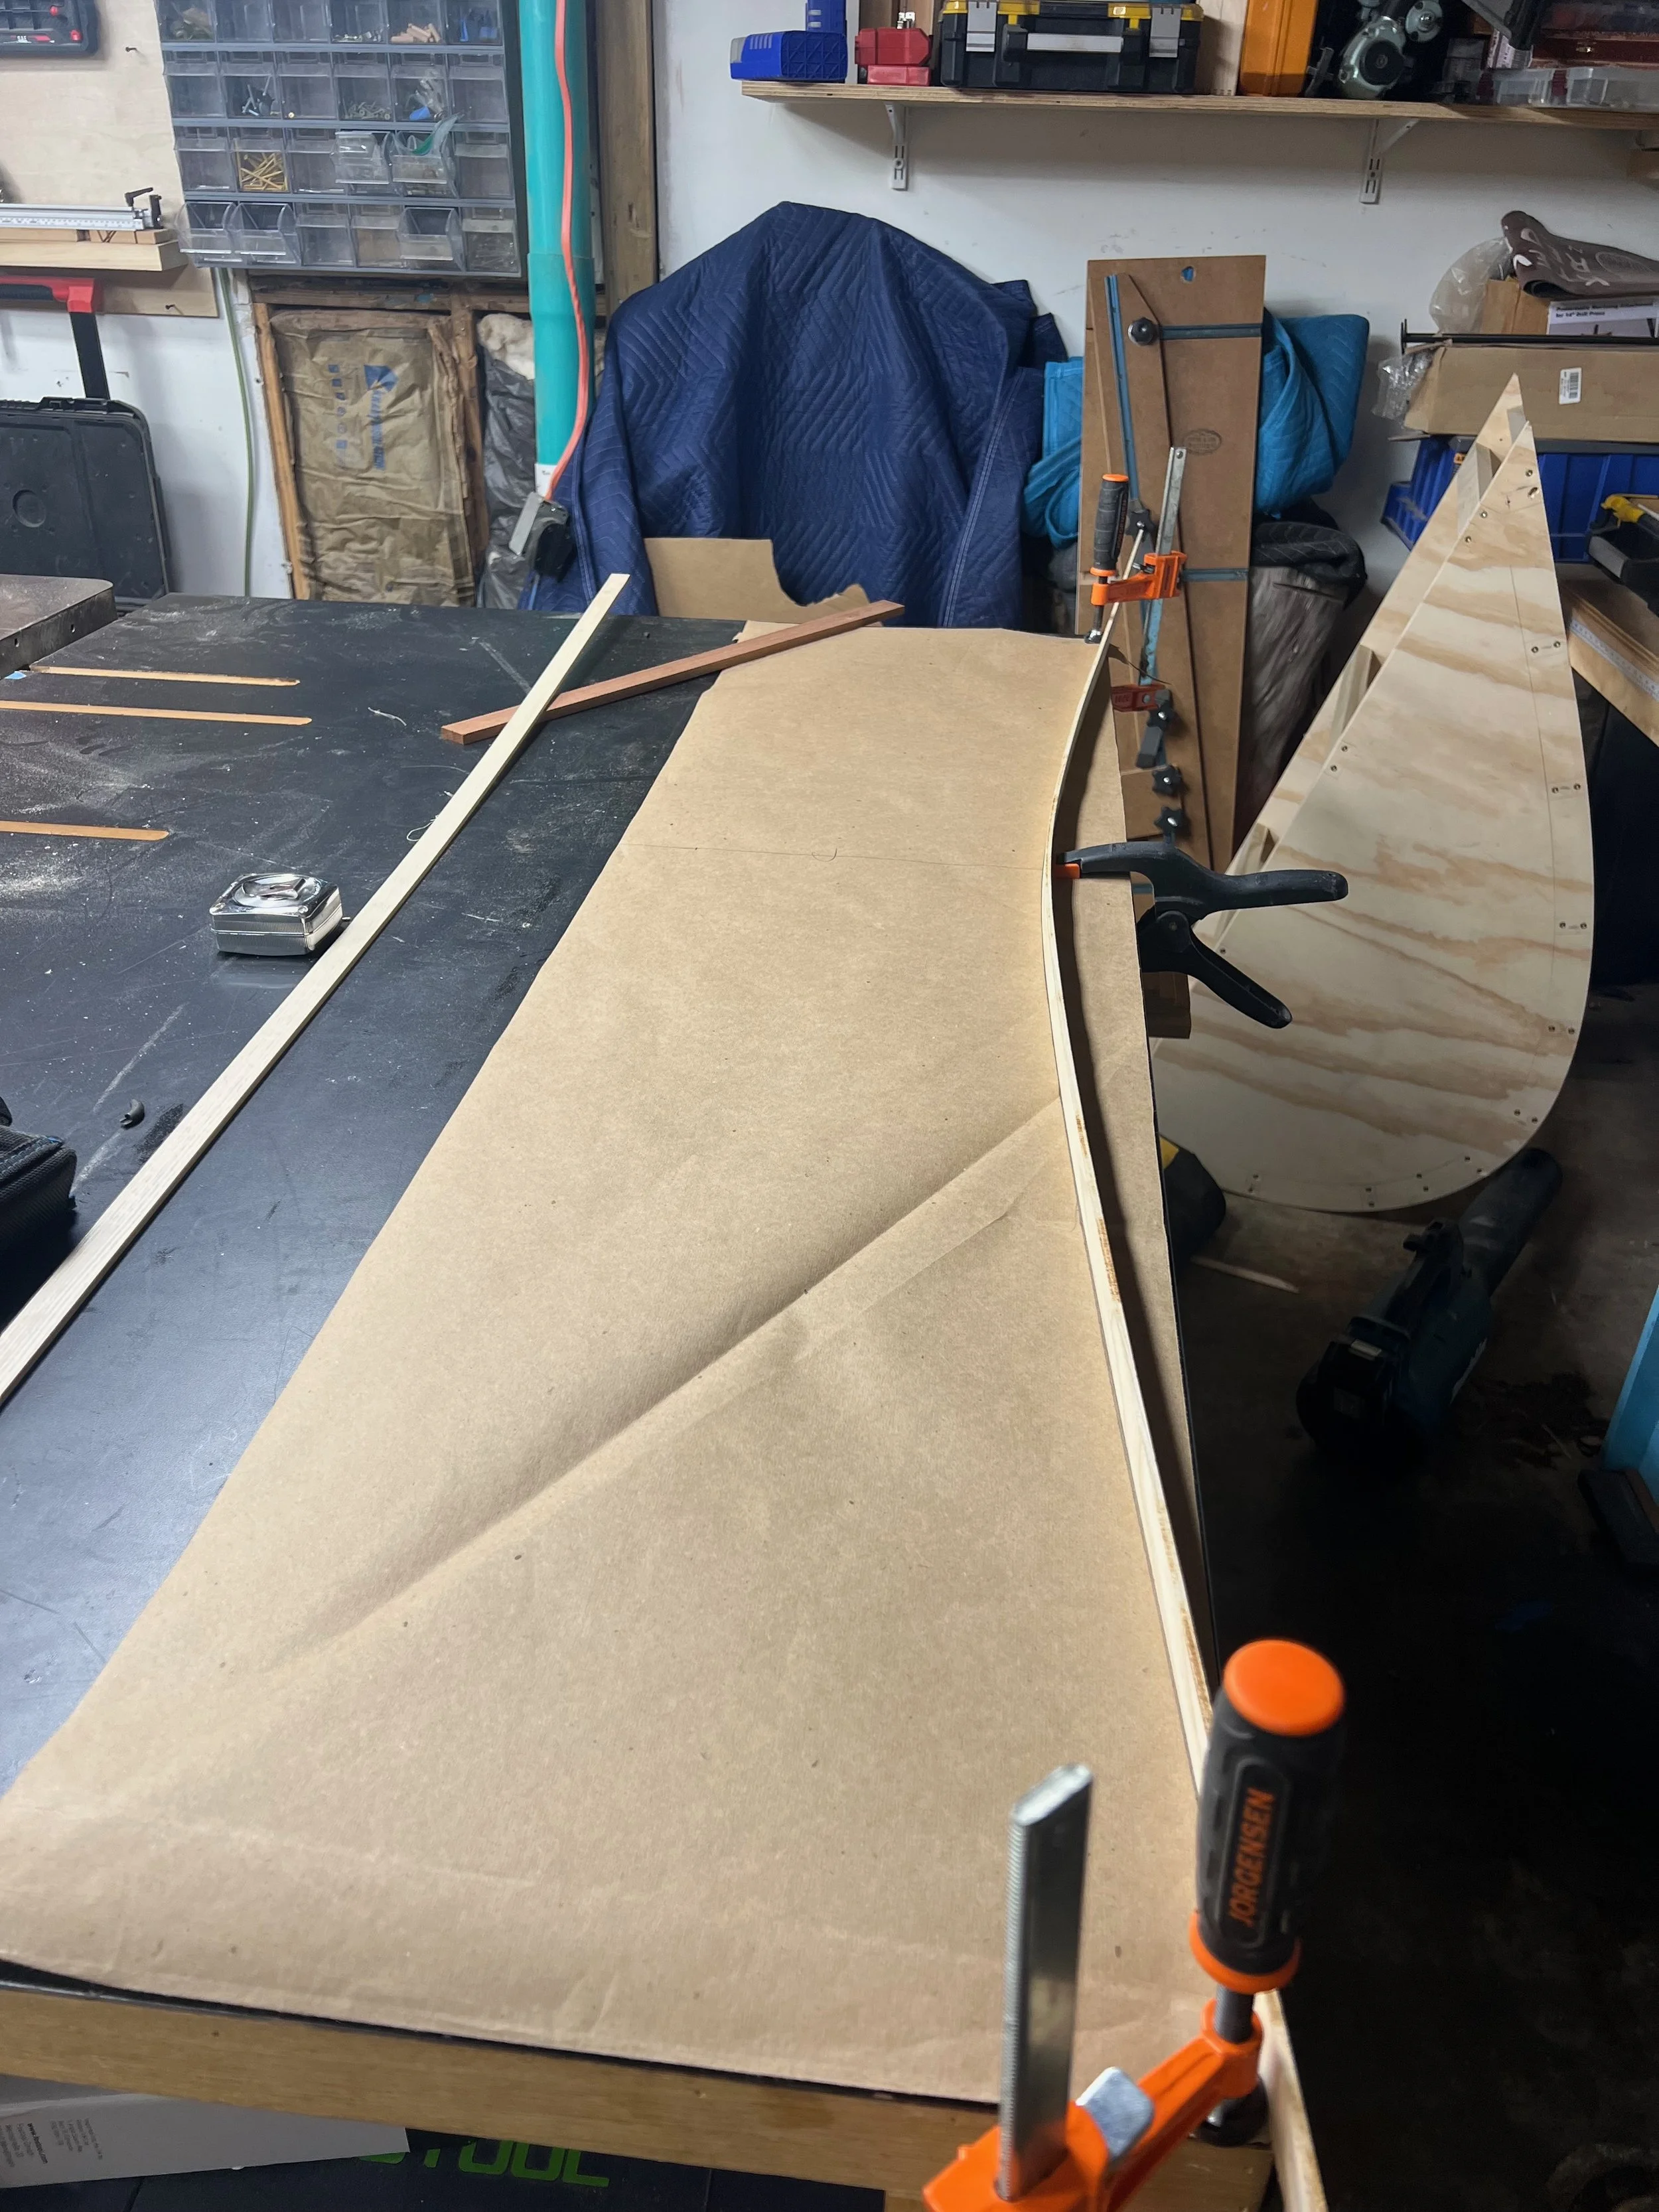
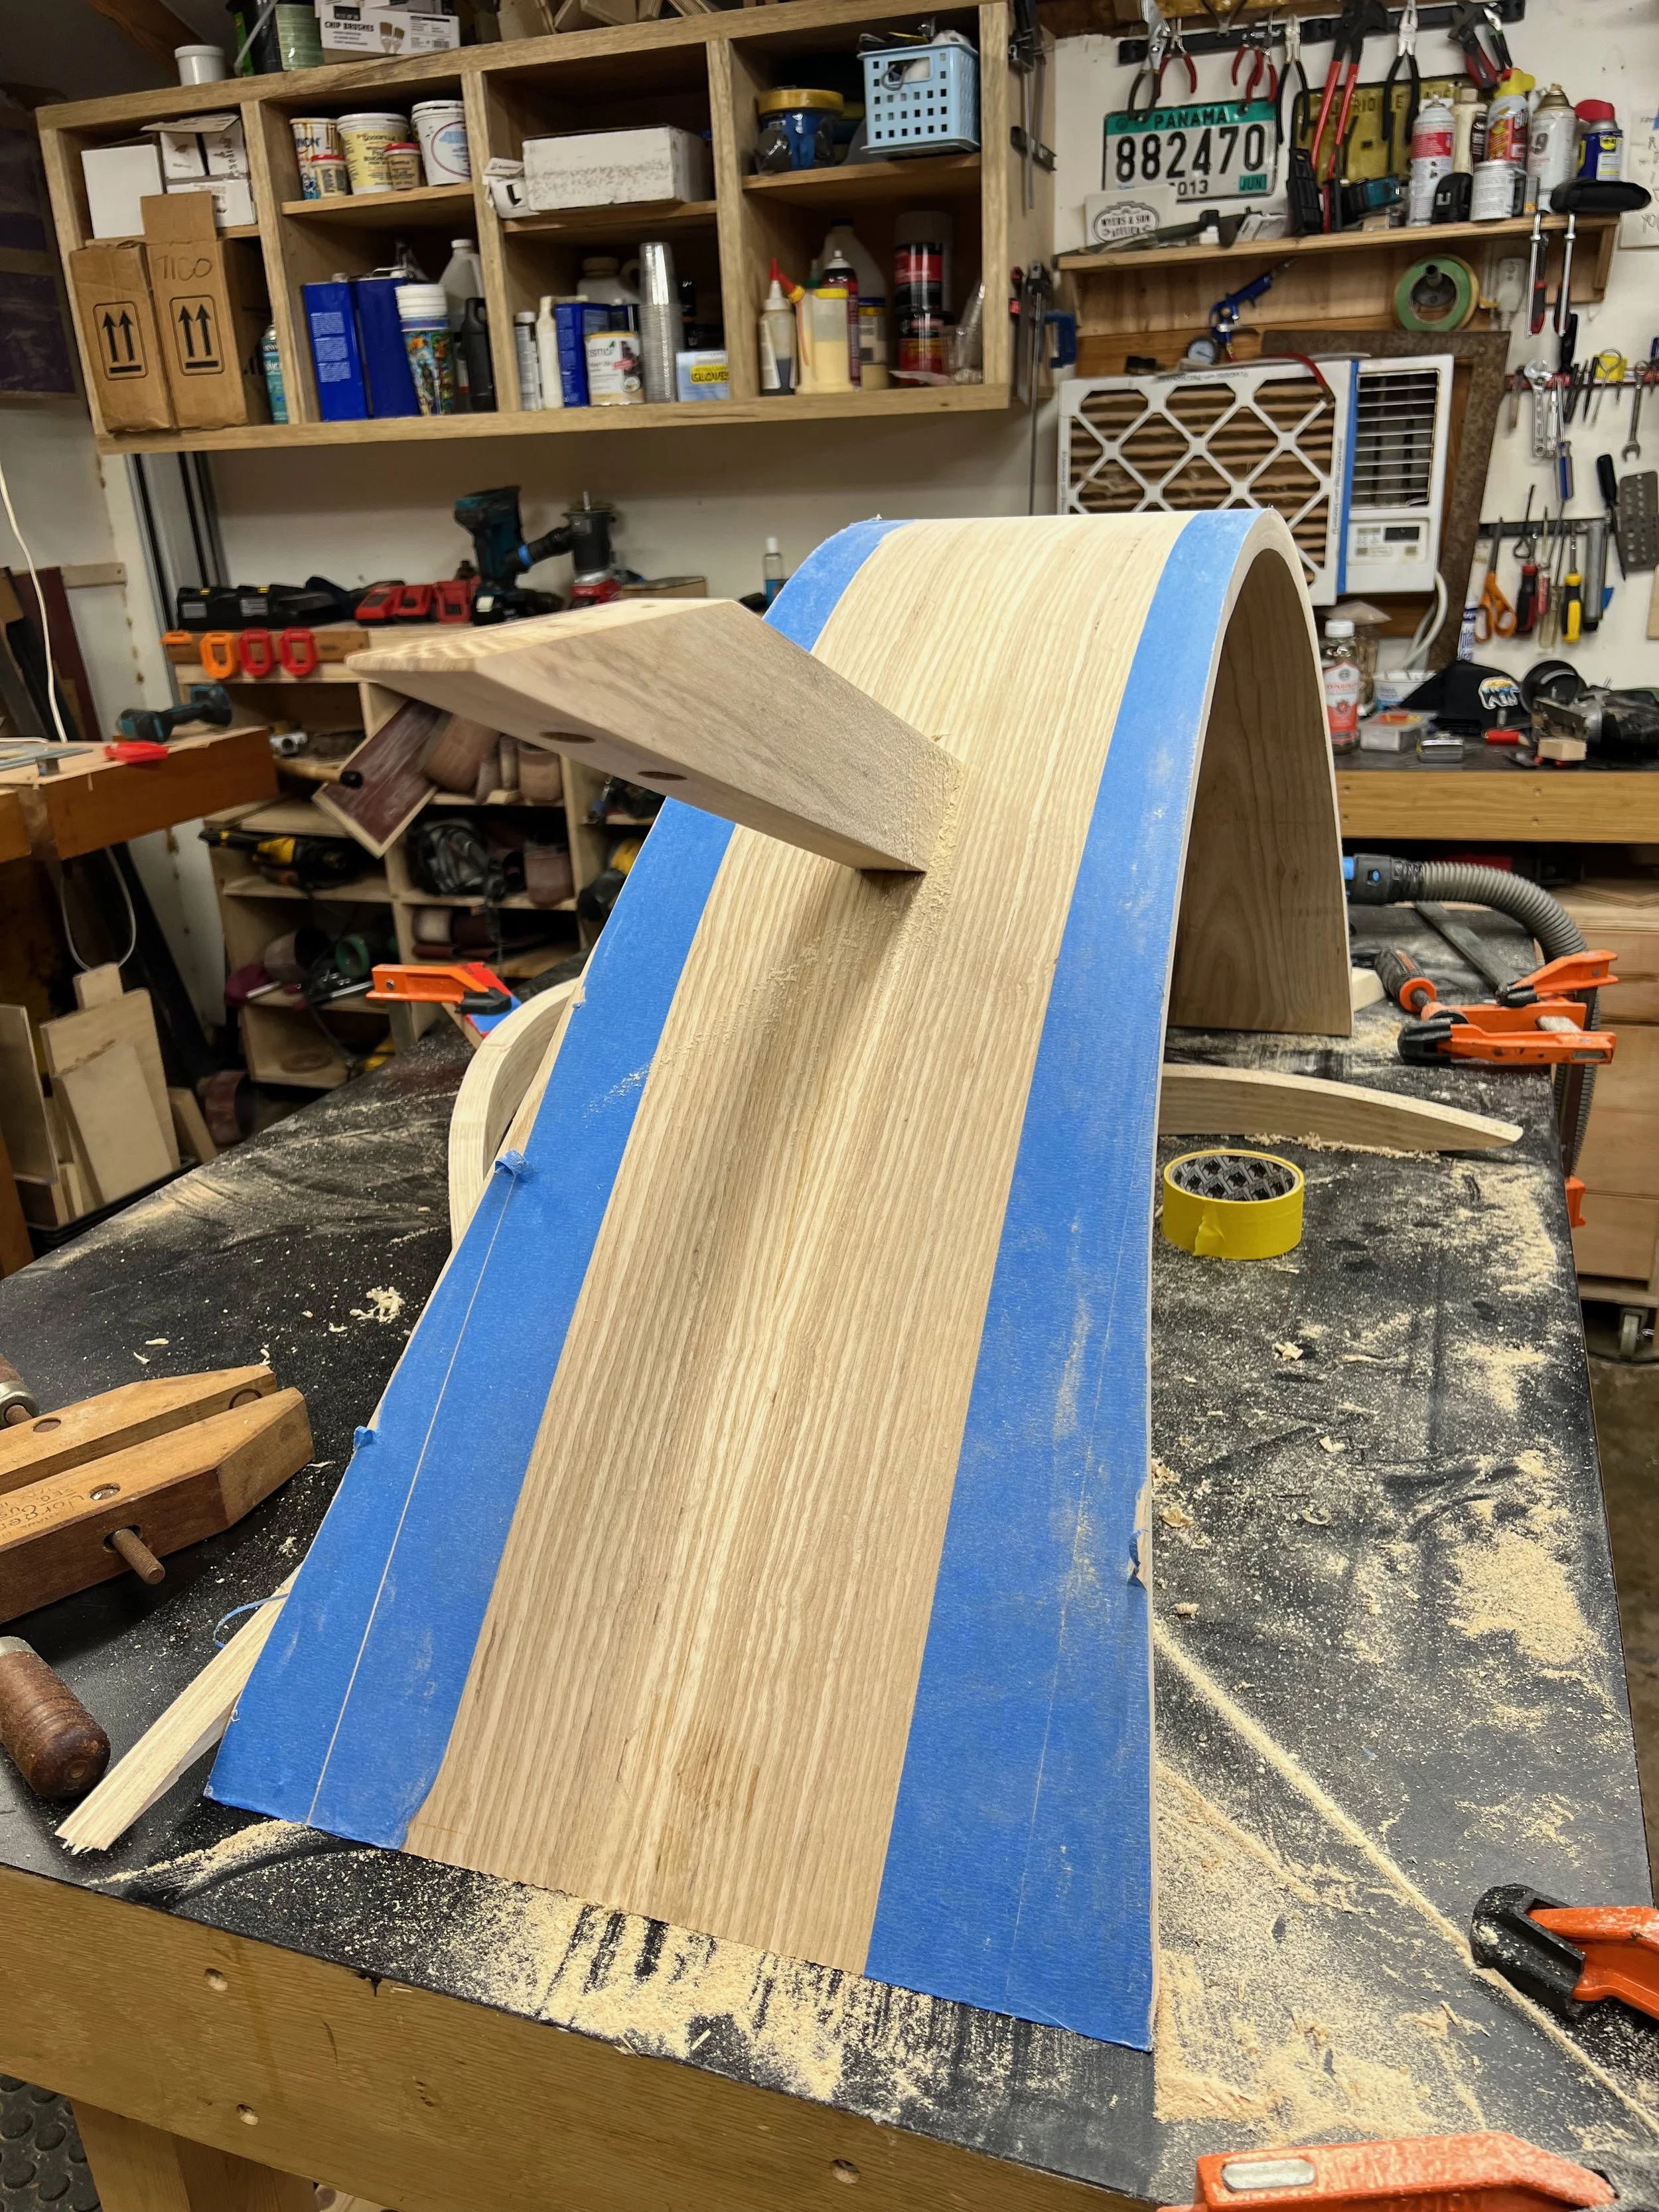
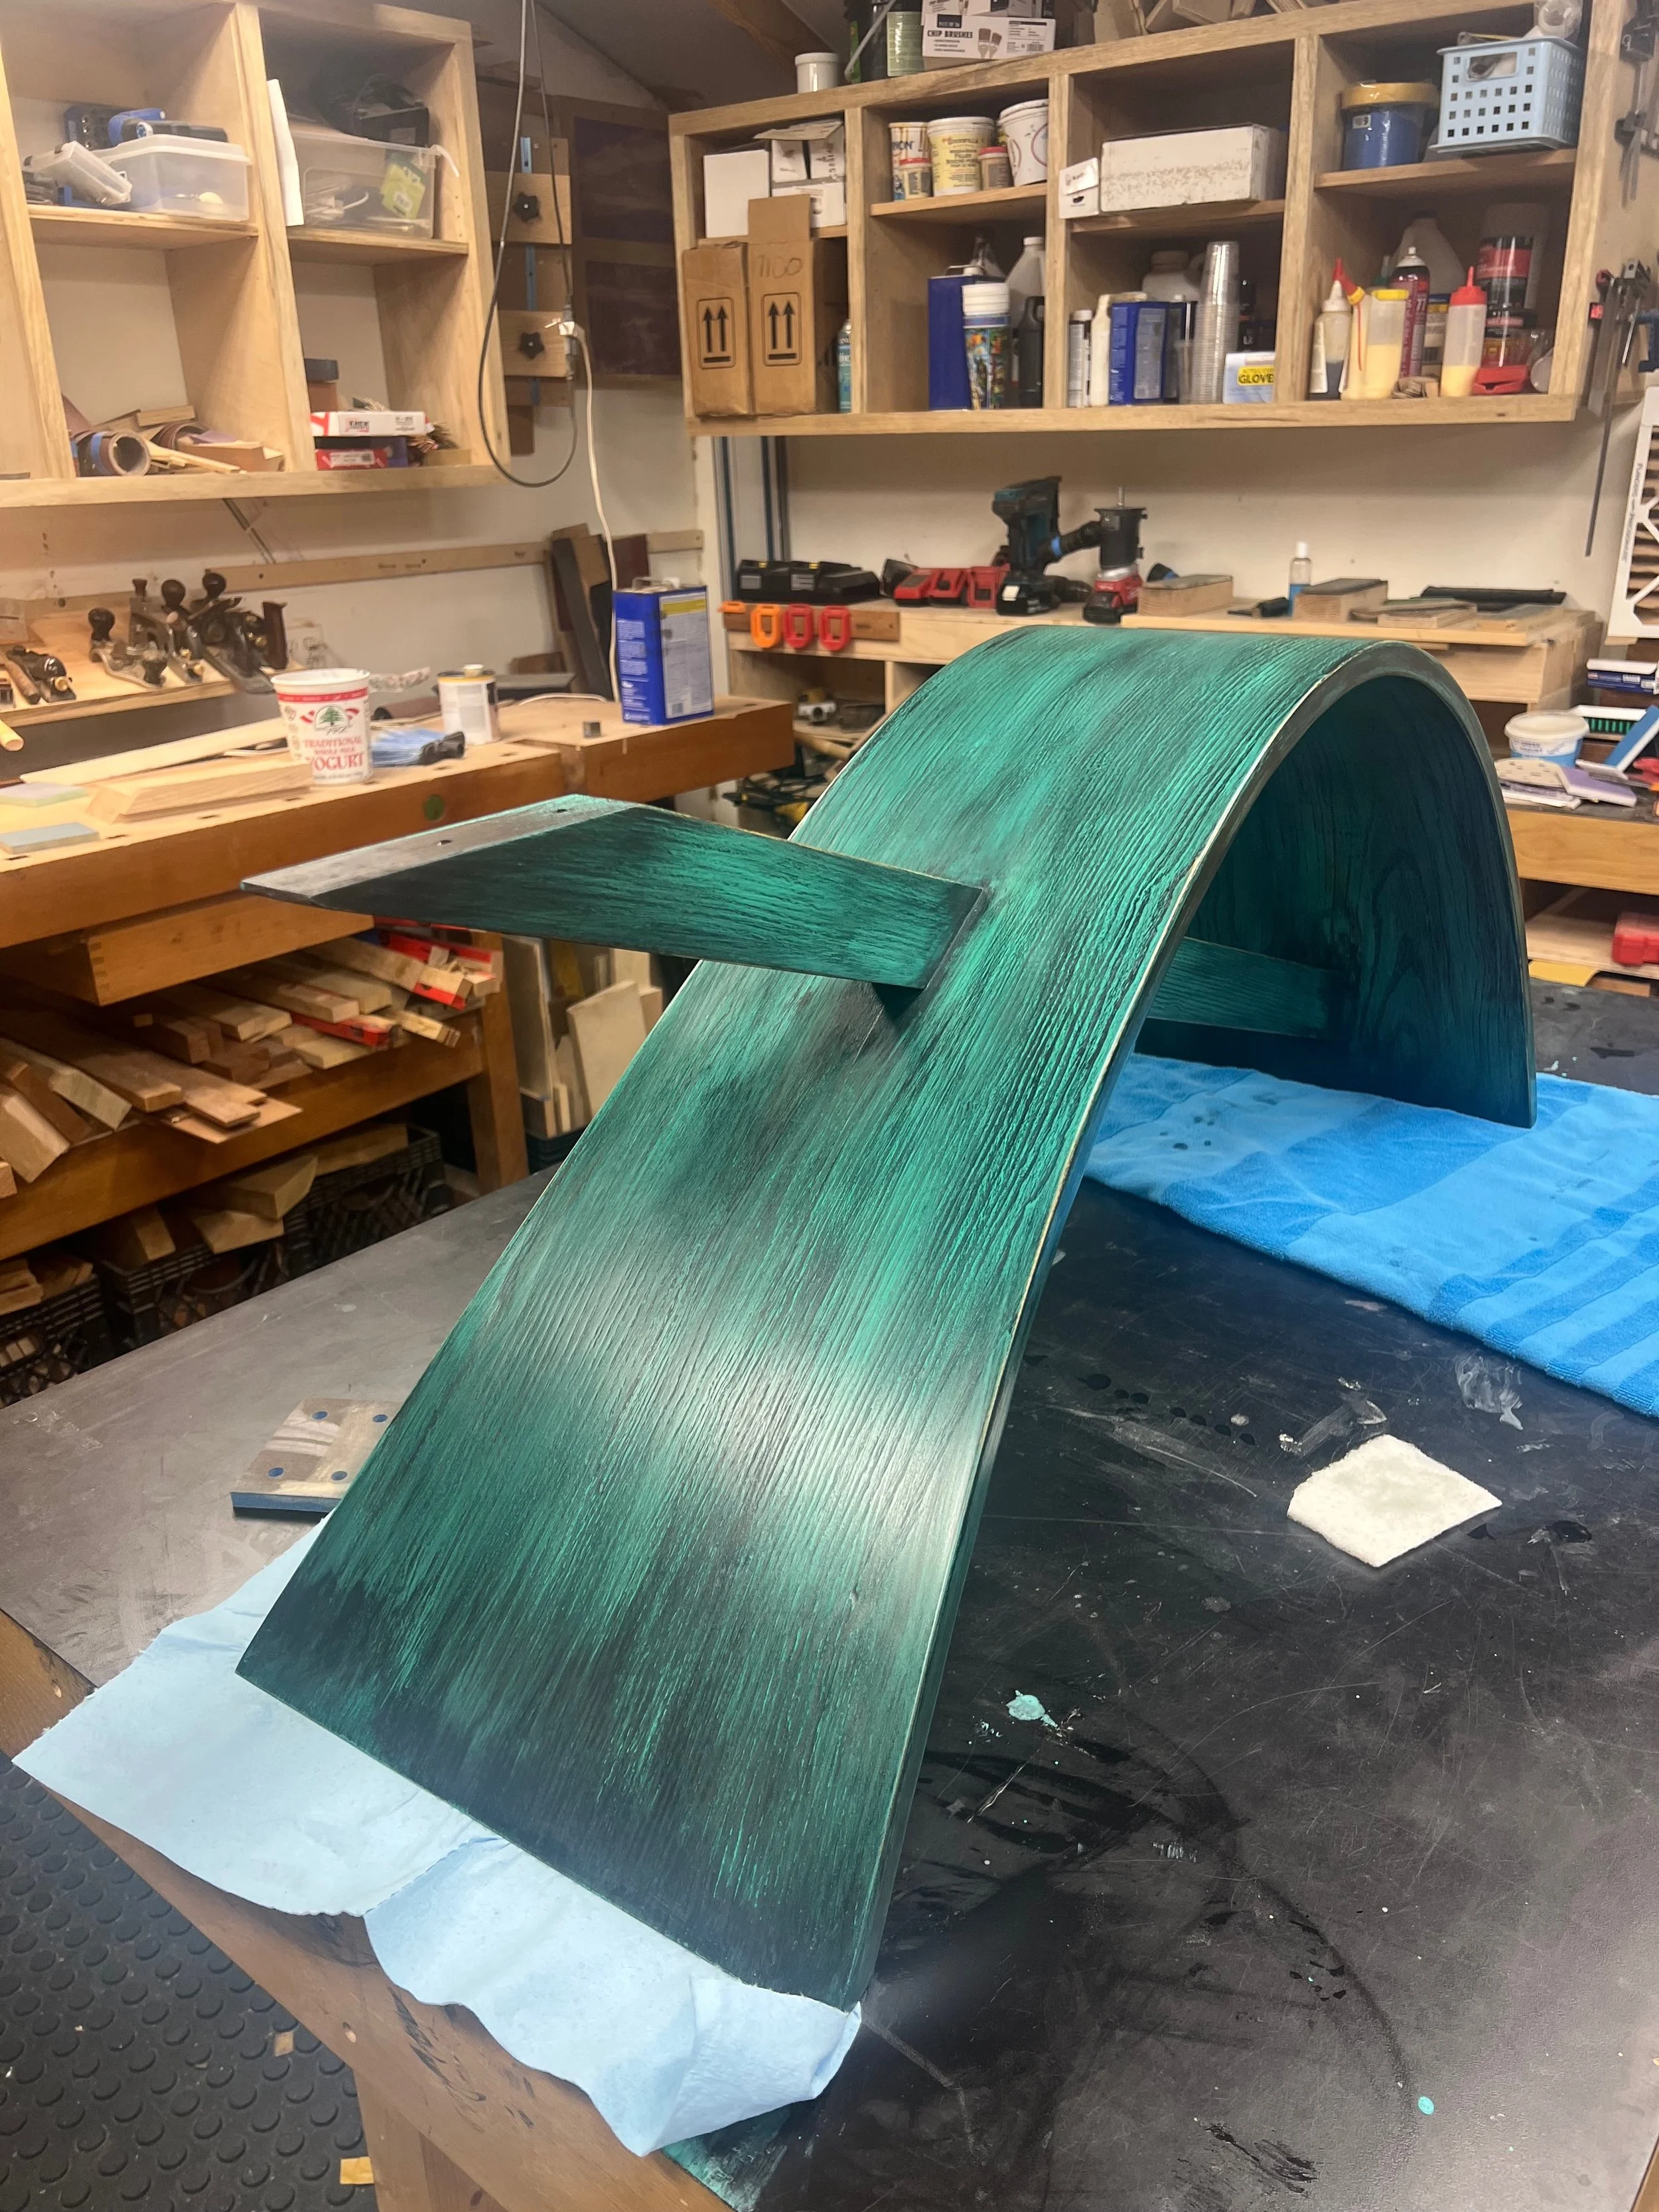
With the base sanded and rough trimmed, I was able to put the slab top on it temporarily, and start to analyze how I liked it visually. Right off the bat, I could tell it was a bit too wide proportionally. After some consideration and consultation with my on-call design guru (my sister, Michelle Vanderwalker), I settled on the idea of cutting in another shallow curve to narrow the “waist” of the base. That let it become visually slimmer, while leaving the portion that contacted the ground as wide as possible for stability. In order to do that, however, I had to finalize the joinery for the stabilizing crosspiece, which required ripping the entire base in half on the tablesaw. I went ahead and did that, and used the crosspiece itself to mark out where I needed material removed in order for the crosspiece to pass through. I set up a simple jig for the router, and made the mating joinery on the crosspiece by hand to create a simple, albeit angled lap joint.
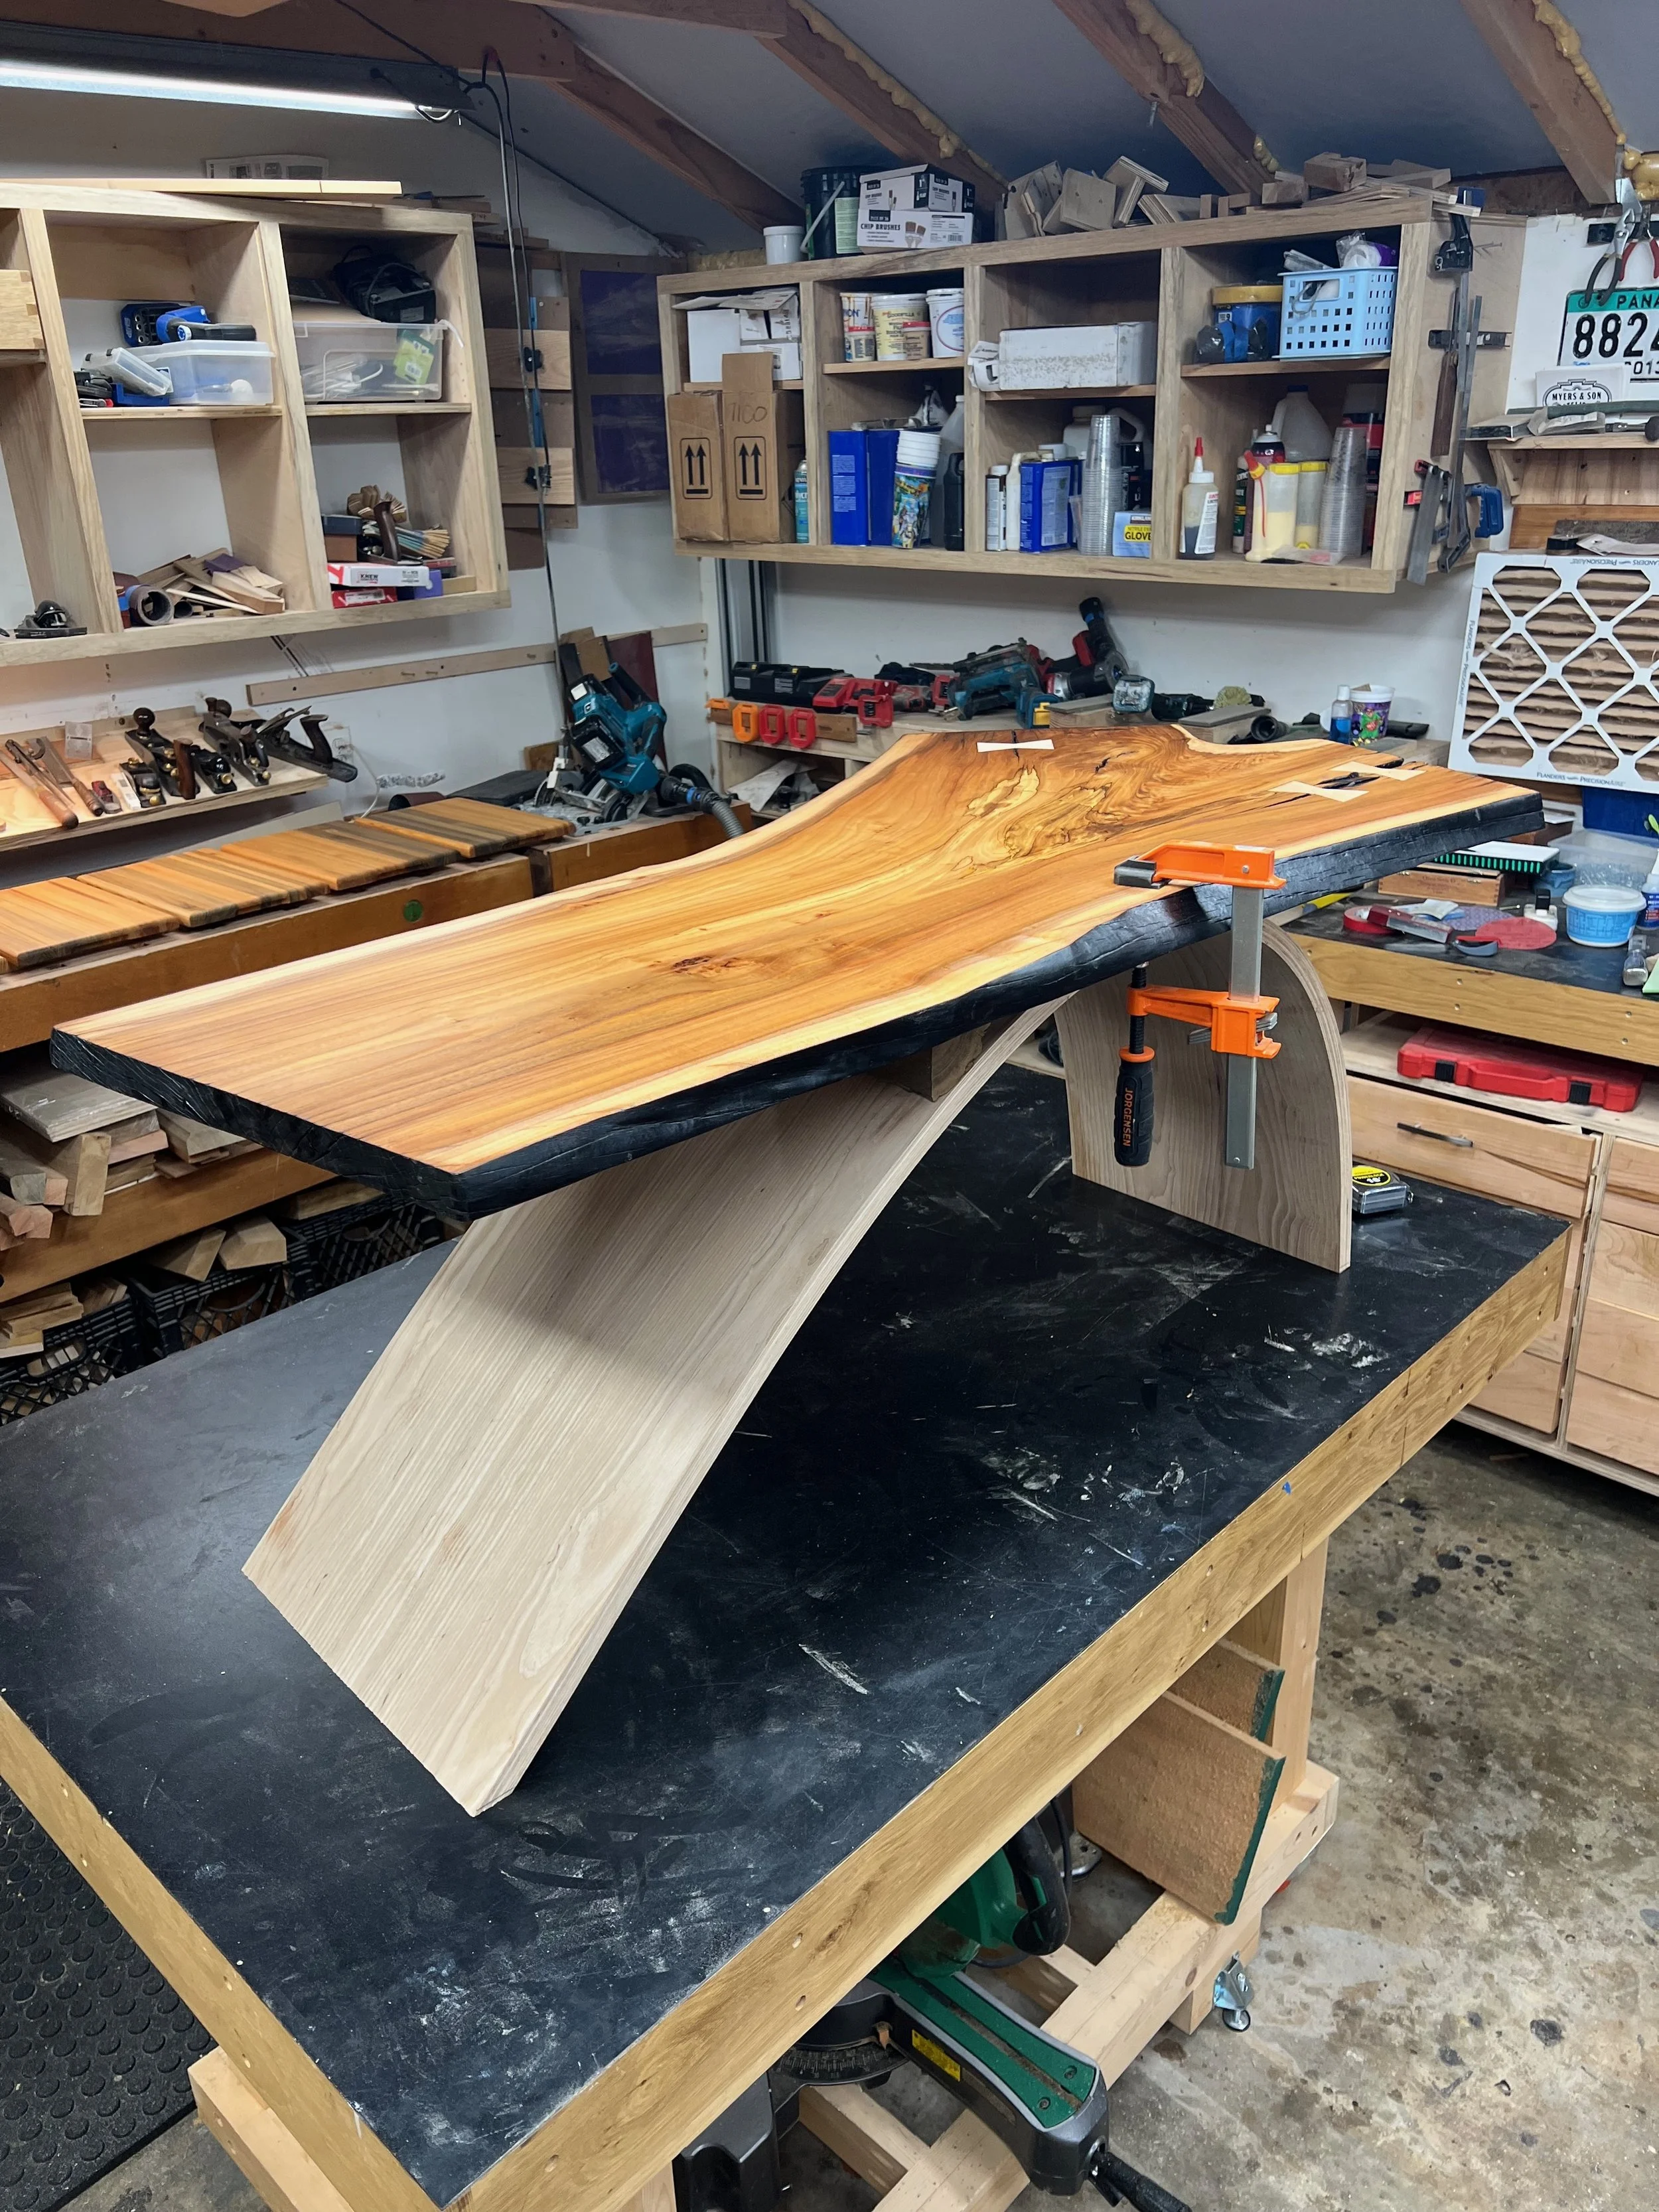
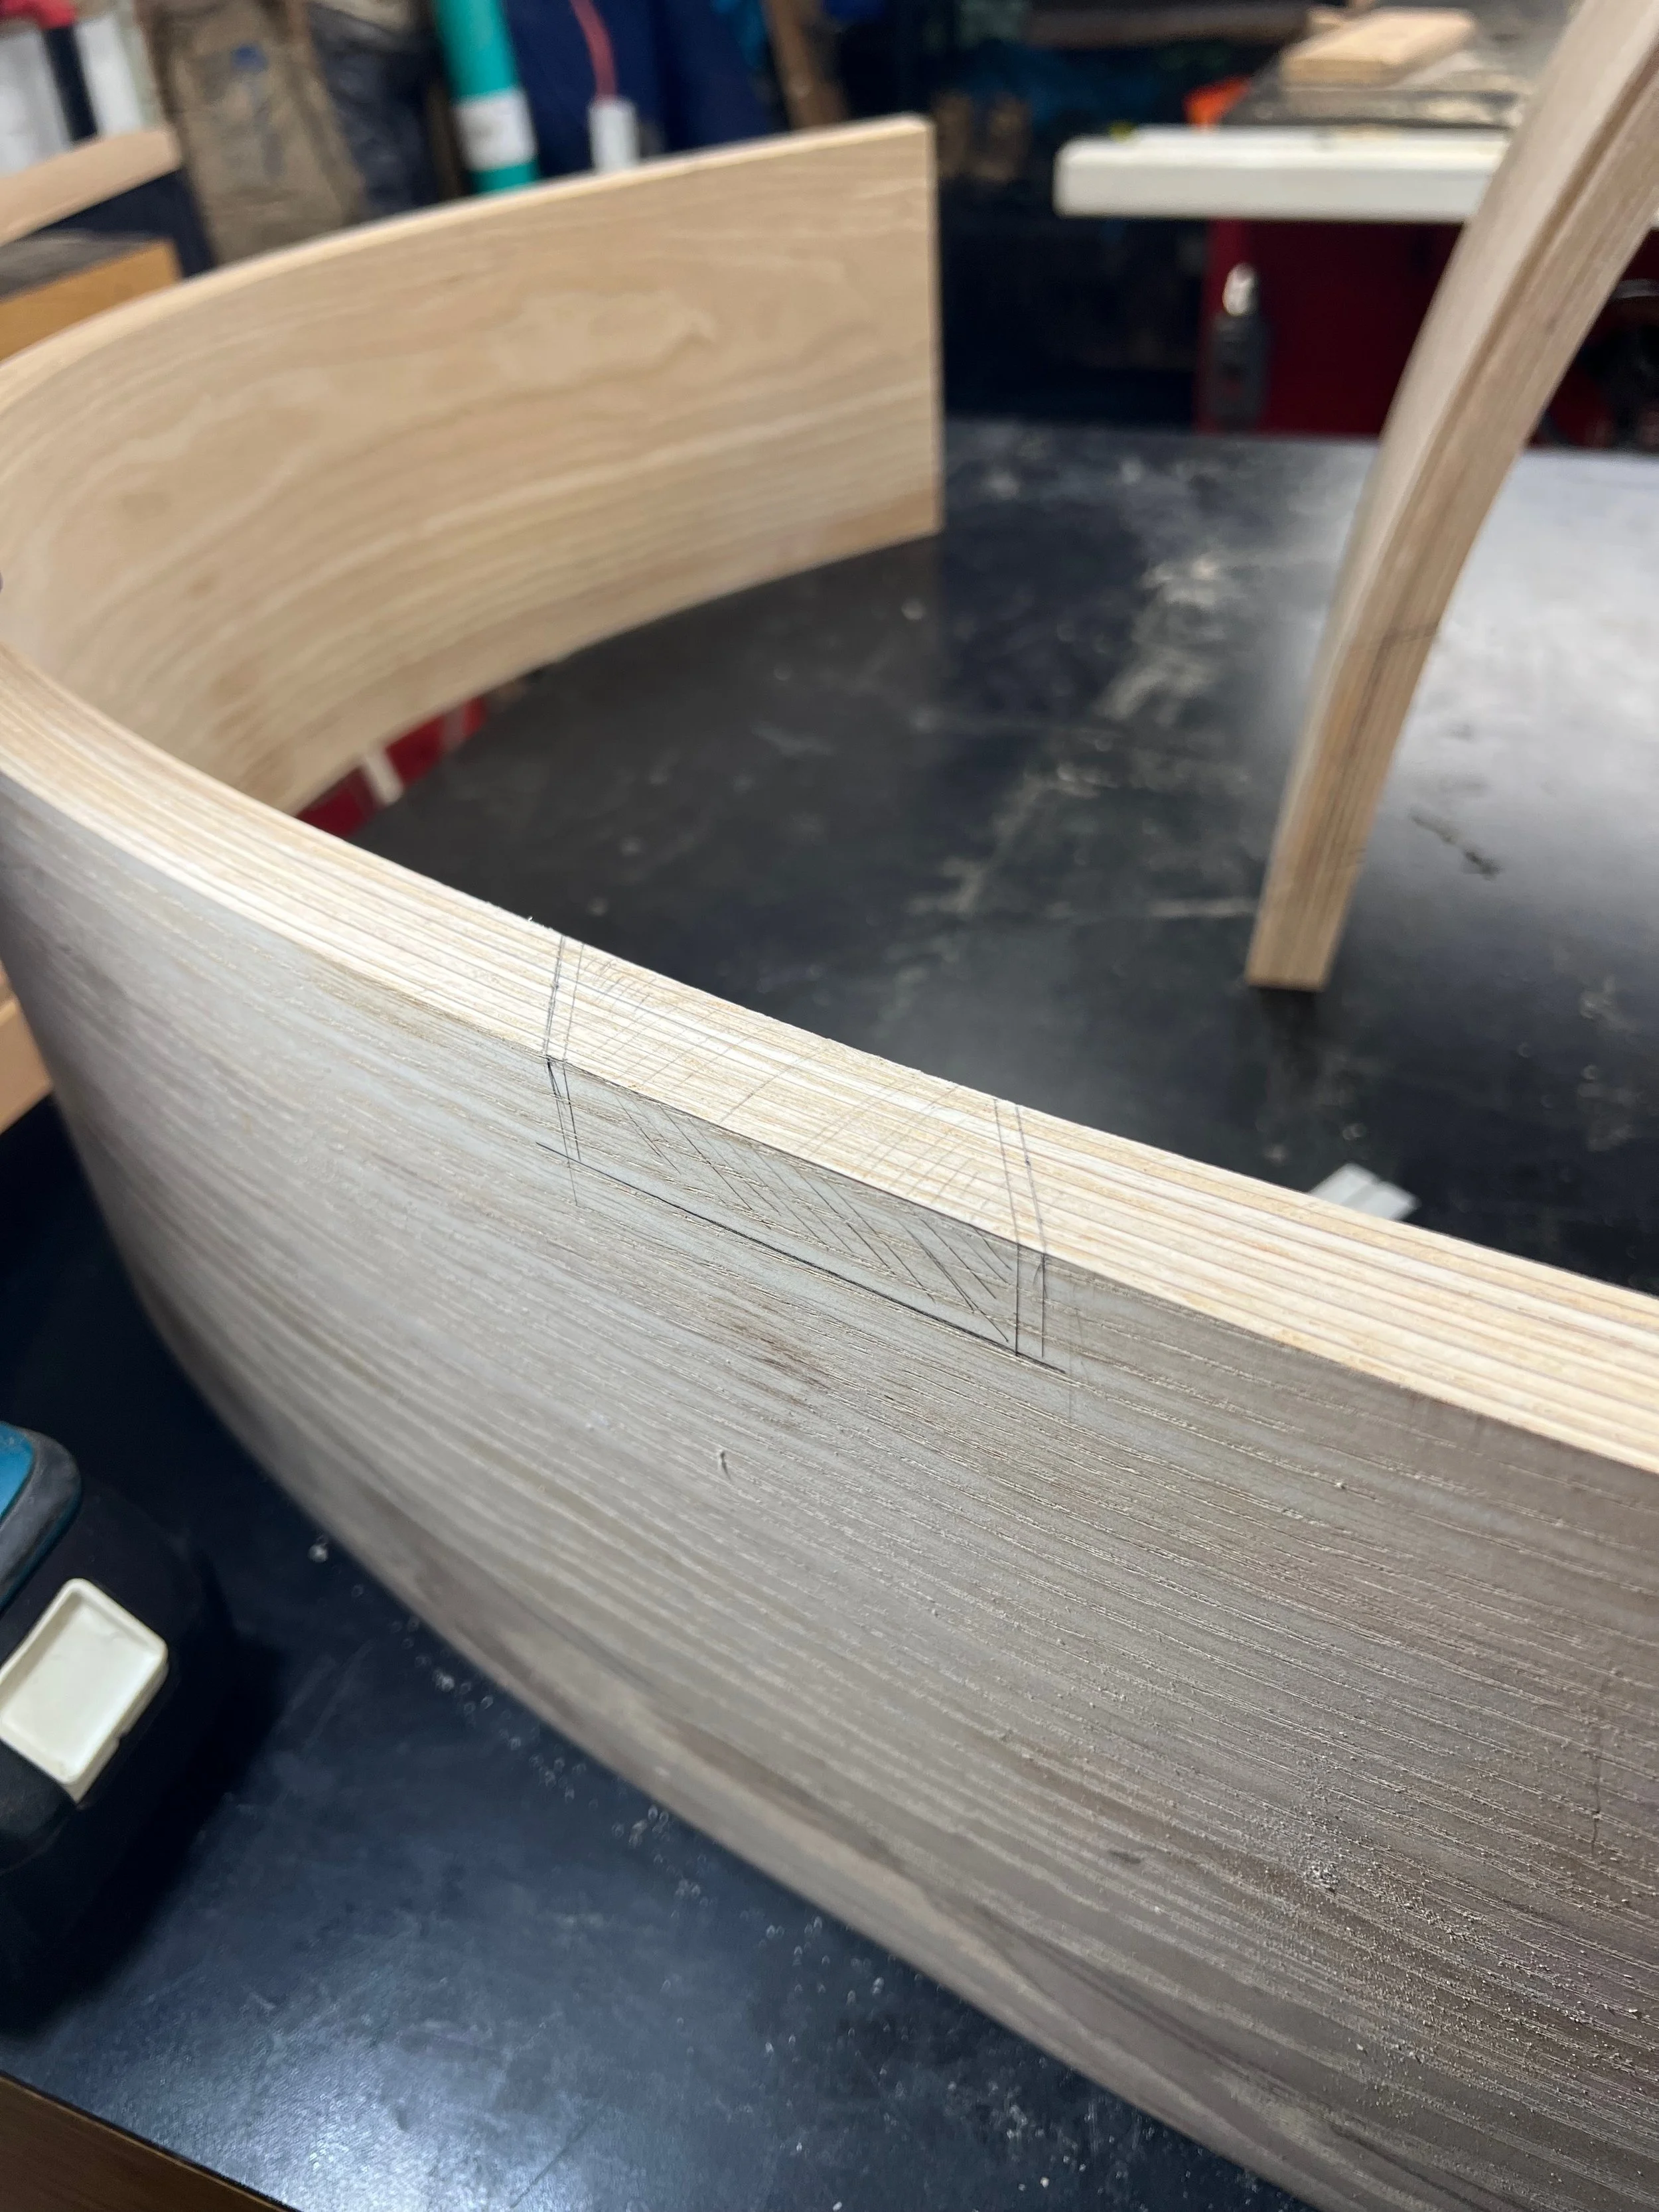
With the joinery accomplished, it was finally time to make the last couple of cuts to create the “waist”. Since the drawing stick can’t bend in two planes, I created a paper template that fit the top surface of the base, and laid it flat on the table, then used the drawing stick to create a curve. From there, I applied blue tape to the surface of the form, overlaid the paper on top, and cut to the line with a sharp knife. That left me with a clear line to cut to with the jigsaw. At that point, I made a step back, and went ahead with the glue up. I wouldn’t have been able to lay the paper flat on the top surface of the form if I had done the glue up first. After the glue up, the curve was cut with the jigsaw, and the rest was just more lovely sanding and cleanup, and eventually I was ready to move on to developing a finish for it.
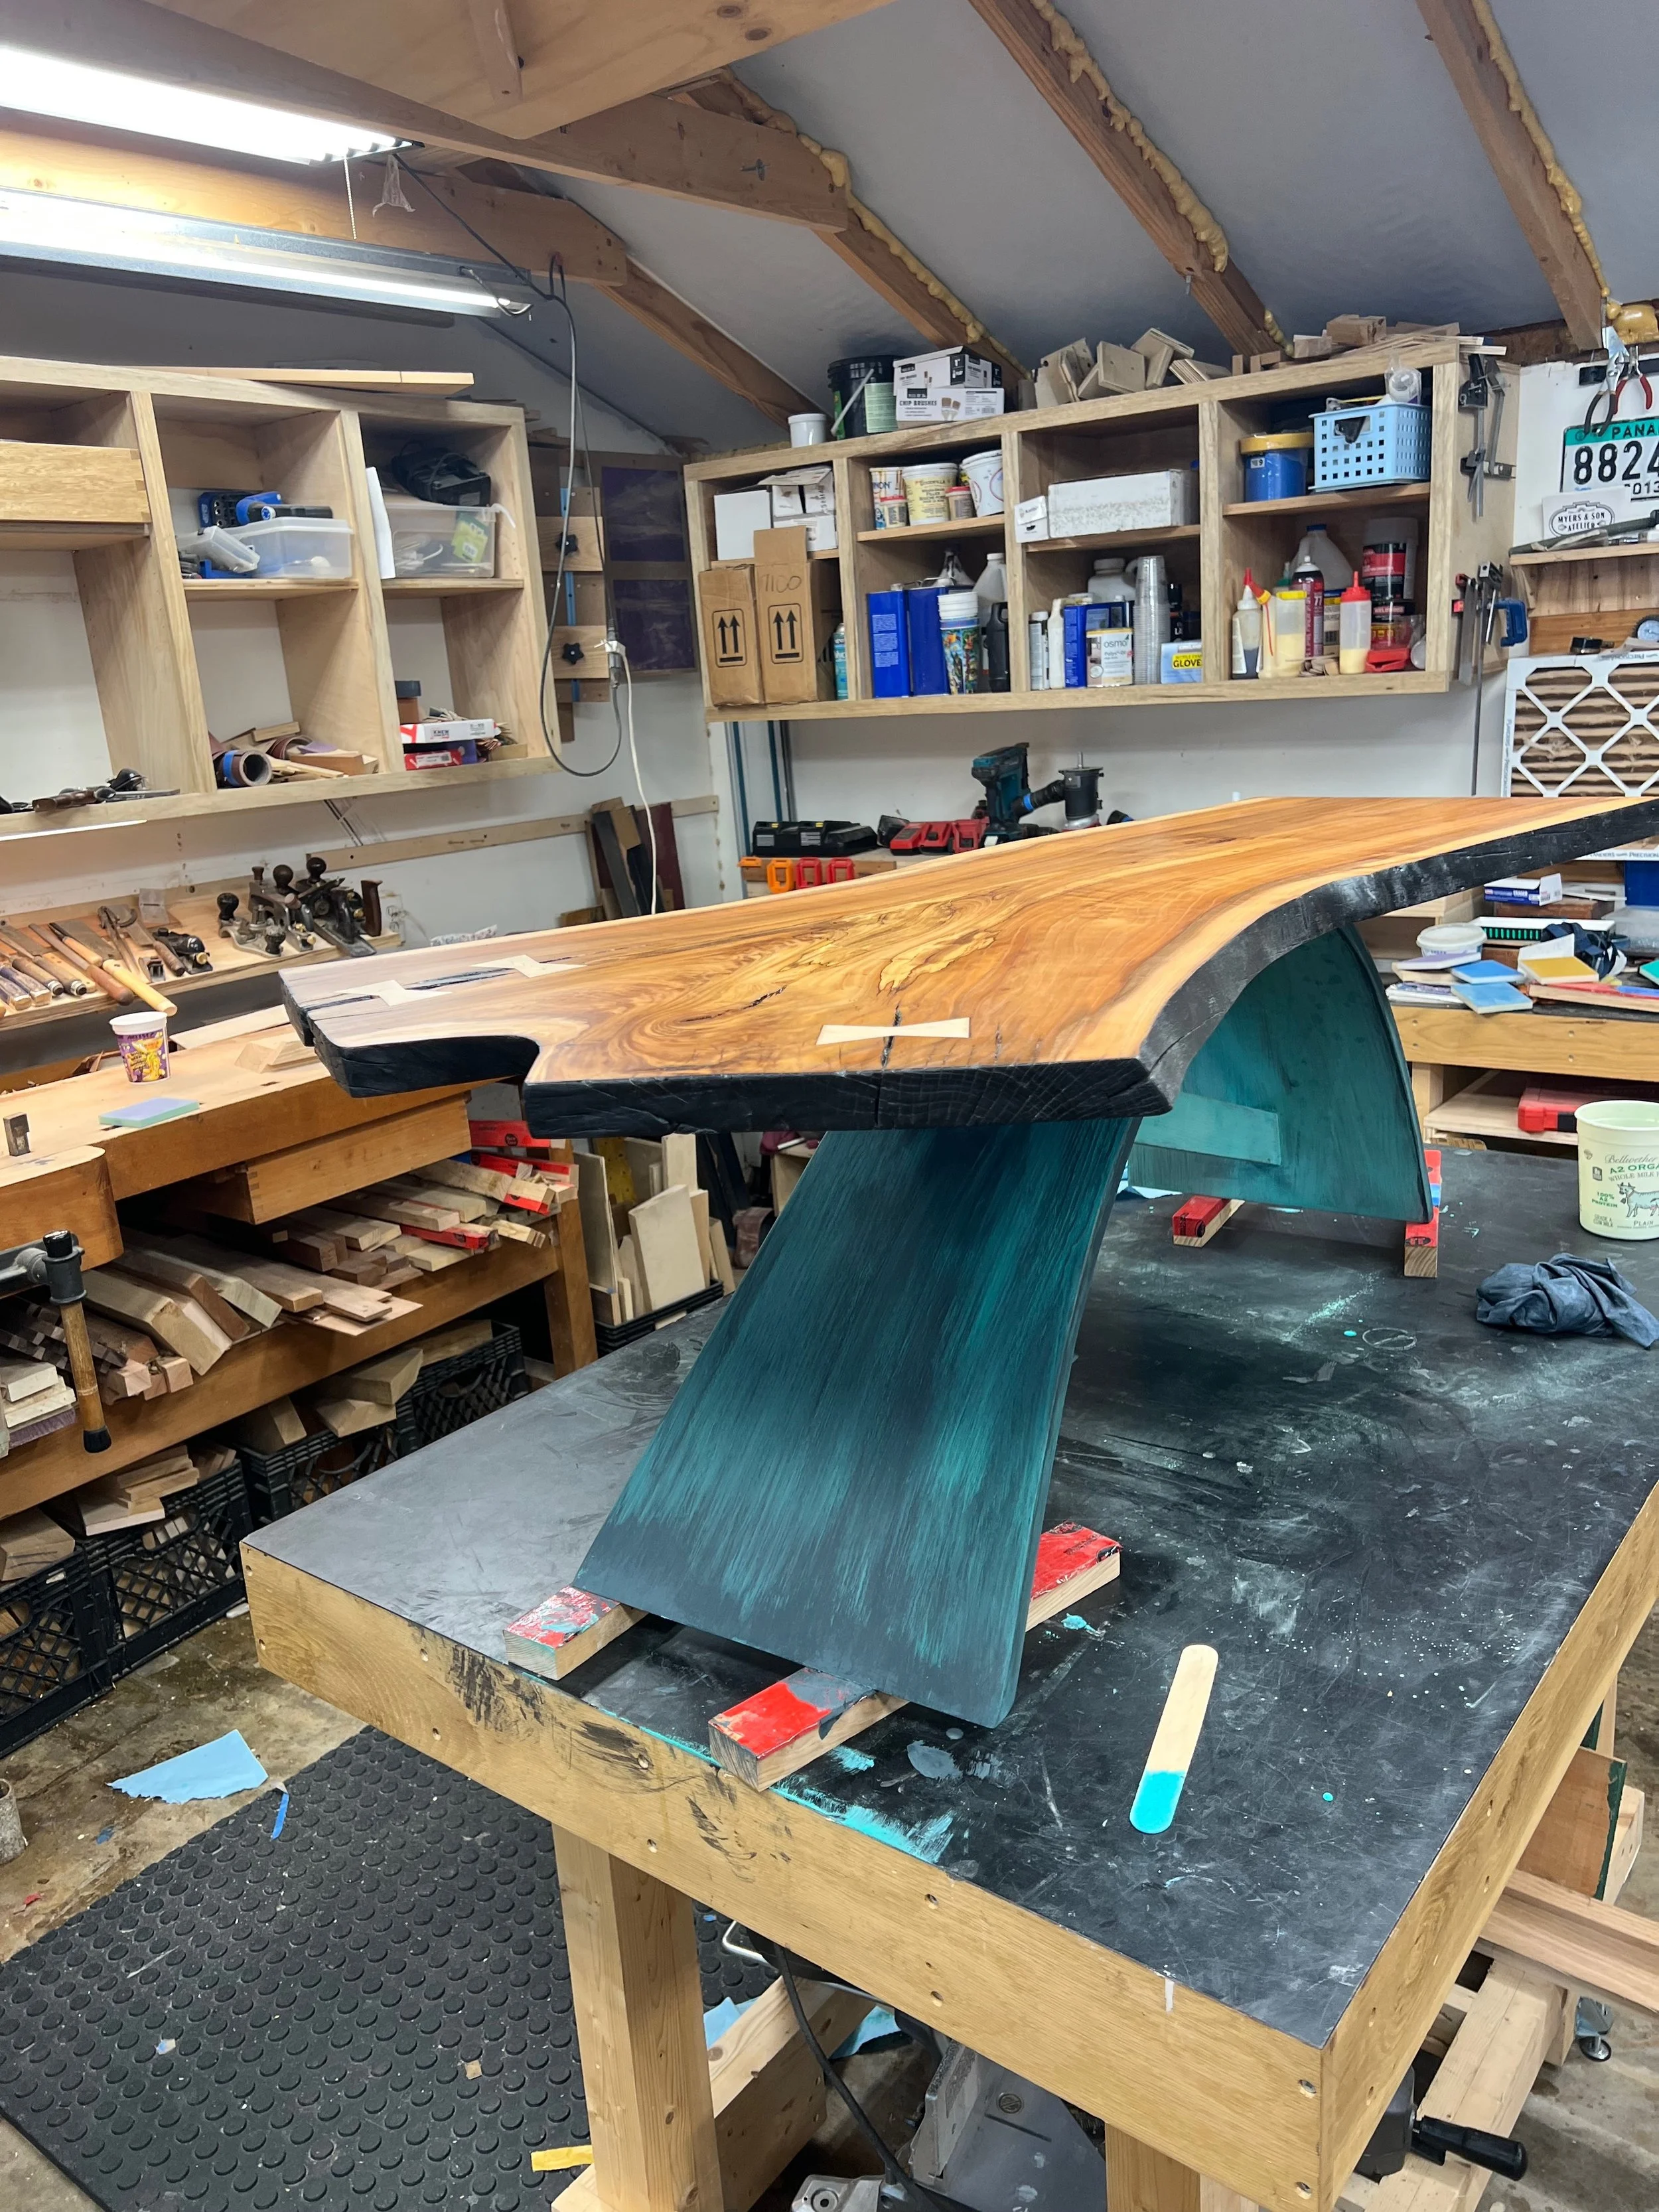
When I chose ash for this project, I knew I wanted to utilize its open pored nature in the final finish. At first I had been thinking of an all black base, but looking at the slab top on the base, I started to realize that I wanted some color to set it off. With the black edge of the slab, I think a black base wouldn’t have provided much separation. I ordered a few colors of milk paint, and got started doing some experimenting with a multi-level finish. What I ended up with was a sapphire-adjacent blue, with black undertones. The finish required 4 steps - a black coat that was wiped off while still wet, highlighting the open grain, a light blue coat, a darker blue that was partially wiped off and again highlighted the open grain, and finally a protective clear coat. It took a lot of experimenting to get it figured out, but I really like the final look when paired with the slab.

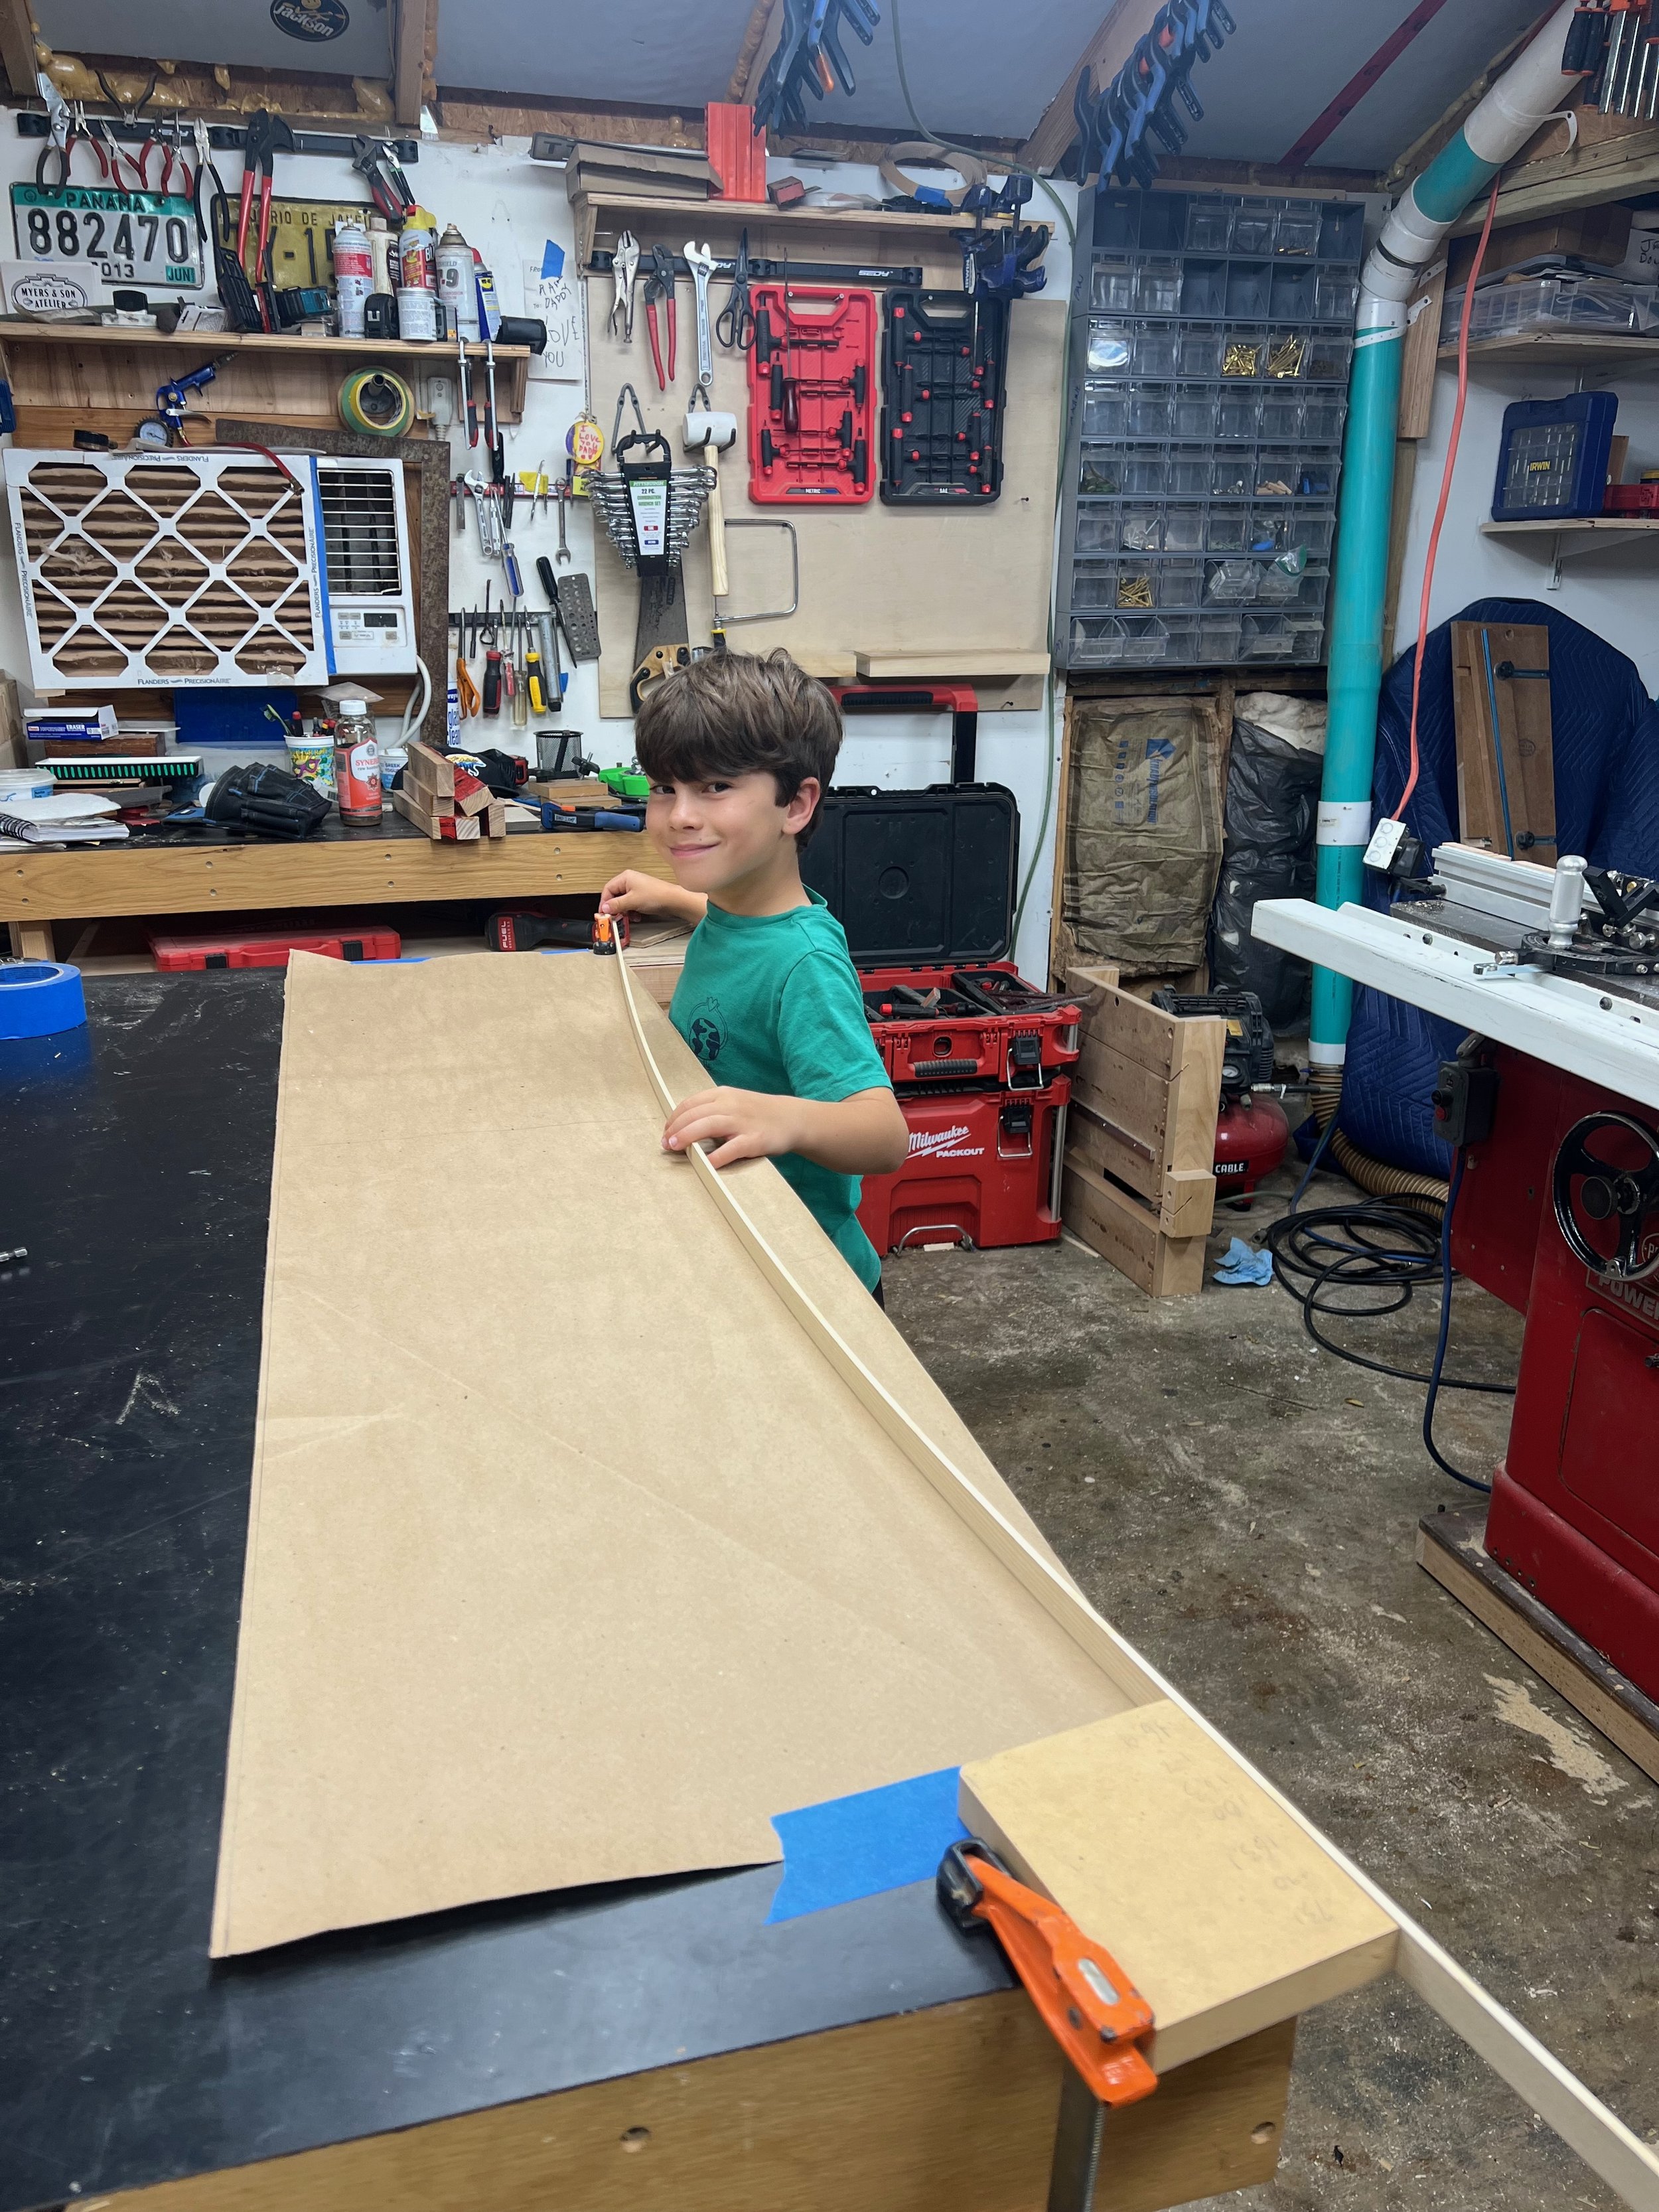
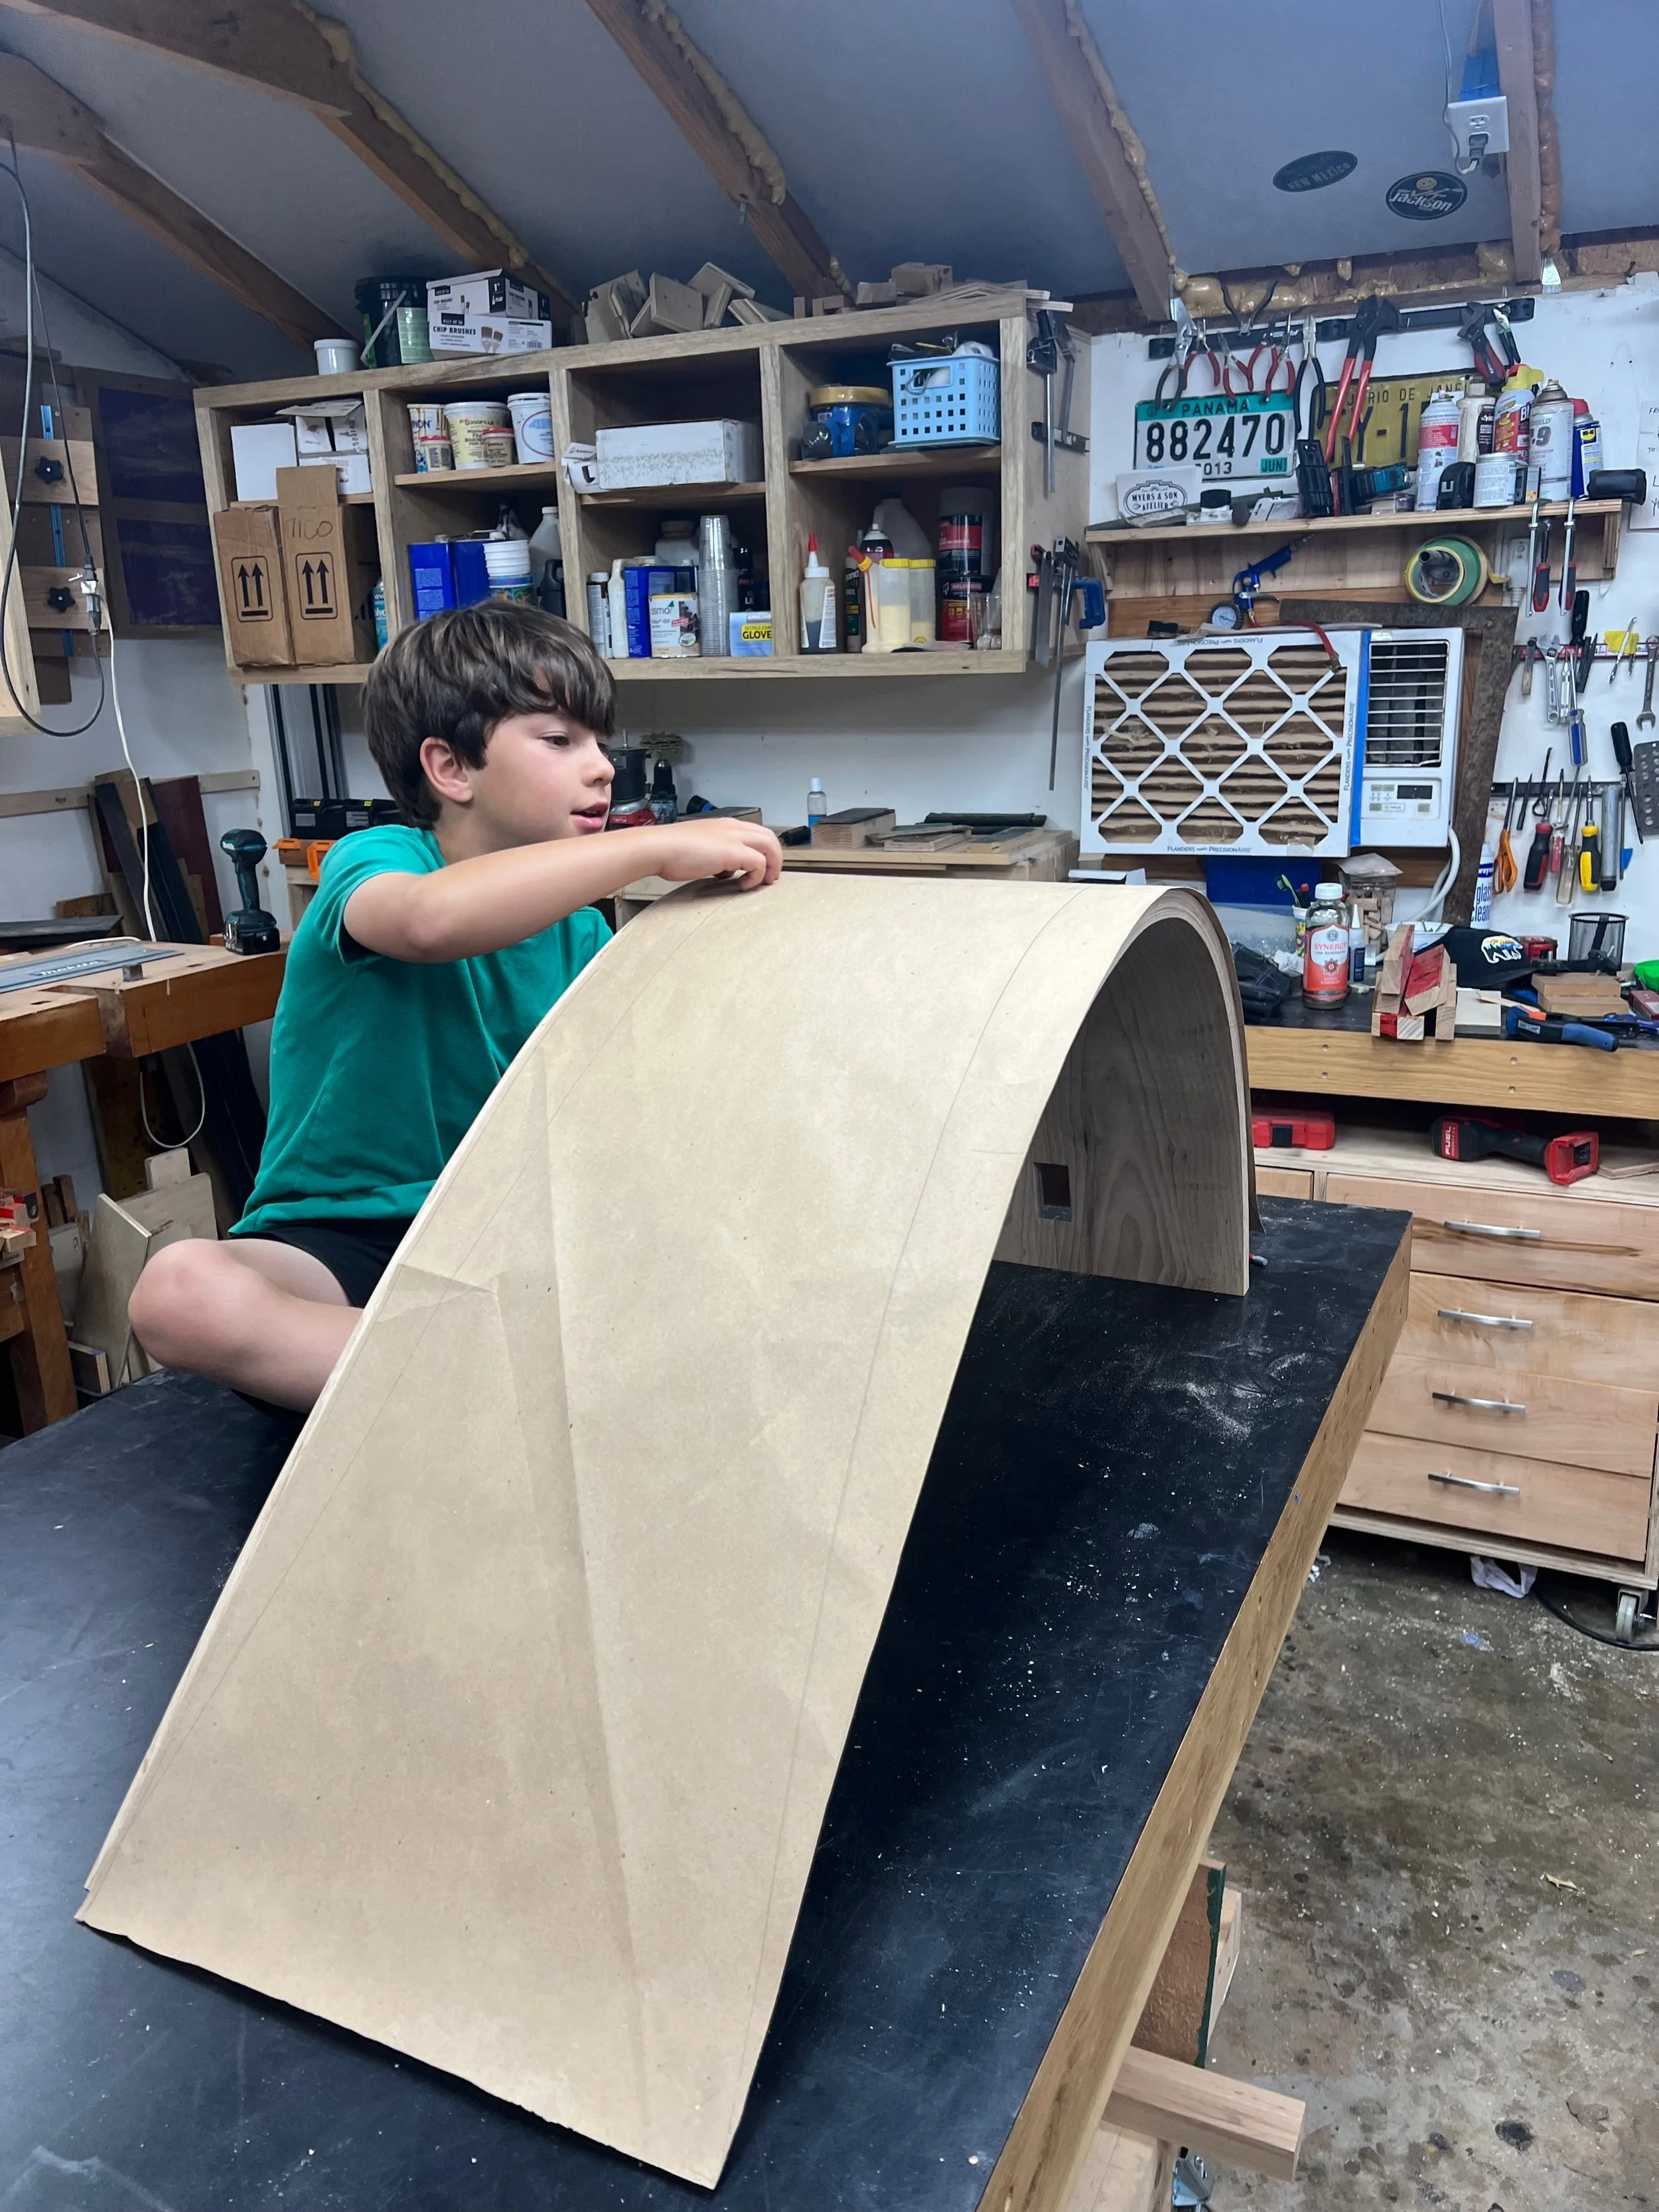
All in all, this was definitely one of my favorite builds to date. I love making stuff for friends, my son got involved and spent some time on it with me, it was great to use the slab I had put so much love into, and I got to try out quite a few new techniques along the way. There were the usual bumps in the road along the way, but Aaron and Kim were kind enough to be patient while I worked through it, and the end result is something I’m certainly proud of.
Finished pics: