Lacebark Elm + Laminated Ash coffee table Pt 1

First, a quick background on my wonderful clients for this build, Kim and Aaron Novod. We met back around 2008, when they hired me to photograph their wedding. We managed to stay in touch over the years, as we all started families. Kim and Aaron sadly had a traumatic event with their first son, Saul, which ended in his death after a prolonged stay in the NICU. Channeling their grief into purpose, they started a non-profit organization, Saul’s Light, which supports mothers and families in the NICU community and beyond. In short, they’re good people. Please check out their organization at https://www.saulslight.org/
The slab
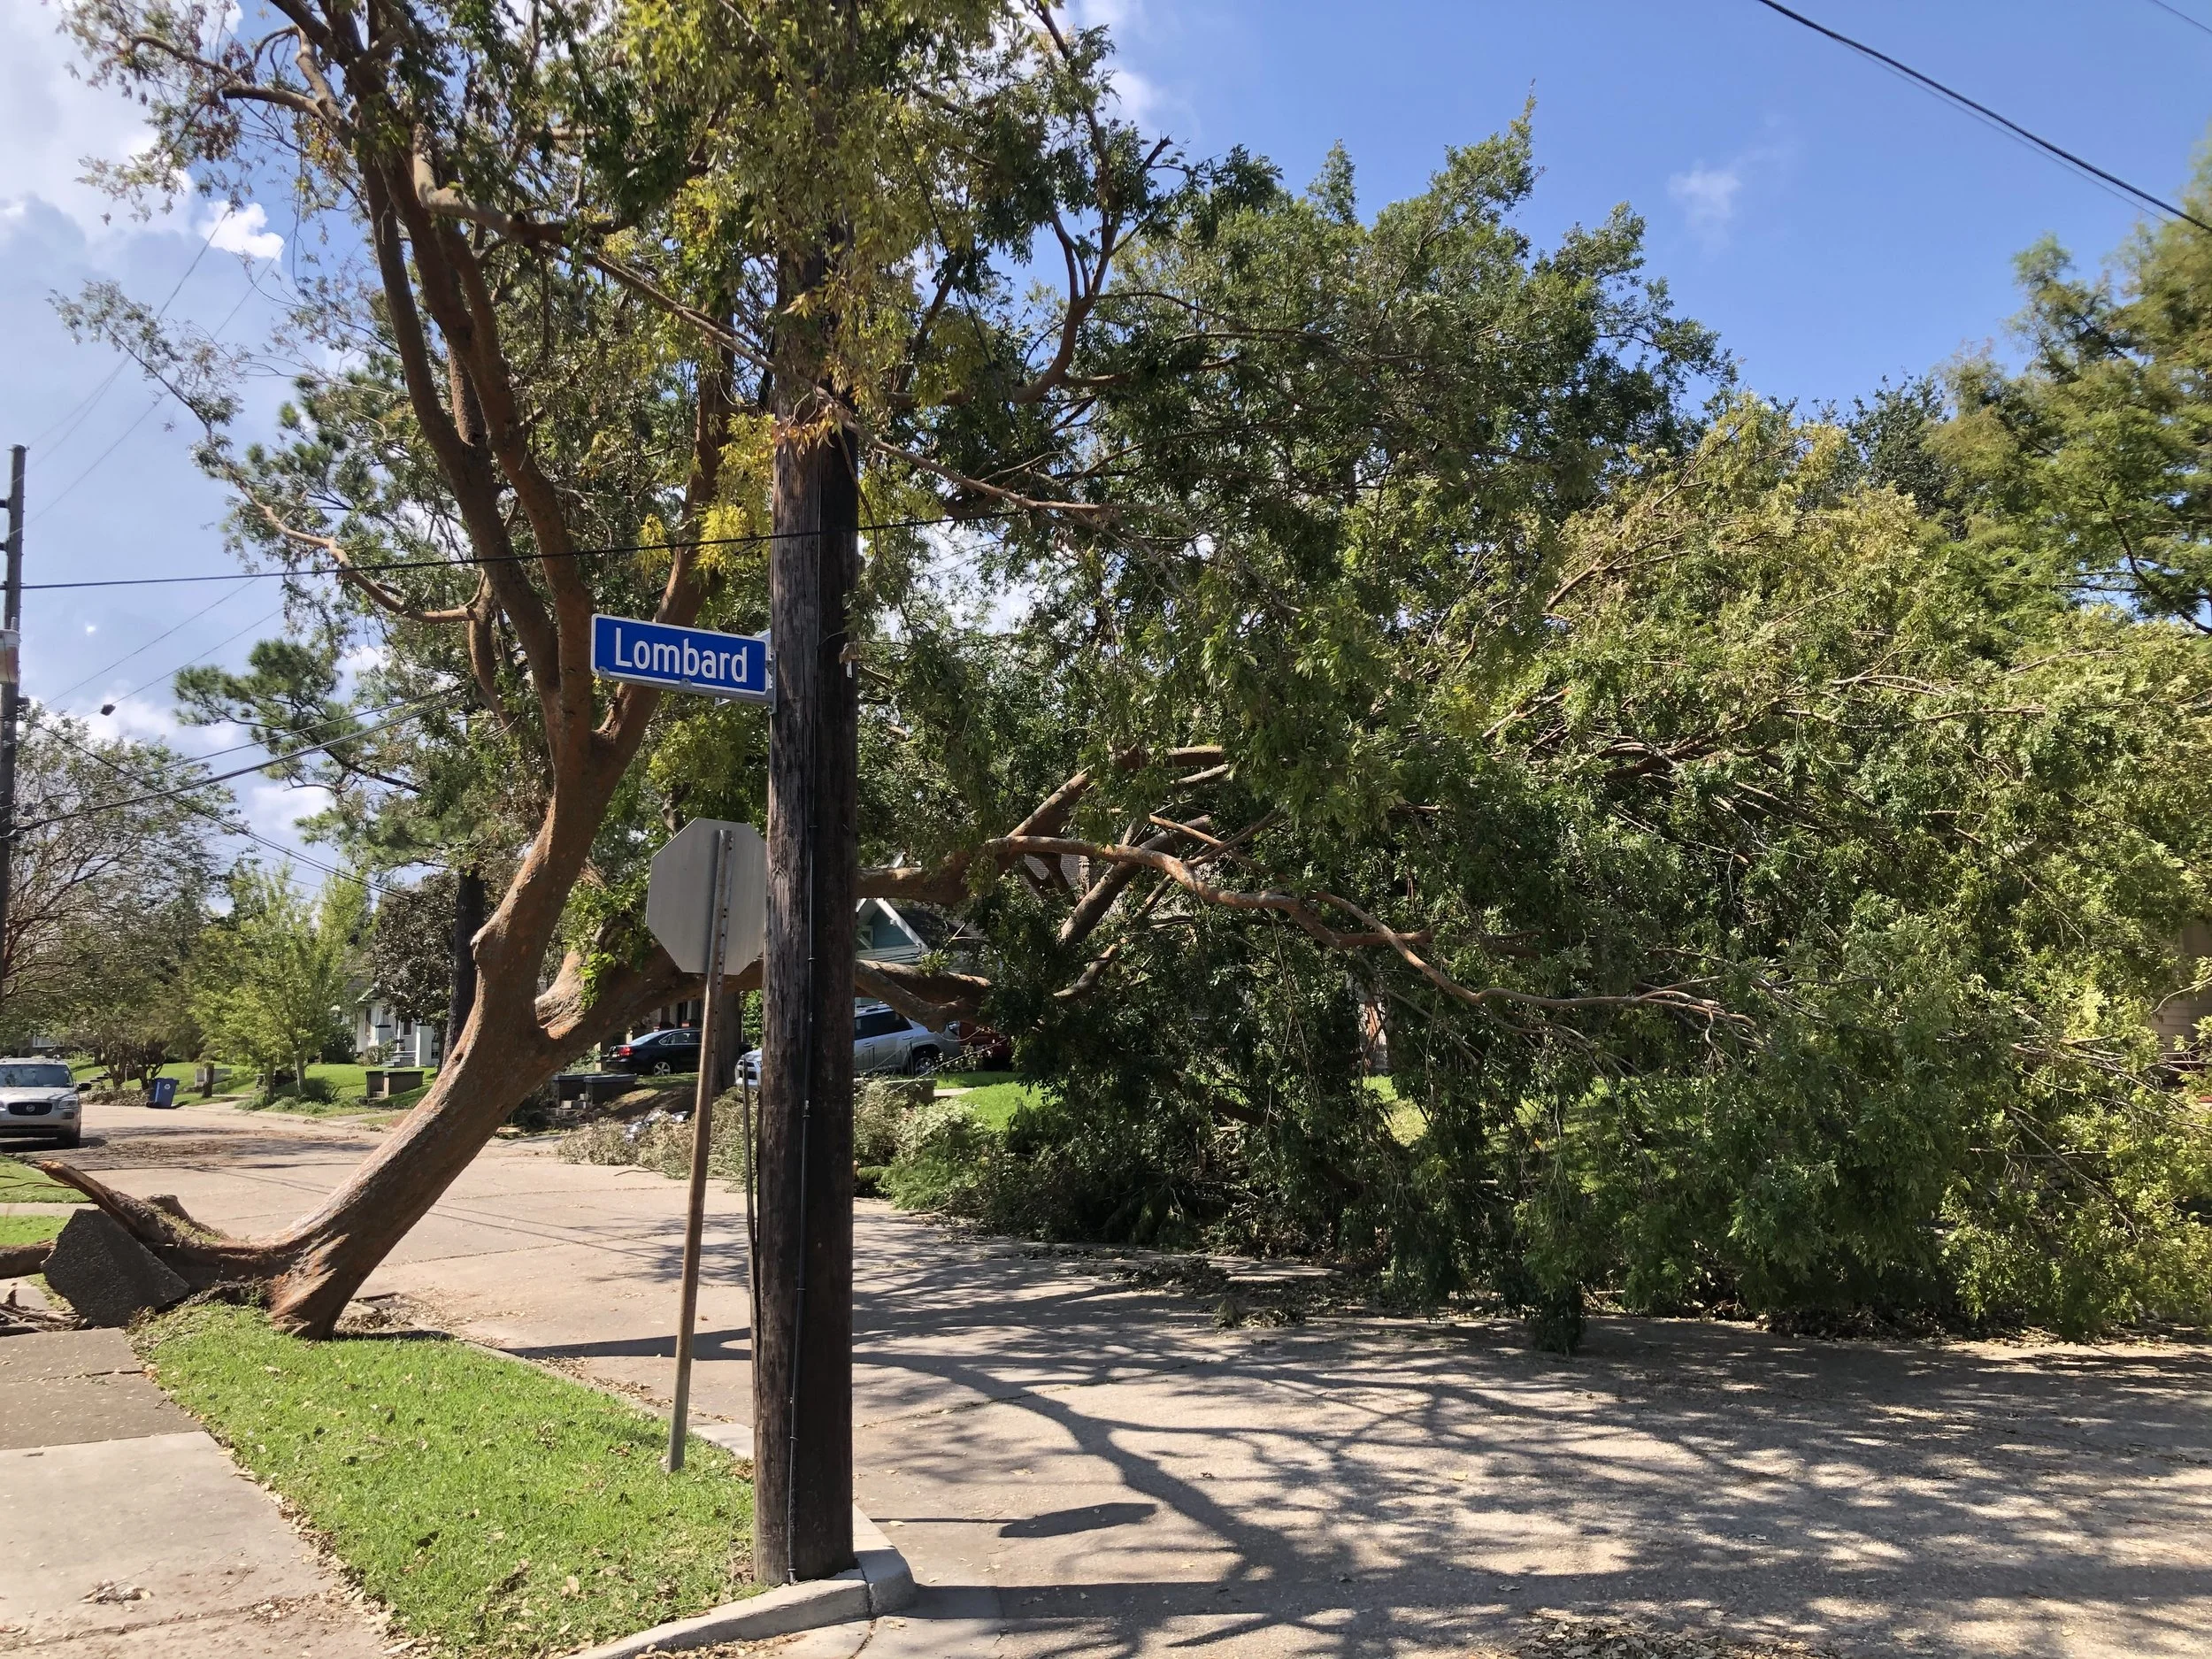
I was really just beginning my woodworking journey about the time that Hurricane Ida came through New Orleans. For the first time, I finally had a permanent shop for my tools, and was beginning to get more and more obsessed and excited about the prospect of building my space out and learning more about a subjetct that I had been interested in for years. We evacuated north for the storm, and when I returned, brand new chainsaw in hand, I noticed a badly leaning tree on the corner of our block, which had clearly taken out some of the power wires.
Lacebark Elm
Downed as a result of Hurricane Ida
At some point over the next day or two, contractors came and cut the tree into pieces, and while passing by, I noticed it had a beautiful color to the freshly sawn ends. Curiosity struck, and with some research, I was able to figure out that the tree was a Lacebark Elm, commonly planted as an ornamental in the city, and a species that is used in other parts of the world for furniture making. At that point, I didn’t yet have an Alaskan Mill, but it seemed inevitable that I would end up with one, so I went ahead and brought home some of the bigger chunks of the tree, enlisting my buddy Cesar to help drag the biggest part of the main trunk home with my truck.
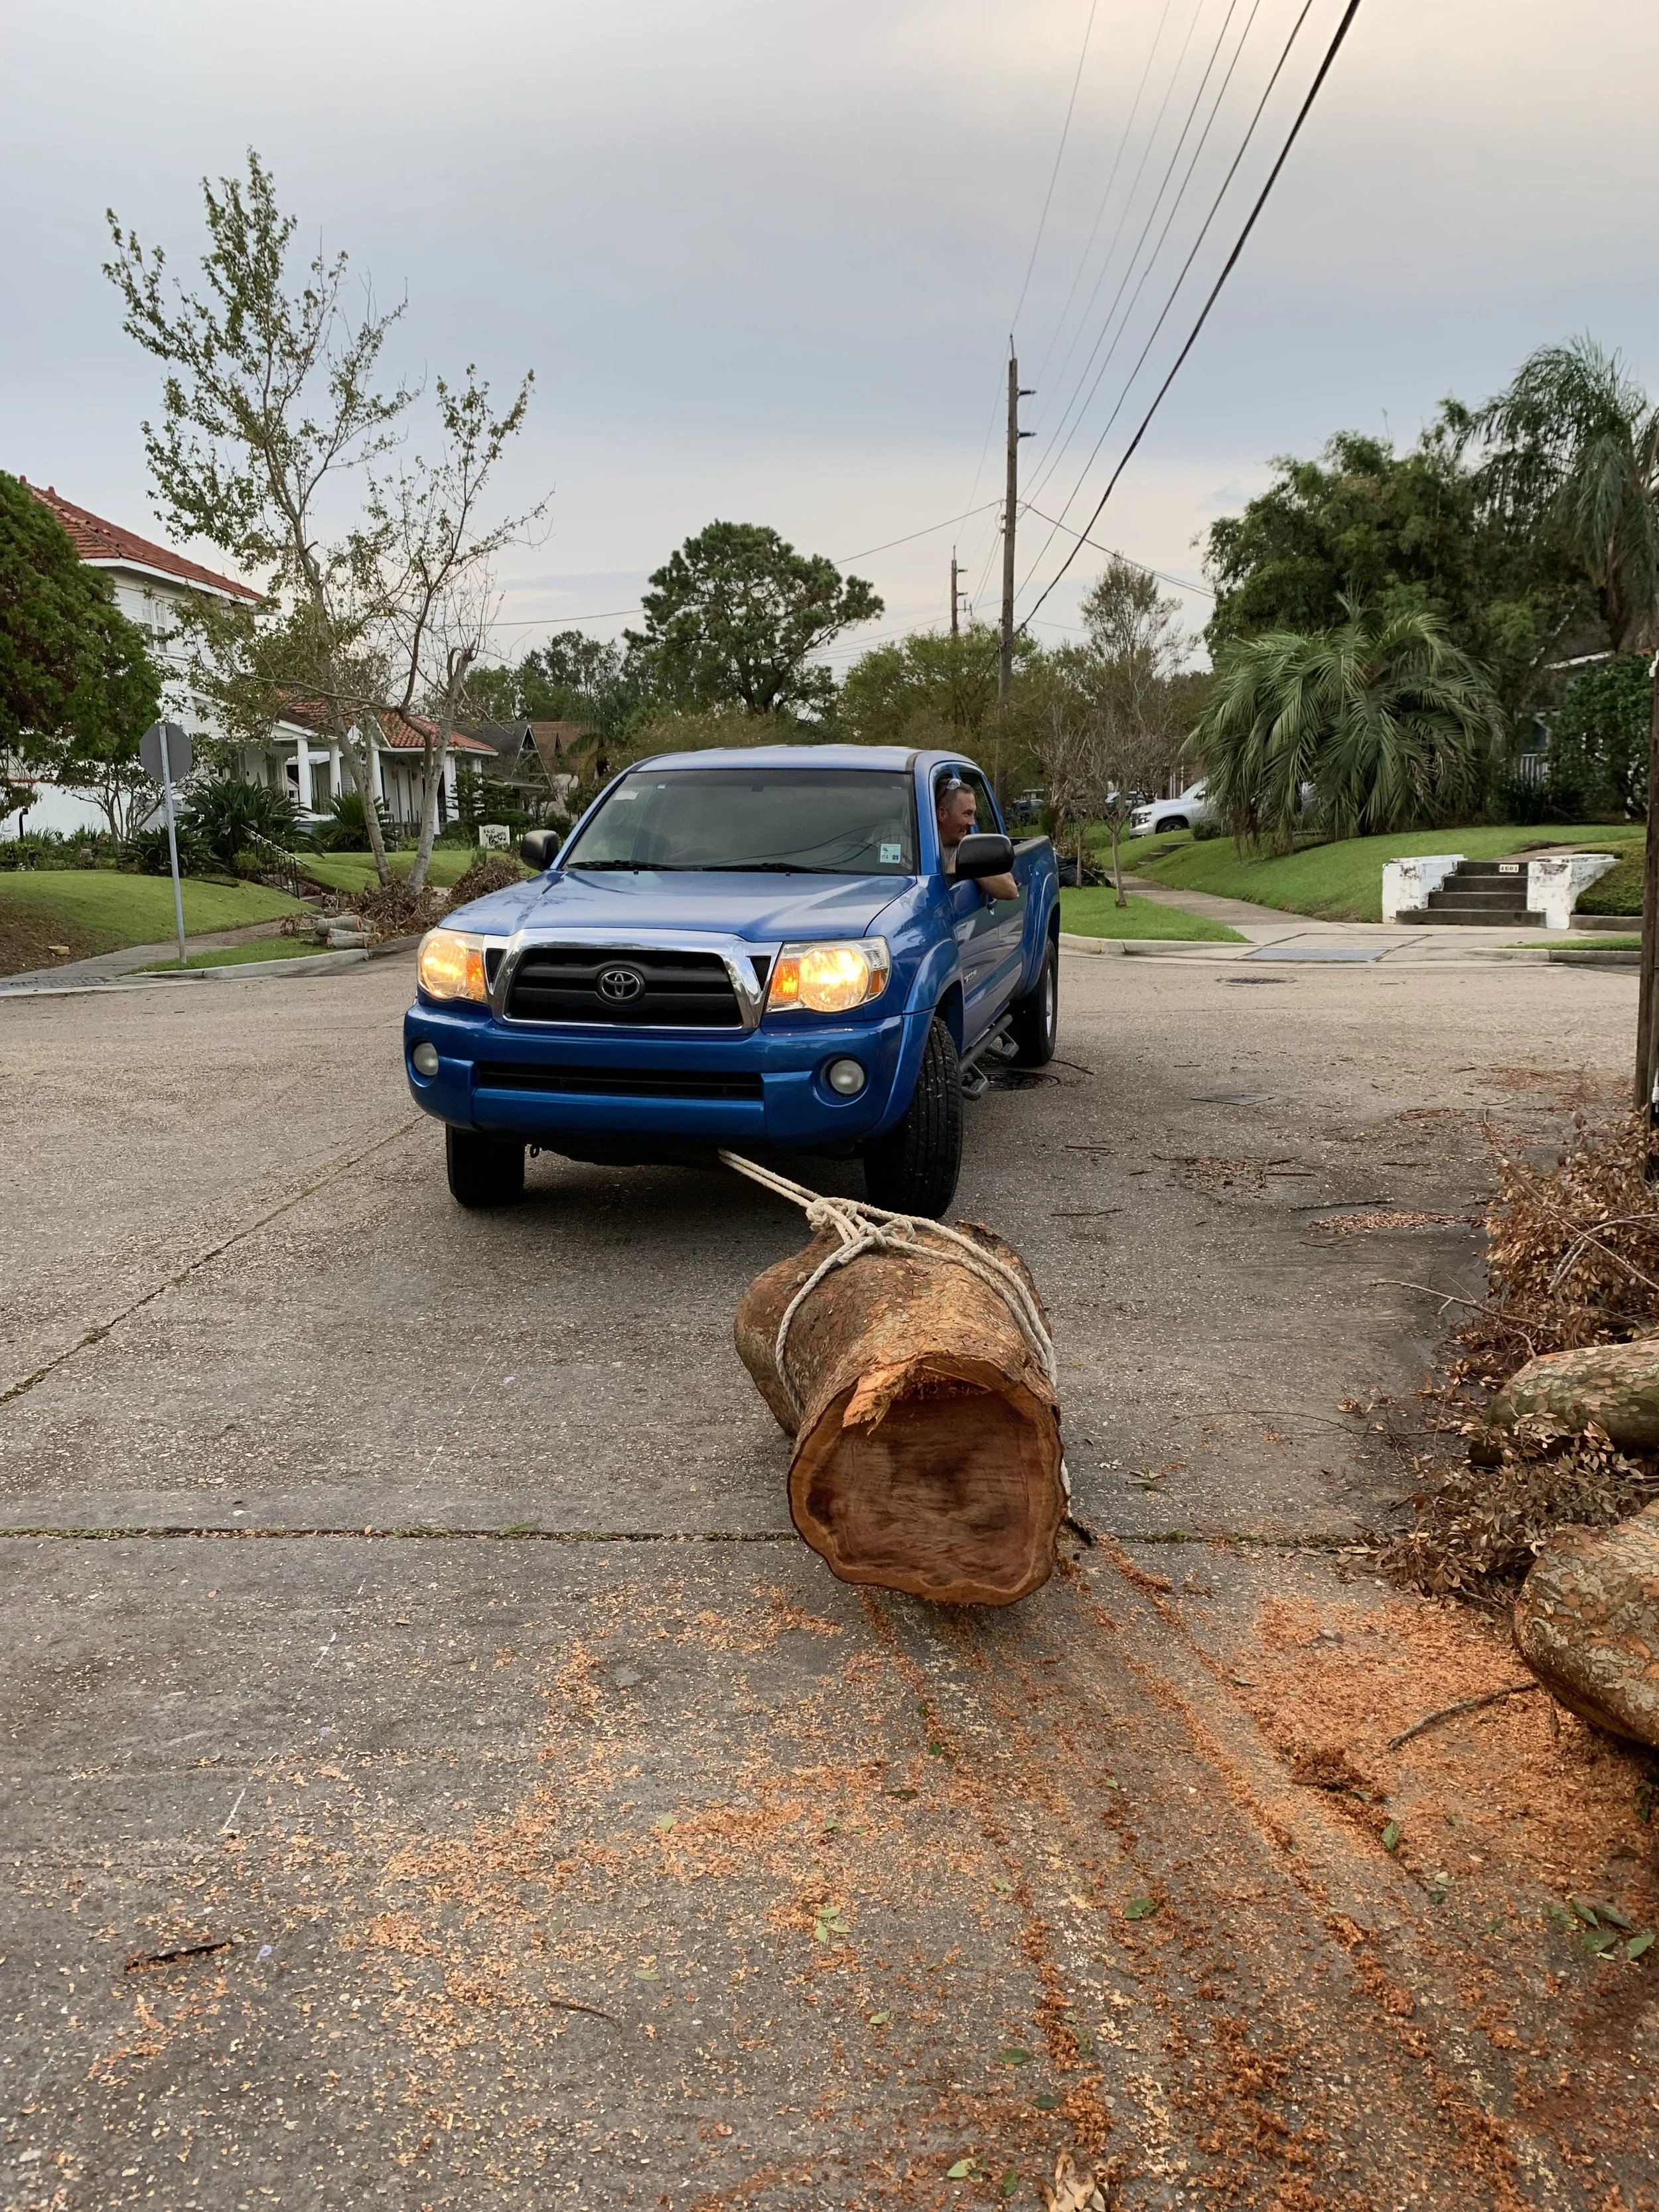
Dragging the main trunk home
At that point, I was stumped (see what I did there), and it was a good long while before I ended up with a chainsaw milling setup wide enough to handle the main trunk. Eventually, having secured a Stihl MS881 with a 41” bar, I sliced it up and set it aside to dry, first air drying it, then passing it through a homemade dehumidifier kiln that I created out of rigid insulation.
The first slab I used from the flitch was used for a table for my buddy Robert Bostick. As I had done with quite a few other projects, I burned and burnished the edges, filled any defects, and finished the top, in this case with Arm-R-Seal. I enlisted another friend of mine, Arlyn Jimenez to fabricate a custom base for it, and he did an amazing job of that. You can see a photo of that first table below. Check out more of Arlyn’s work here

When Aaron and Kim asked me about making a coffee table, I was happy to have found an ideal scenario in which to use another one of the slabs from that log. The amount of blood, sweat and tears that went into that process of sawing and drying the lumber means that it is, for all intents and purposes, invaluable to me. I can’t think of a much better fit than using it for some old friends, and in the process working out a style of laminated base that I’d had in my head for quite a while. As with most slab projects, I started out the process by flattening it with a router sled, taking out whatever twisting and cupping had been introduced in the sawing and drying process.
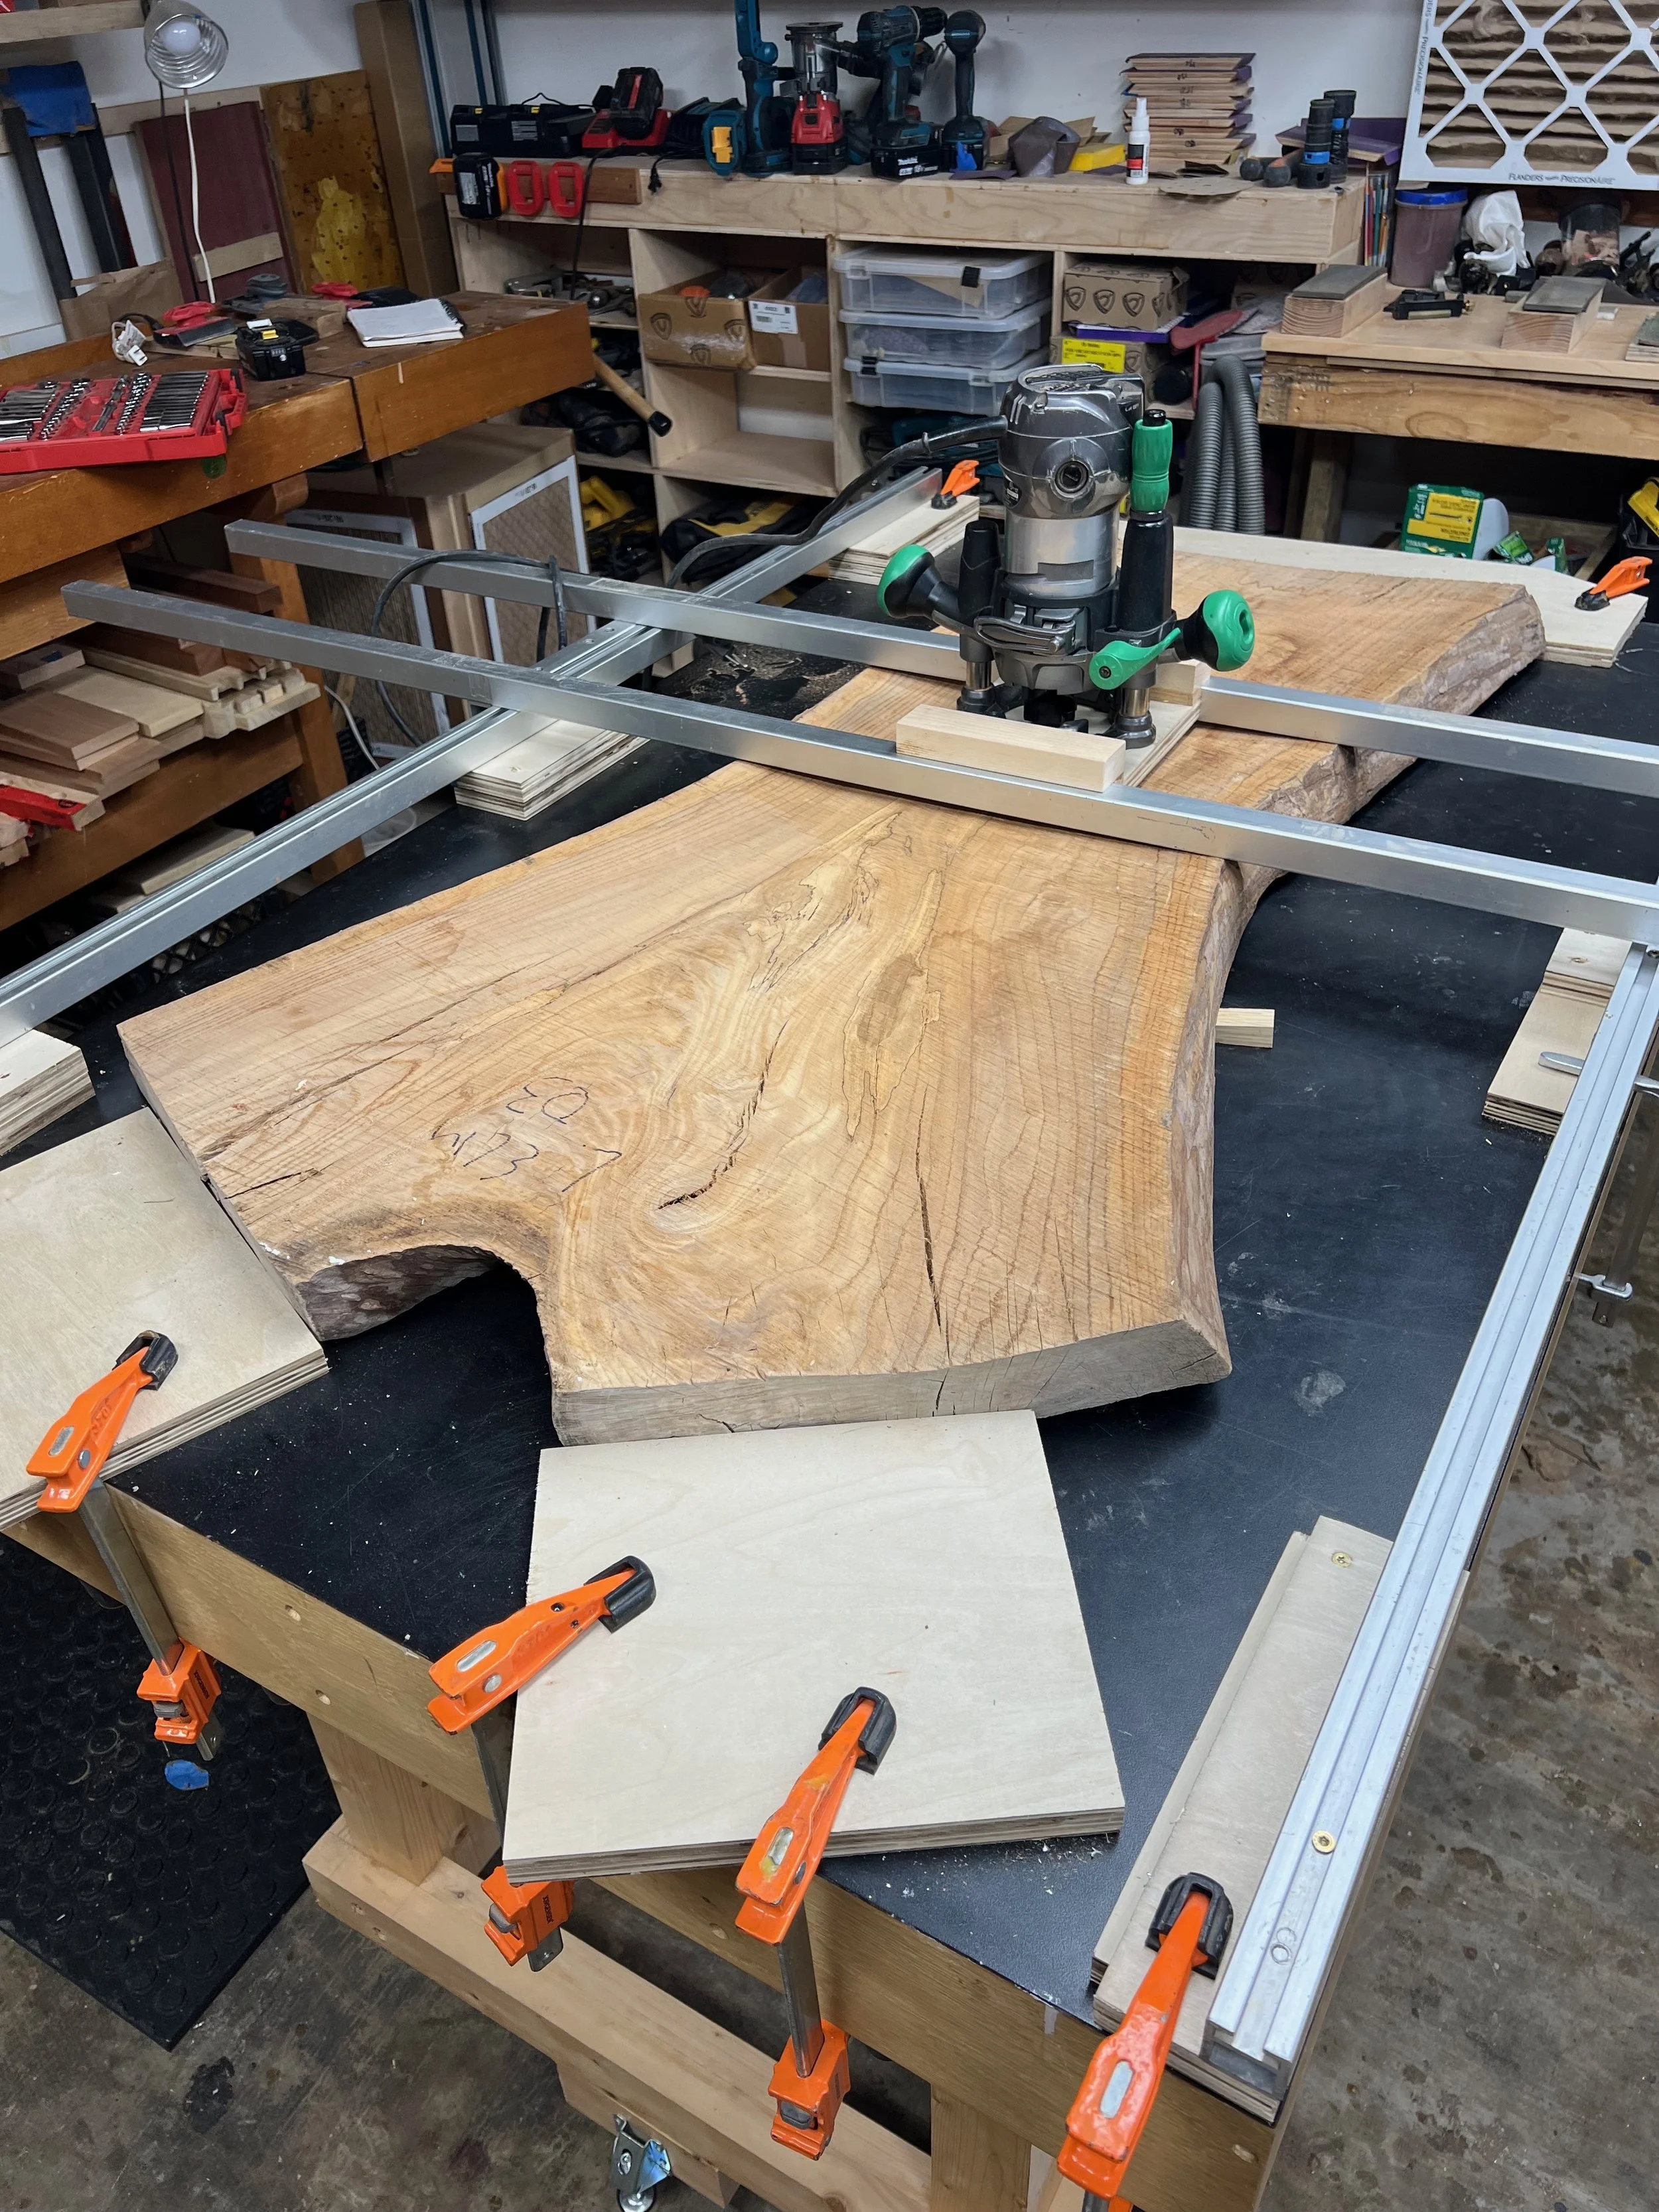
Router sled setup for flattening. The aluminum rails are from my Granberg alaskan mill, but work pretty well for this. I also tried out a new flattening bit for this, with carbide cutter inserts that can be rotated and changed.
After flattening the slab, I burned the sides with a propane torch, and then brushed and burnished them. This is a fairly involved process that I have gotten pretty decent at over the years, to the point that it is sort of an element of my style with live edge stuff. The process requires quite a few passes of burning and burnishing to get something that is going to stand up to any kind of use/abuse. Each pass with the torch is followed by brushing off the char, and burnishing the remaining surface with a softer brush, non-woven pad, or any combination of those. Depending on the species of wood, the degree to which it’s been burnt, and the final effect you want, using a hand brushing with plastic brushes combined with a drill mounted plastic brush can usually get the end result you want. I typically also go ahead and apply one coat of whatever finish I’m going to use just to the edges, so that as I move the piece around and finish the top, the char doesn’t cross contaminate the top.
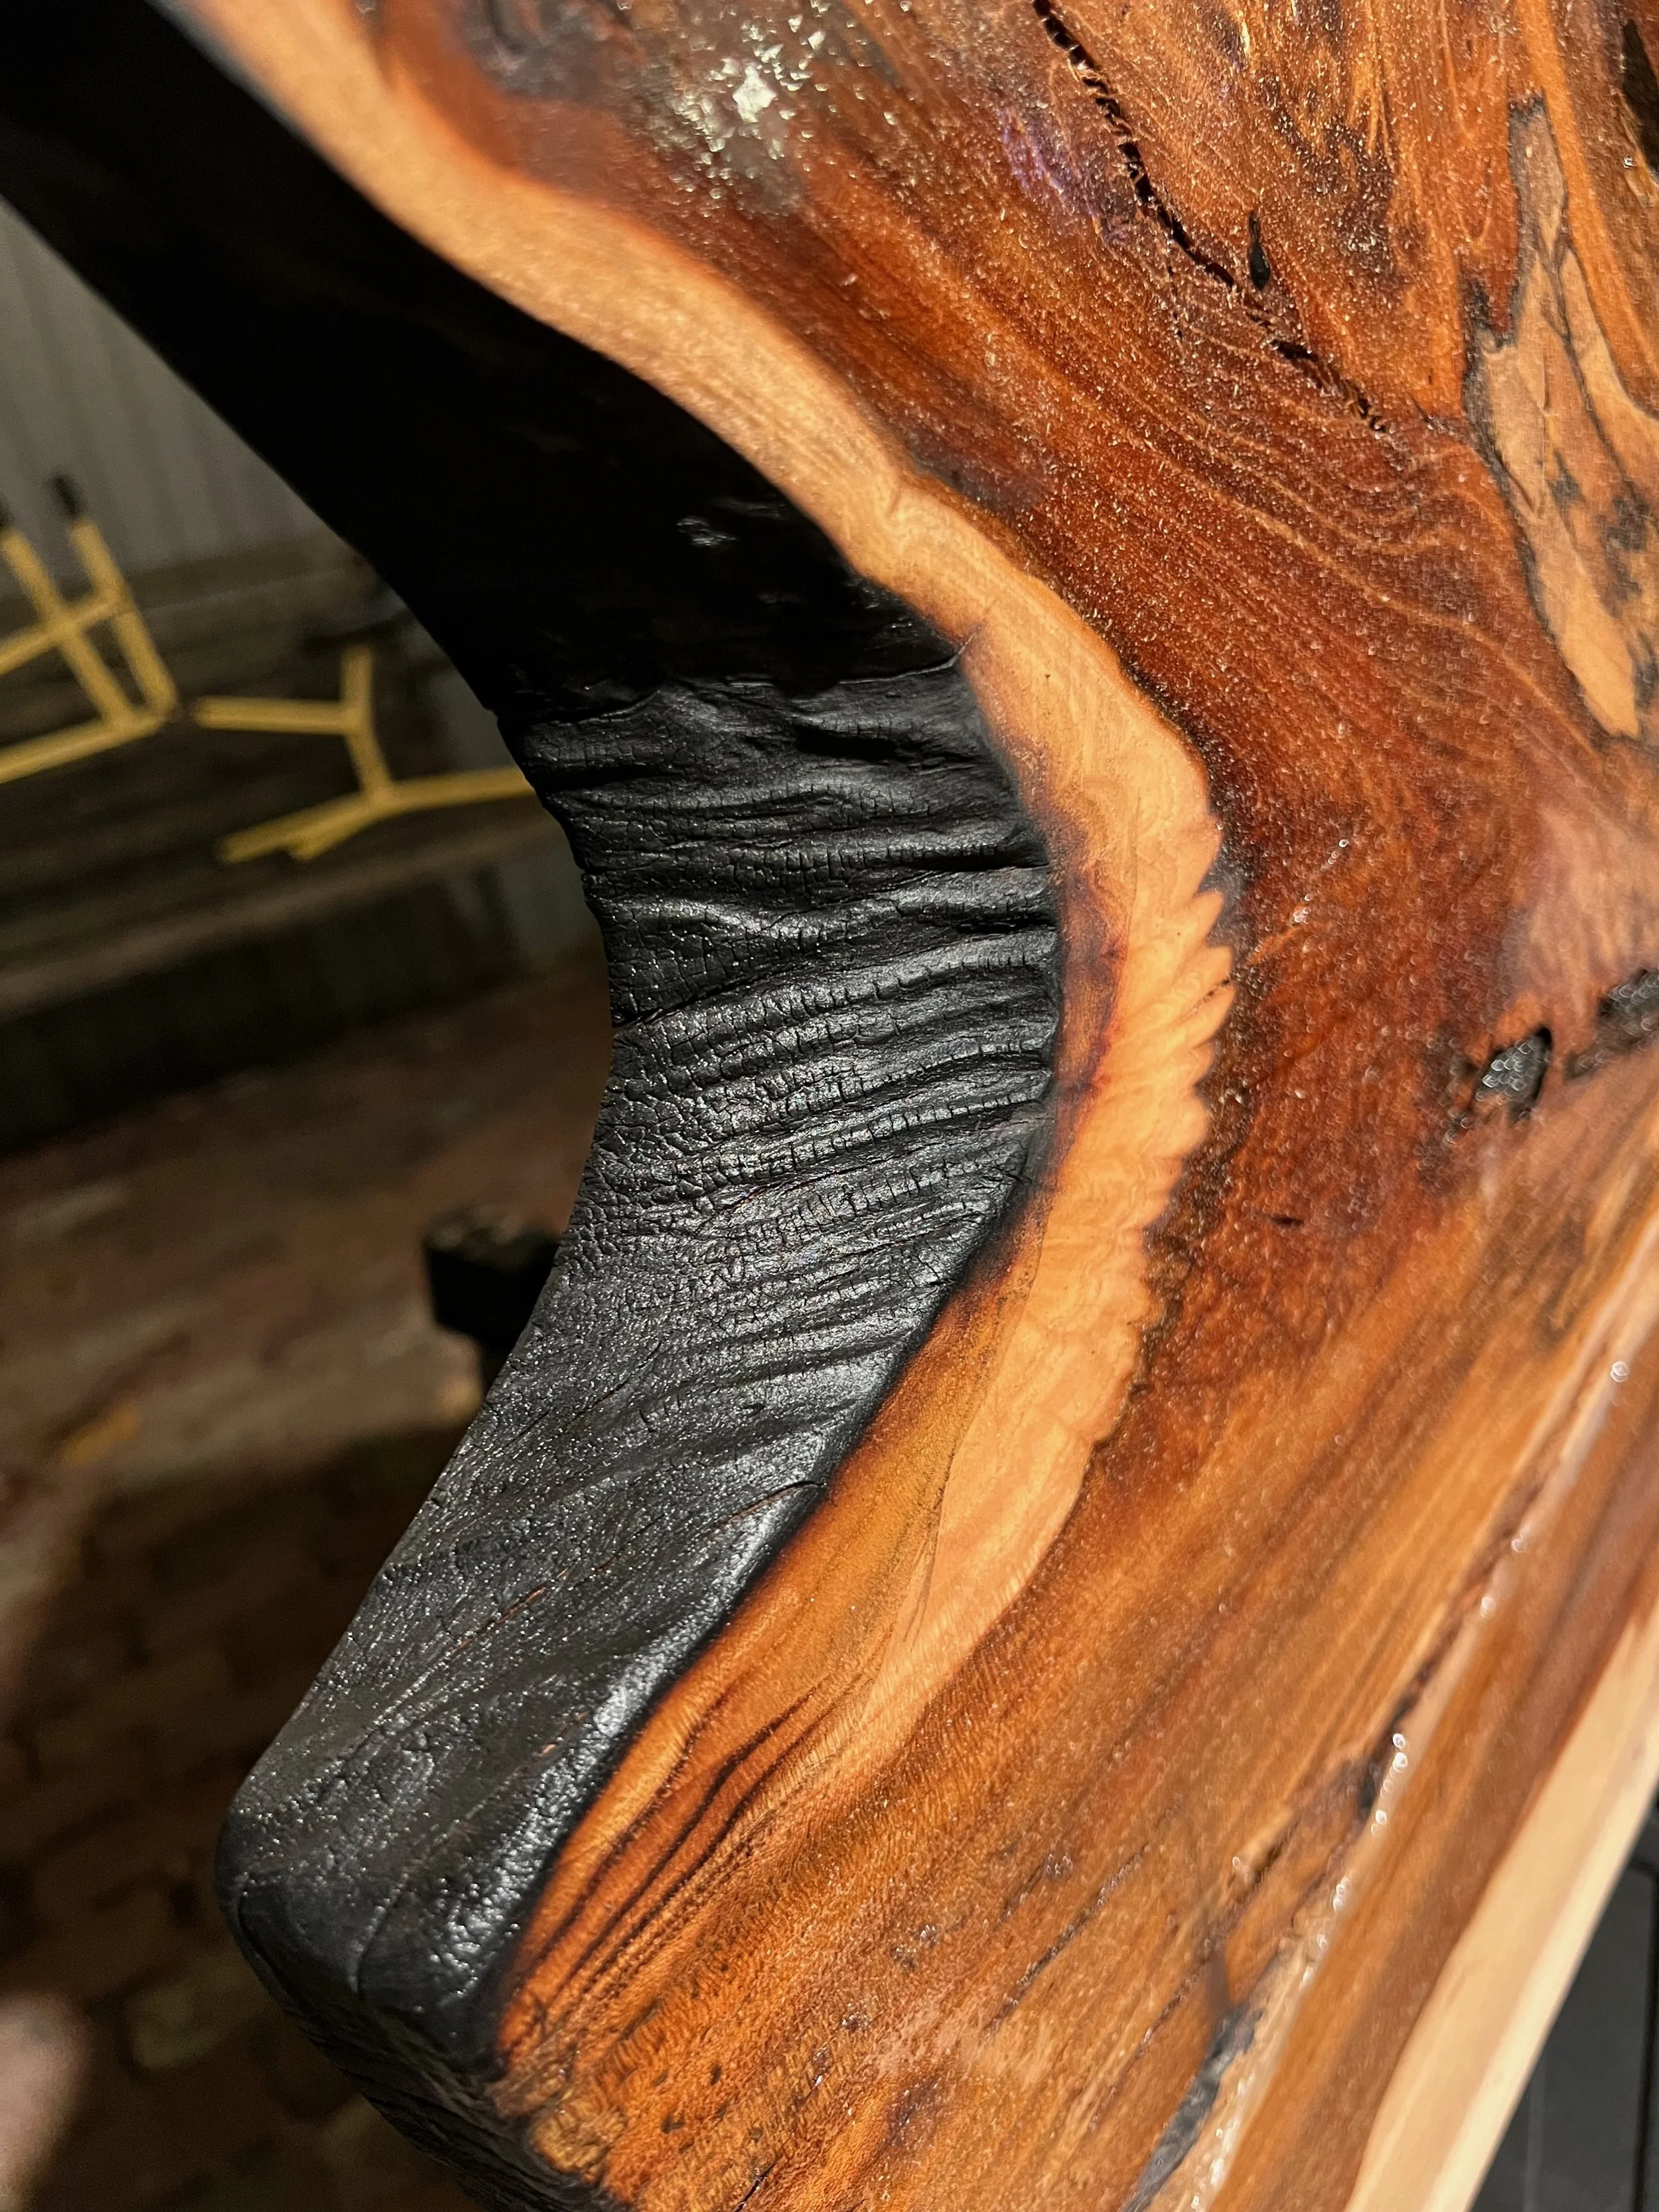
Charred and burnished edge
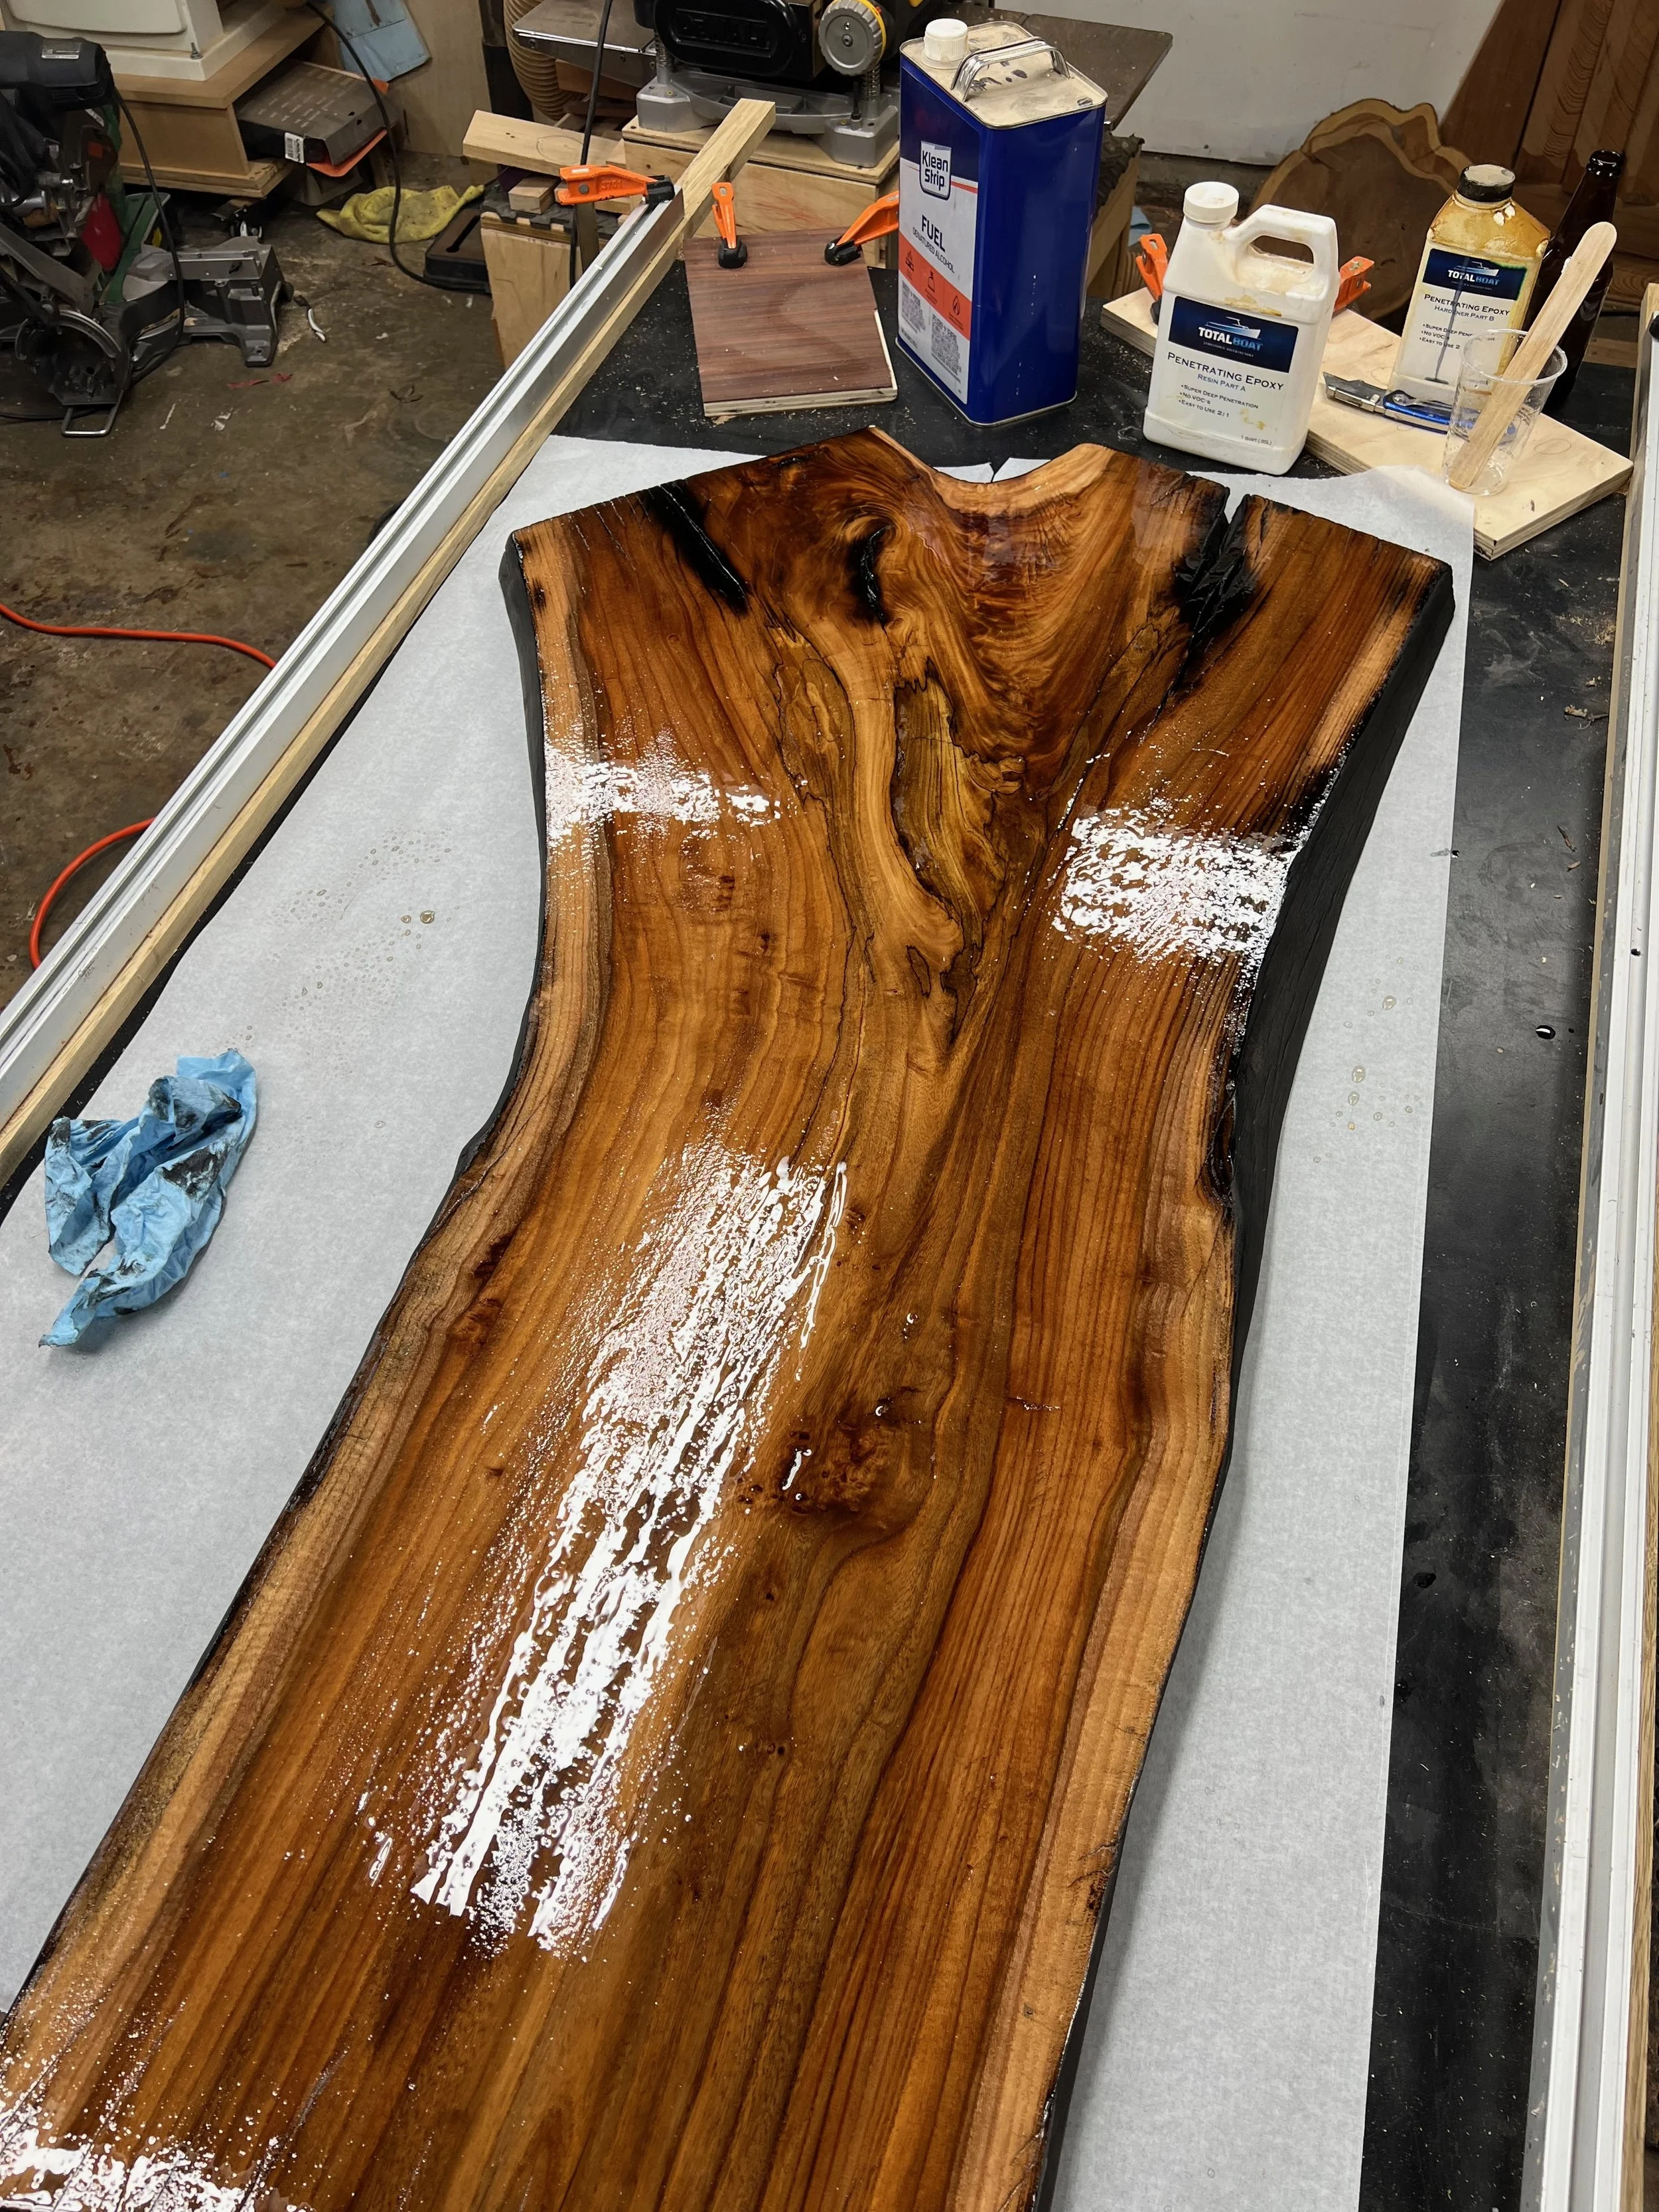
This particular slab had a good amount of punky, almost spalted wood in it, and after I had completed the burning/burnishing, I moved on to stabilizing that portion. I didn’t want the epoxy I would be using to run down into the bigger cracks in the slab, which I had also burned - there would be no way to sand or remove the epoxy. To keep that from happening, I used a bit of caulk to create dams around the cracks, to keep the epoxy out. I then mixed up some epoxy, thinned it slightly with denatured alcohol, and warmed it a bit, to make it as thin as possible, letting it penetrate into the punky portions of the wood. I’d love to tell you all that it took one pour, but as is typical with woodworking, it took vastly longer than I had planned or hoped for, requiring multiple pours to get to the point where it stopped soaking up the epoxy. When that process was at long last finished, I once again whipped out the router sled, and did a small final flattening, to remove the leftover epoxy.
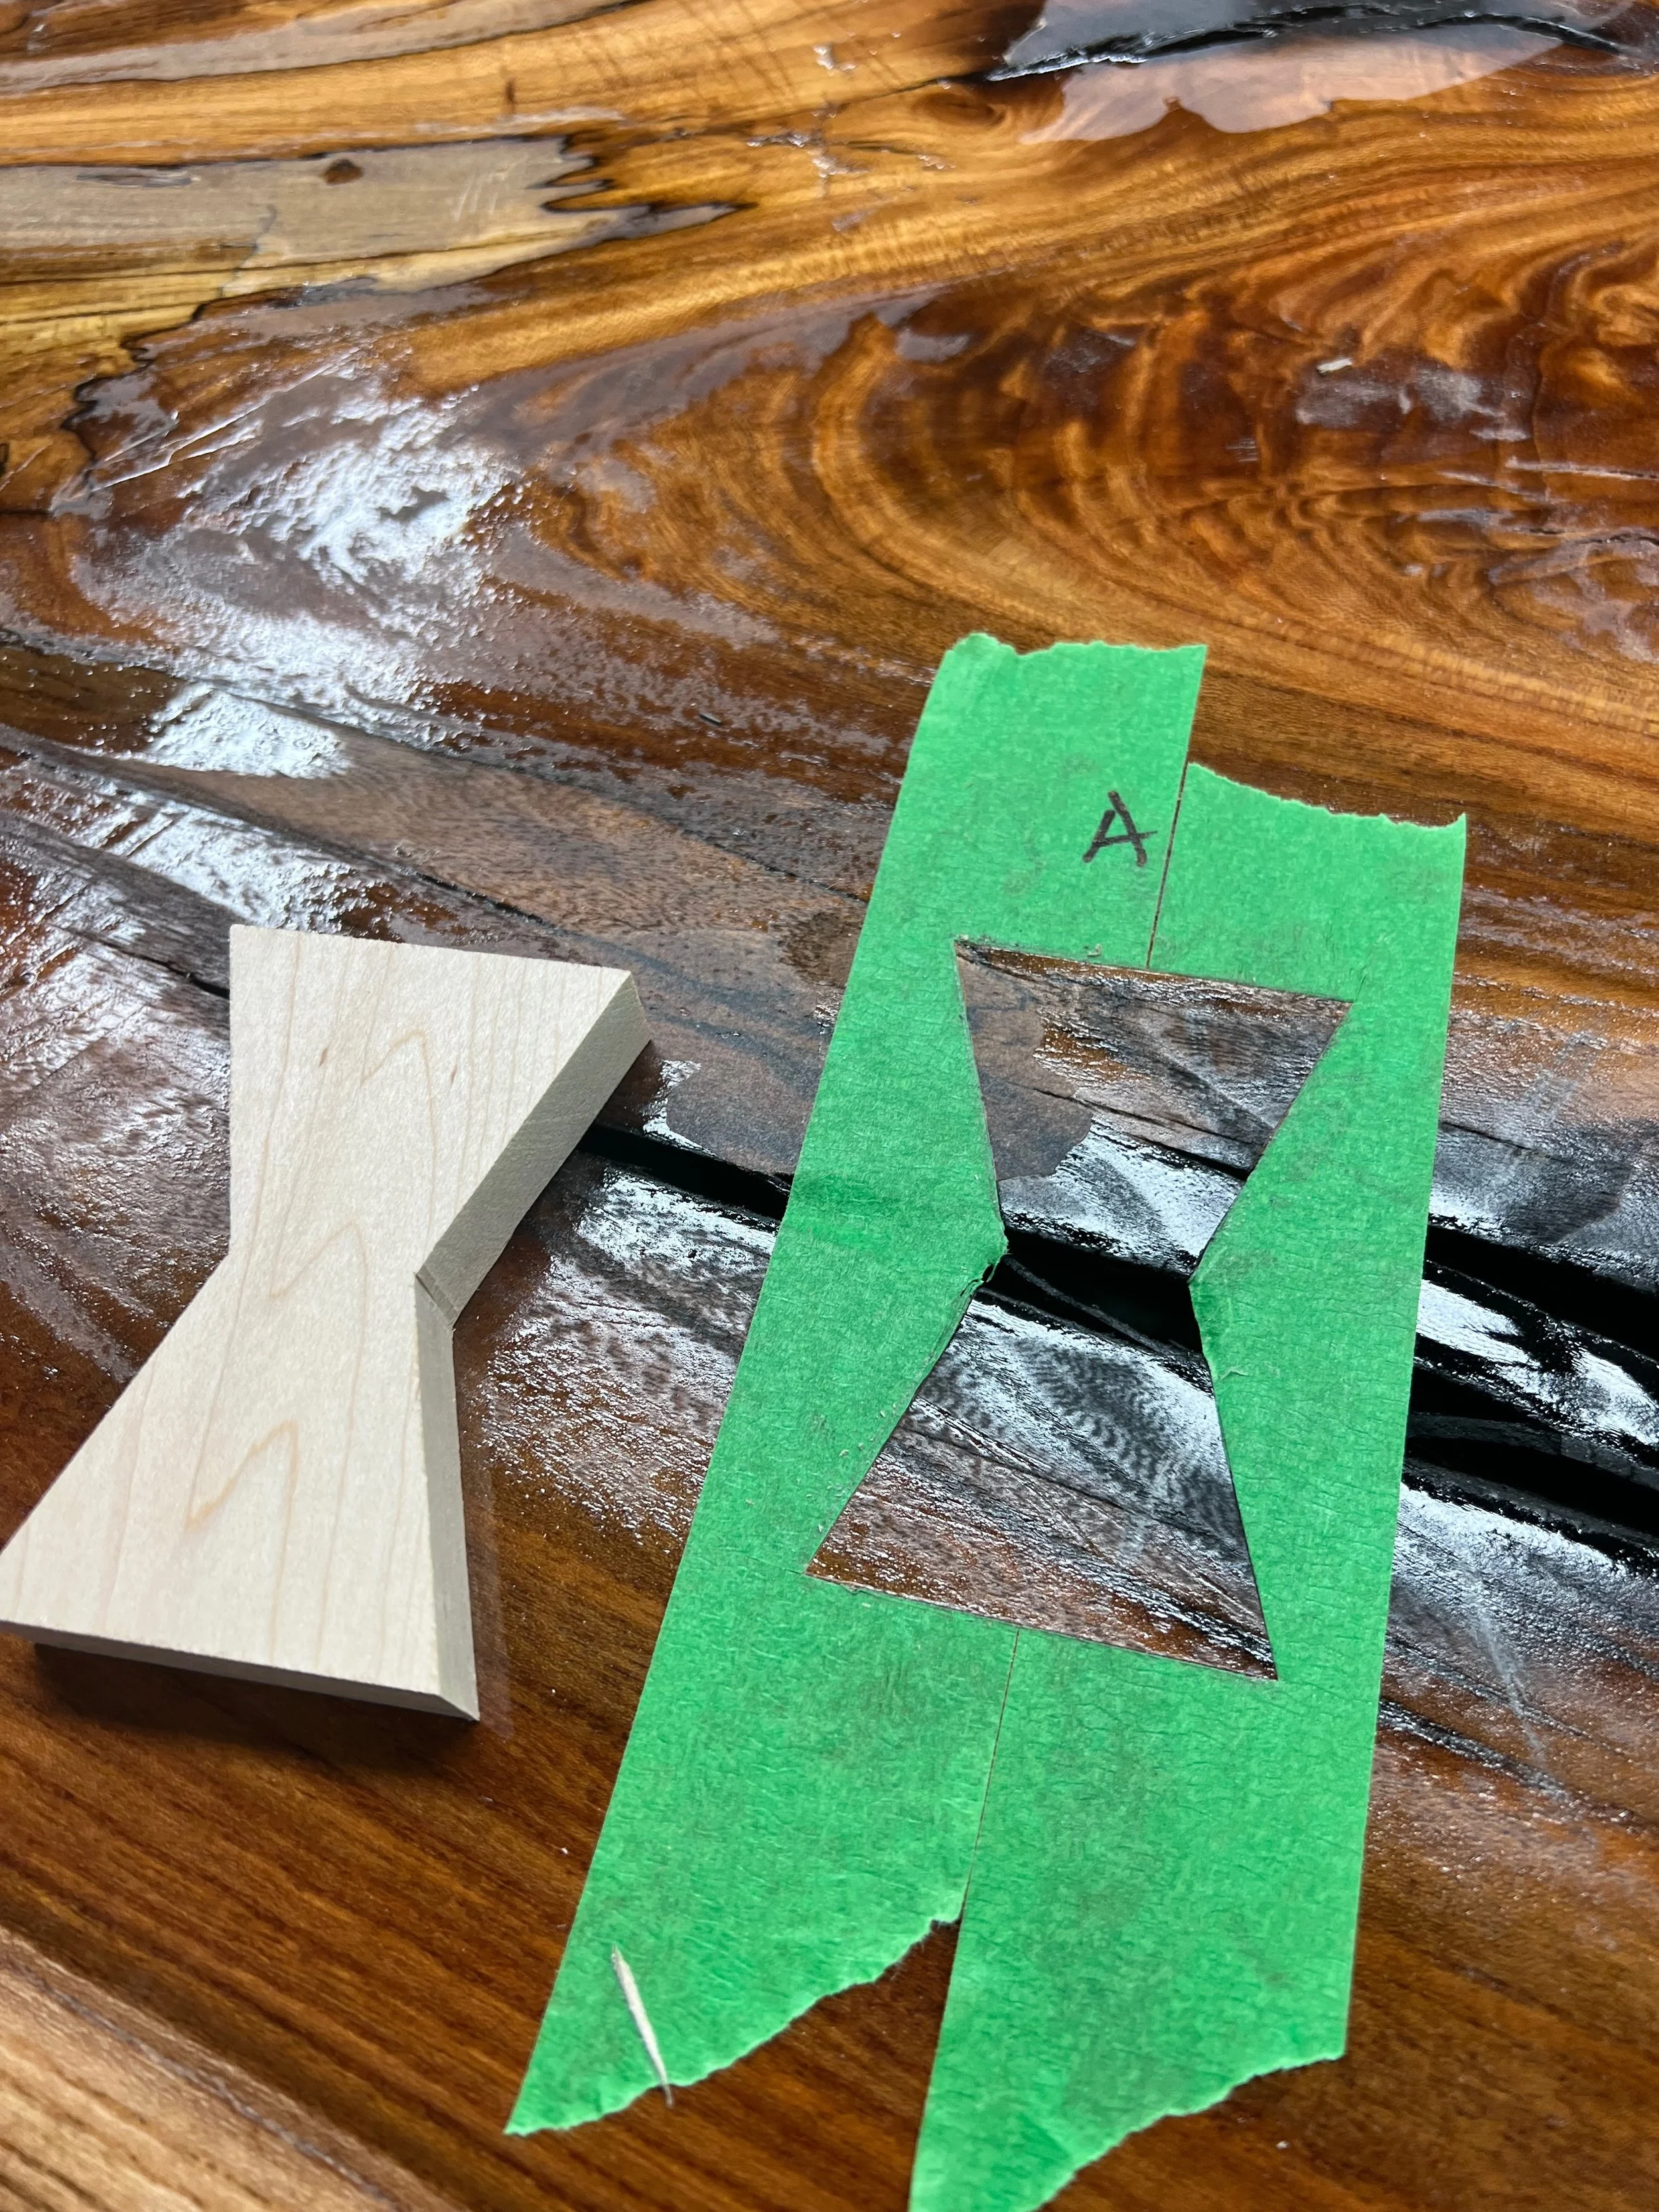
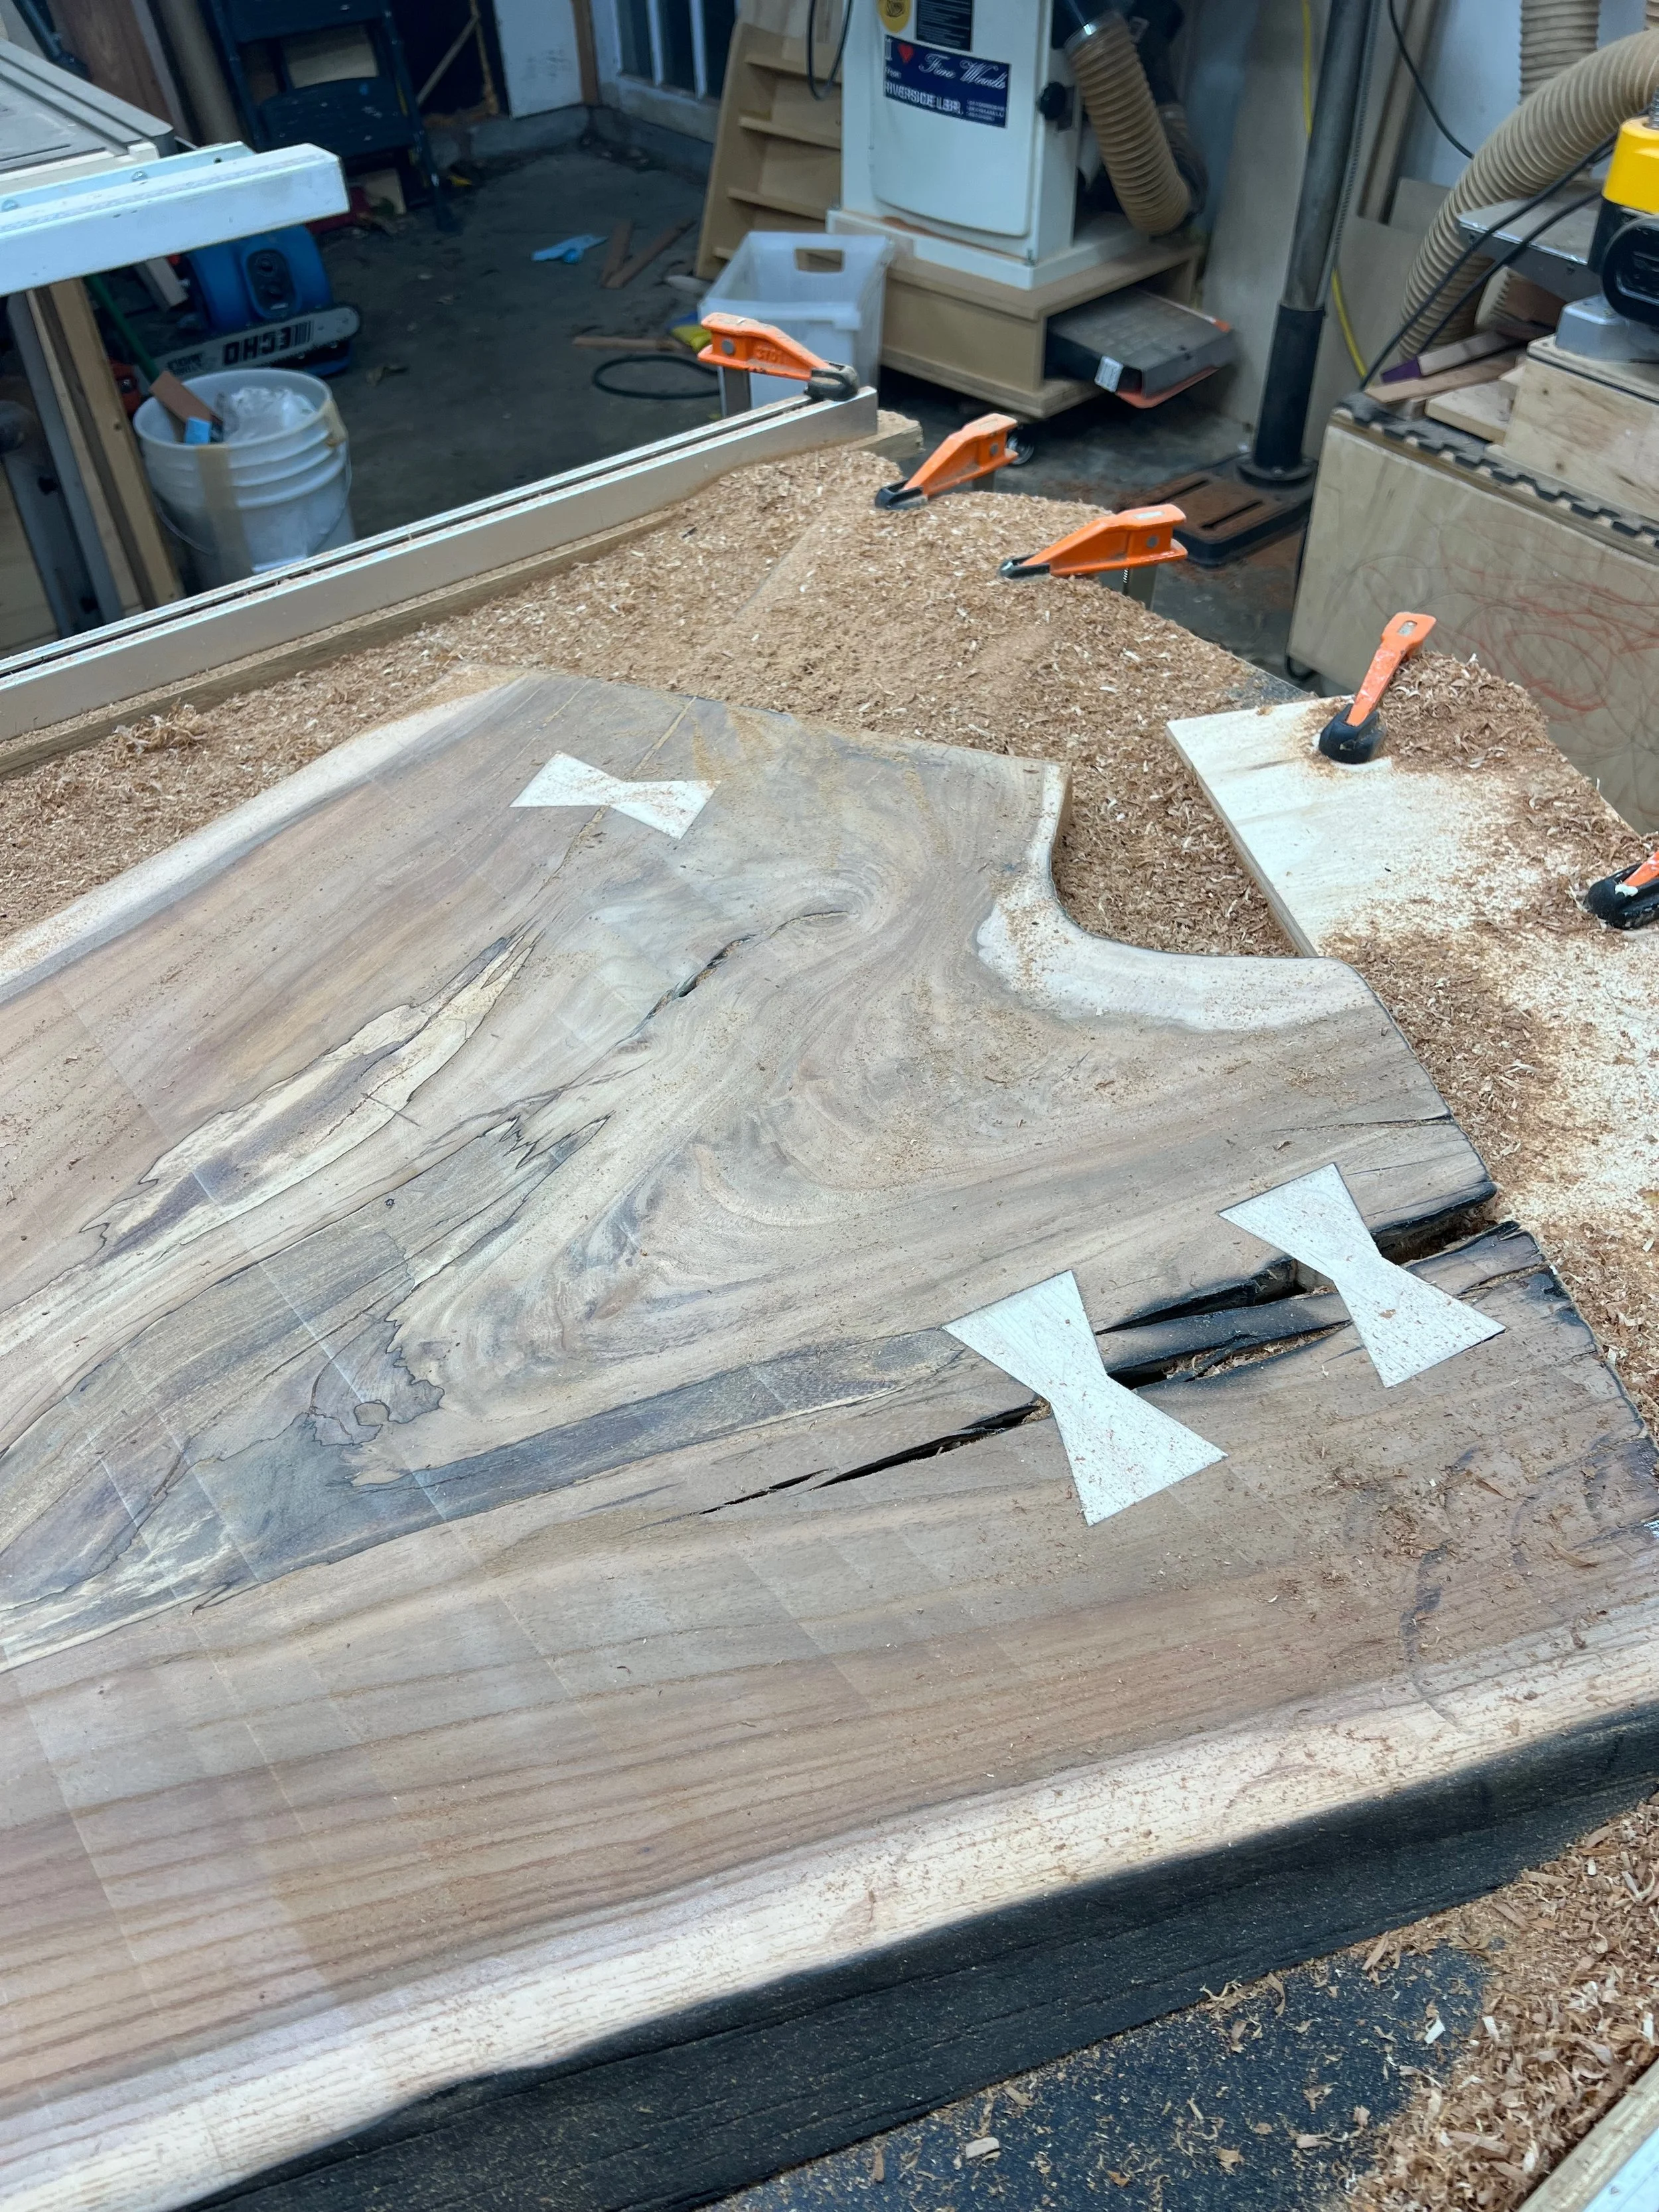
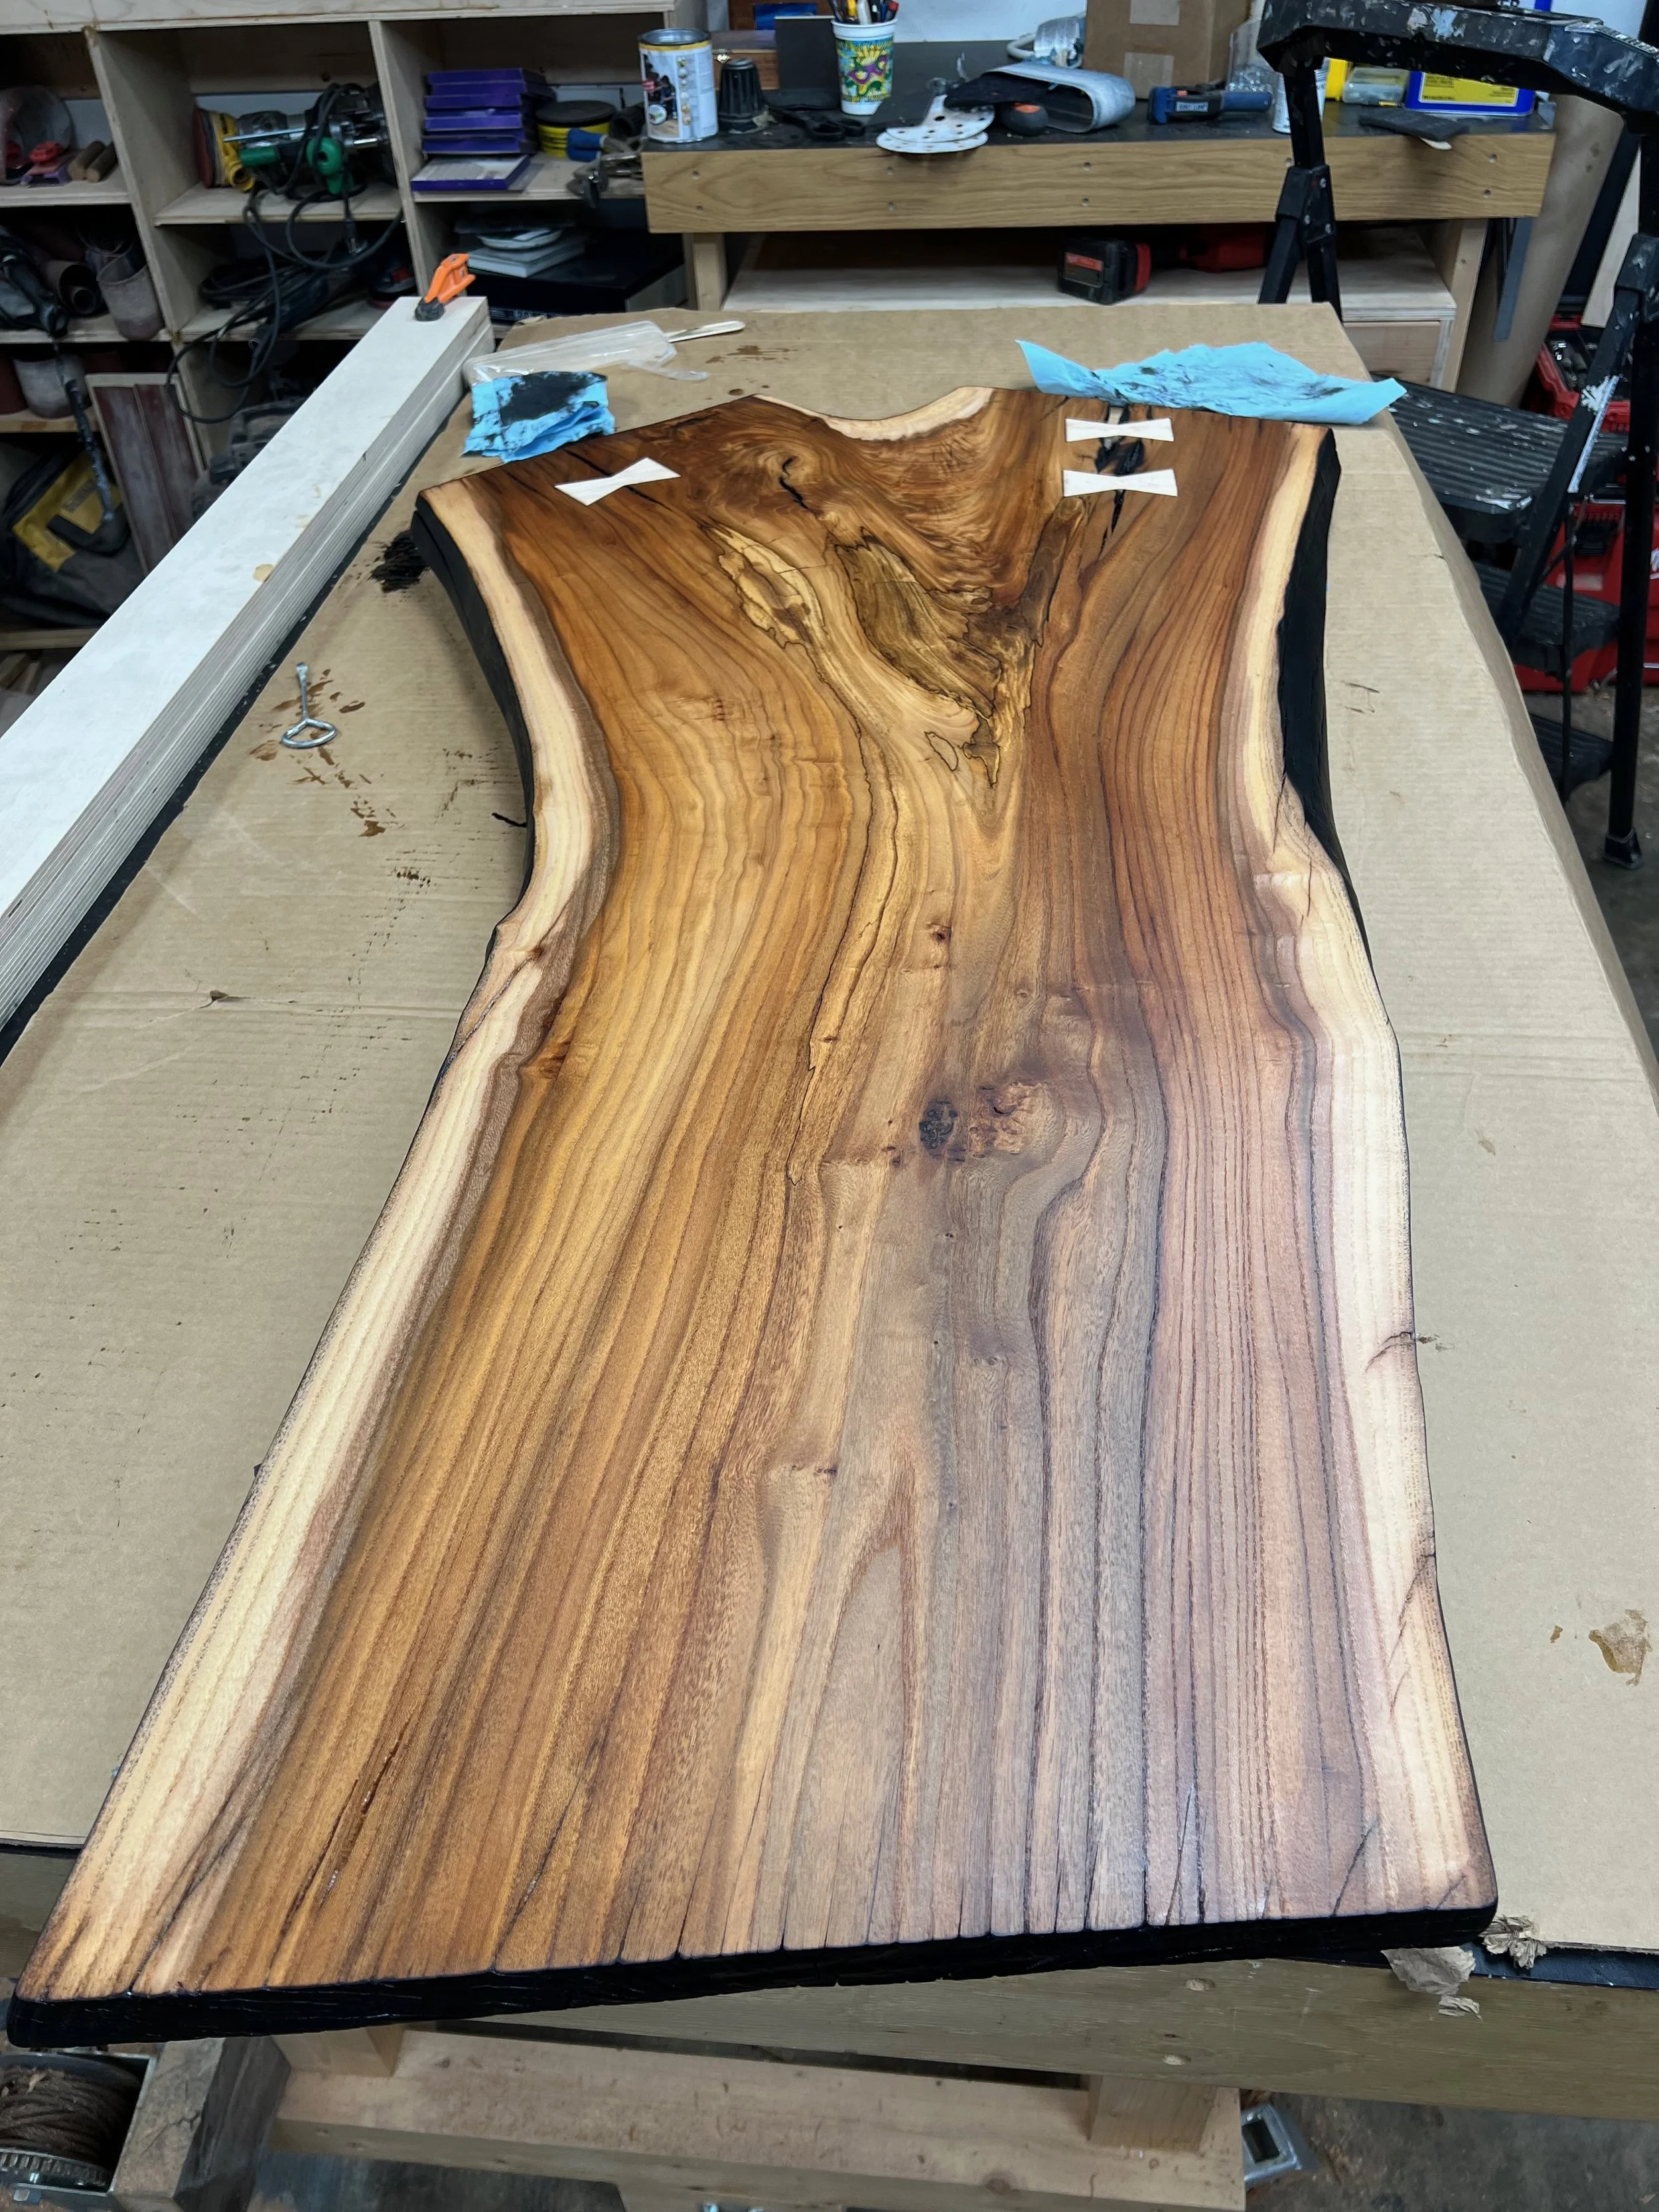
With the slab flat, punky portions stabilized, and the edges prepared, I was finally ready to throw in some inlays to stabilize the couple of bigger cracks. I don’t actually think this slab will move much more than it has, but the added inlays give some visual interest and some peace of mind. I used some fairly light colored maple I had around, felt like the contrast was good

After final sanding, I finished the top with Osmo, buffed it well, and… There it sat. For months…. I had to finish up a couple of other projects, and also had a fairly busy schedule at the mill shop where I’m working.
…..Continued in Part 2